Extron Electronics MPA 181T User Guide User Manual
Page 4
Quick Start Guide — MPA 181T
MPA 181T • Quick Start Guide
QS-1
To install and set up an MPA 181T Mini Power Amplifier, follow
these steps:
Step 1
Turn all of the equipment off
and disconnect it from the power
source.
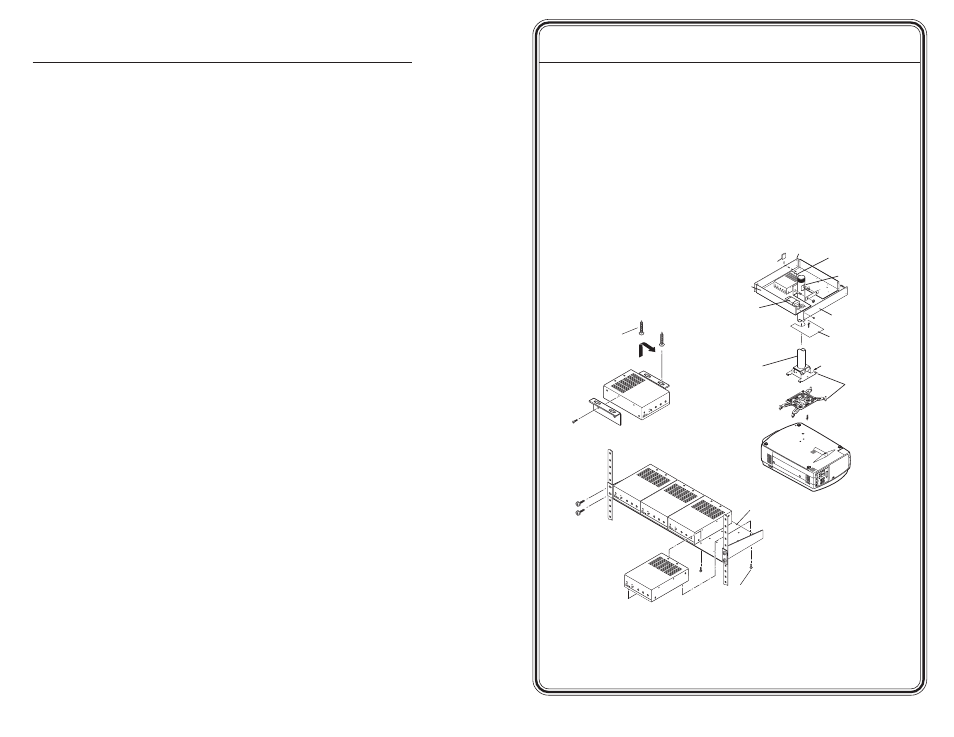
Step 2
Mount the MPA 181T
on a rack, under a desk, or on a projector, as
illustrated below.
Step 3
Attach the speakers to the MPA 181T
.
#8 Wood Screws (2 Plcs)
Each Side
Drill pilot holes —
3/32” (2.4mm) dia.
1/4” (6.3 mm) deep
BA
SS
LE
VE
L
TR
EB
LE
MI
NI
P
OW
ER
A
MP
LIF
IE
R
MP
A 1
81
T
ON
OF
F
LIM
ITE
R
Machine Screw (2 Plcs)
Each Side
Under Desk
6" Deep Rack Shelf
(2) 4-40 x 3/16" screws
BA
SS
LE
VE
L
TR
EB
LE
MIN
I P
OW
ER
AM
PL
IFIE
R
MPA
181T
ON
OFF
LIM
ITE
R
BA
SS
LE
VE
L
TR
EB
LE
MIN
I P
OW
ER
AM
PL
IFIE
R
MP
A 181T
ON
OFF
LIM
ITE
R
BA
SS
LE
VE
L
TR
EB
LE
MIN
I P
OW
ER
AM
PL
IFIE
R
MP
A
181T
ON
OFF
LIM
ITE
R
BA
SS
LE
VE
L
TR
EB
LE
MIN
I P
OW
ER
AM
PL
IFIER
MP
A 181T
ON
OFF
LIM
ITE
R
Rack Mount
Projector Mount
Extron
UPB 25
Universal Projector
Mounting Bracket
BA
SS
LE
VE
L
TR
EB
LE
MIN
I P
OW
ER
AM
PL
IFIE
R
MP
A 1
81T
ON
OFF
LIM
ITE
R
Extron
MPA 181
Mini Power
Amplifier
Extron
PMK 350
Above Projector
Mount Bracket
Extron
Power Supply
for MPA 181
Cover Sheet
Projector
Front Plate
Rear Plate
Extron PMP
6”, 10“ or 12”
Projector Mount
Pole
Cable Access
Cable Access
Rubber Pad
Step 4
Attach inputs to the MPA 181T unit
and the audio source and/or
projector. Ensure that the projector’s audio output is set to variable
out
. Multiple input options (RCA, 3.5 mm stereo input, or captive
screw) can be used simultaneously; this results in audio mixing.