Installation and operation, cont’d, Rear panel features – Extron Electronics MPA 181T User Guide User Manual
Page 11
MPA 181T • Installation and Operation
MPA 181T • Installation and Operation
Installation and operation, cont’d
6.
Secure the bracket to the U-bolt onto the ceiling pole with
the included hex nuts, washers, and lock washers.
P
O
W
E
R
1
2
V
3
A
M
A
X
O
U
T
P
U
T
S
4/
8
Oh
m
s
IN
PU
T
S
7
0
V
C
O
M
7
0
V
R
E
M
O
T
E
(M
O
N
O
)
(M
O
N
O
)
L
R
1
0
V
L
IS
T
E
D
1
T
2
3
I.
T
.E.
V
O
L
/M
U
T
E
L
MP
A 1
8
1T
R
C
U
S
U
S
Extron
PMK 300
Multi Product Projector
Mount Kit
U-Bolt
Rubber Pad
Clamping
Plate
Extron
MPA 181T
Mini Power
Amplifier
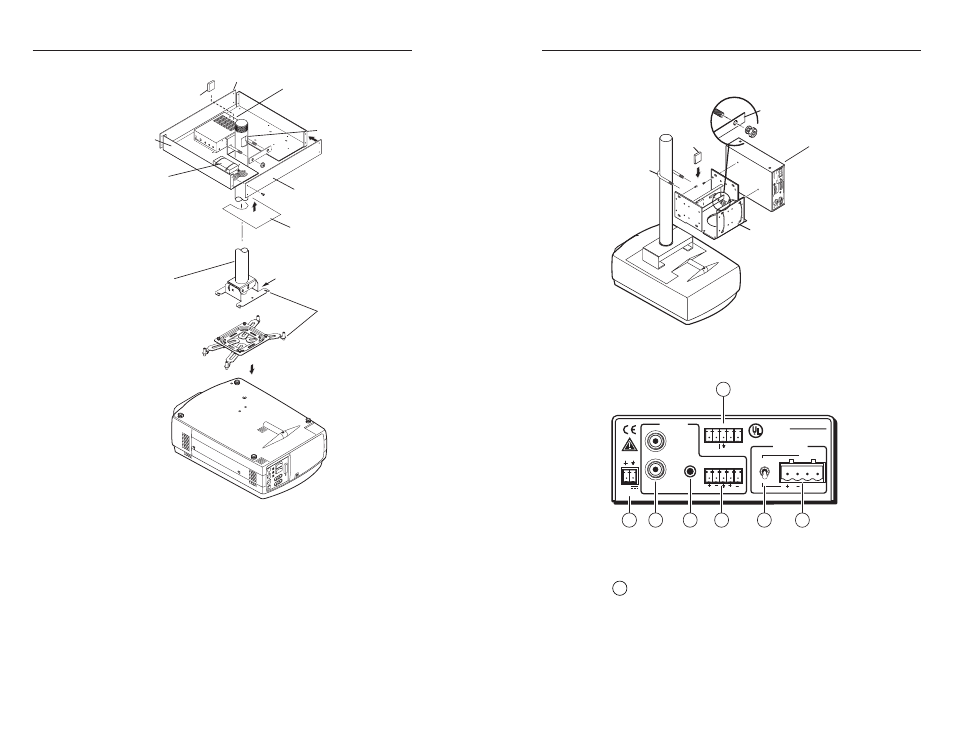
Figure 2-5 — Mounting the PMK 300
Rear Panel Features
POWER
12V
3A MAX
OUTPUTS
4/8 Ohms
INPUTS
70V
COM 70V
REMOTE
(MONO)
(MONO)
L
R
10V
LISTED
1T23
I.T.E.
VOL/MUTE
L
MPA 181T
R
C
US
US
1
3
4
6
7
2
5
Figure 2-5 — MPA 181T back panel
Power input
1
Power connection
— Plug the external 12 VDC power
supply into this connector. The power supply is included
with the unit.
2-7
2-6
Extron
UPB 25
Universal Projector
Mounting Bracket
BA
SS
LE
VEL
TREB
LE
MINI
PO
W
ER
AM
PLI
FIER
MP
A 1
81T
ON
OFF
LIM
ITE
R
Extron
MPA 181T
Mini Power
Amplifier
Extron
PMK 350
Above Projector
Mount Bracket
Extron
Power Supply
for MPA 181T
Cover Sheet
Projector
Front Plate
Rear Plate
Extron
PMP
6”, 10“ or 12”
Projector Mount
Pole
Cable Access
Cable Access
Rubber Pad
Figure 2-4 — Using the PMK 350 projector
mounting kit for the MPA 181T
3
.
Affix the black rubber pad to the mounting plate.
4
.
Place the U-bolt behind, then through the two holes of the
mounting plate to wrap around the ceiling pole.
For a typical (1.5" to 2.0" diameter) pole —
The supplied
U-bolt fits a typical ceiling pole.
5.
Place the bracket on the opposing side of the ceiling pole
and through the U-bolt legs.