Armasight NKGVEGA00111I11 VEGA GEN1+ Night Vision Goggle User Manual
Page 5
5
WARNING
:
take into consideration the following information and restrictions in order to avoid damag-
ing the device and to ensure a long service life and failure-free operation:
• Performance of the device in nighttime conditions depends on the level of ambient light in
the environment. Some light (moonlight, starlight, etc.) is required for the device to provide an
image.
• Ambient light level is reduced by the presence of clouds, shade, or objects that block natural
light (buildings, trees, etc.).
• The device loses its effectiveness when operated in shadowed areas.
• The effectiveness of the device is adversely affected by weather conditions such as rain,
snow, sleet, or fog, and environmental conditions such as smoke or dust.
• The device resolution level is reduced in environments with very low light sources. The vis-
ibility will degrade significantly under starlit conditions, particularly in low contrast environ-
ments such as deserts, large areas of uniform vegetation, etc.
• The device is equipped with a protection system that will automatically disable the image
intensifier tube when the illuminance level stays above 40 lux for over 10 seconds.
BATTERY INSTALLATION
1) Unscrew the battery compartment cap on the front side of the goggles body.
2) Insert the CR123A battery into the battery compartment in accordance with polarity markings.
3) Screw the cap onto the place.
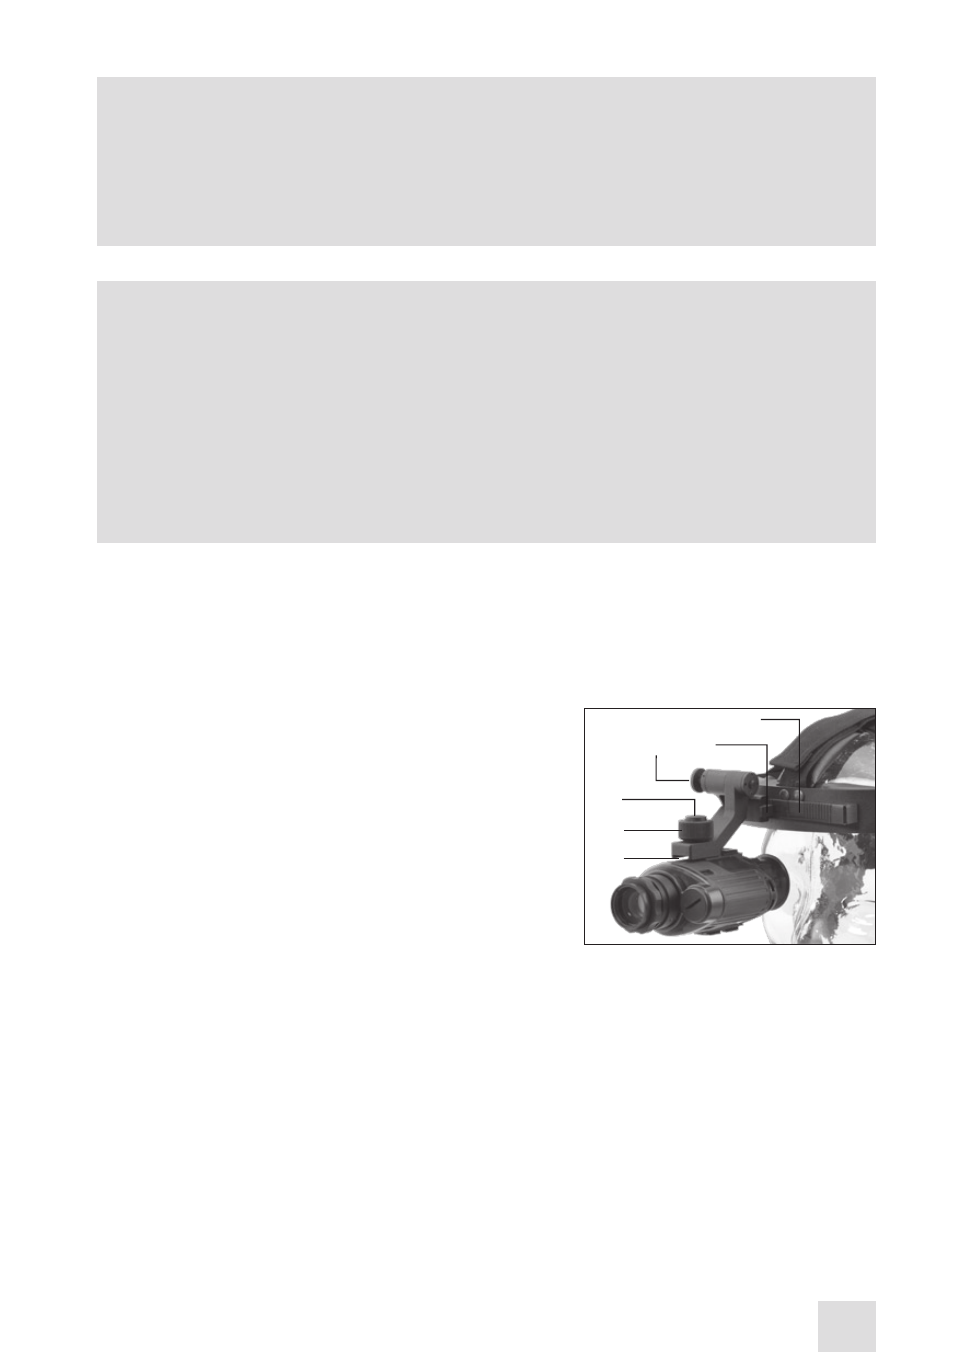
ATTACHING THE VEGA TO A HEAD MOUNT
To attach your Vega to a head mount perform the following
steps:
1) Loosen the screw (A), press the button (B); put the mon-
ocular rail into the headset socket (C).
2) Put the head mount, with the Vega attached, on your
head.
3) Loosen the screw (A) and perform an eye relief adjustment
by moving the monocular on the rail.
4) The head mount intended for use with the Vega is fitted
with a flip-up mechanism. Press the button (D) from the head mount side and lift the monocular to the
top position.
5) To return the unit back to the operating position, press the button (D) again and lower the monocu-
lar.
6) The unit can be accommodated for observation with either the left or the right eye. To switch the unit
position for observation from one eye to the other, remove the unit from the adapter, turn the unit to
180 and attach it to the headset over the desired eye.
7) Press the button (E) and move the monocular on the rail (F) to reach the most comfortable position
for observation.
C
A
B
D
E
F