Asus AP1710-E1 User Manual
Page 85
3 - 3
3 - 3
3 - 3
3 - 3
3 - 3
A S U S A P 1 7 1 0 - E 1
A S U S A P 1 7 1 0 - E 1
A S U S A P 1 7 1 0 - E 1
A S U S A P 1 7 1 0 - E 1
A S U S A P 1 7 1 0 - E 1
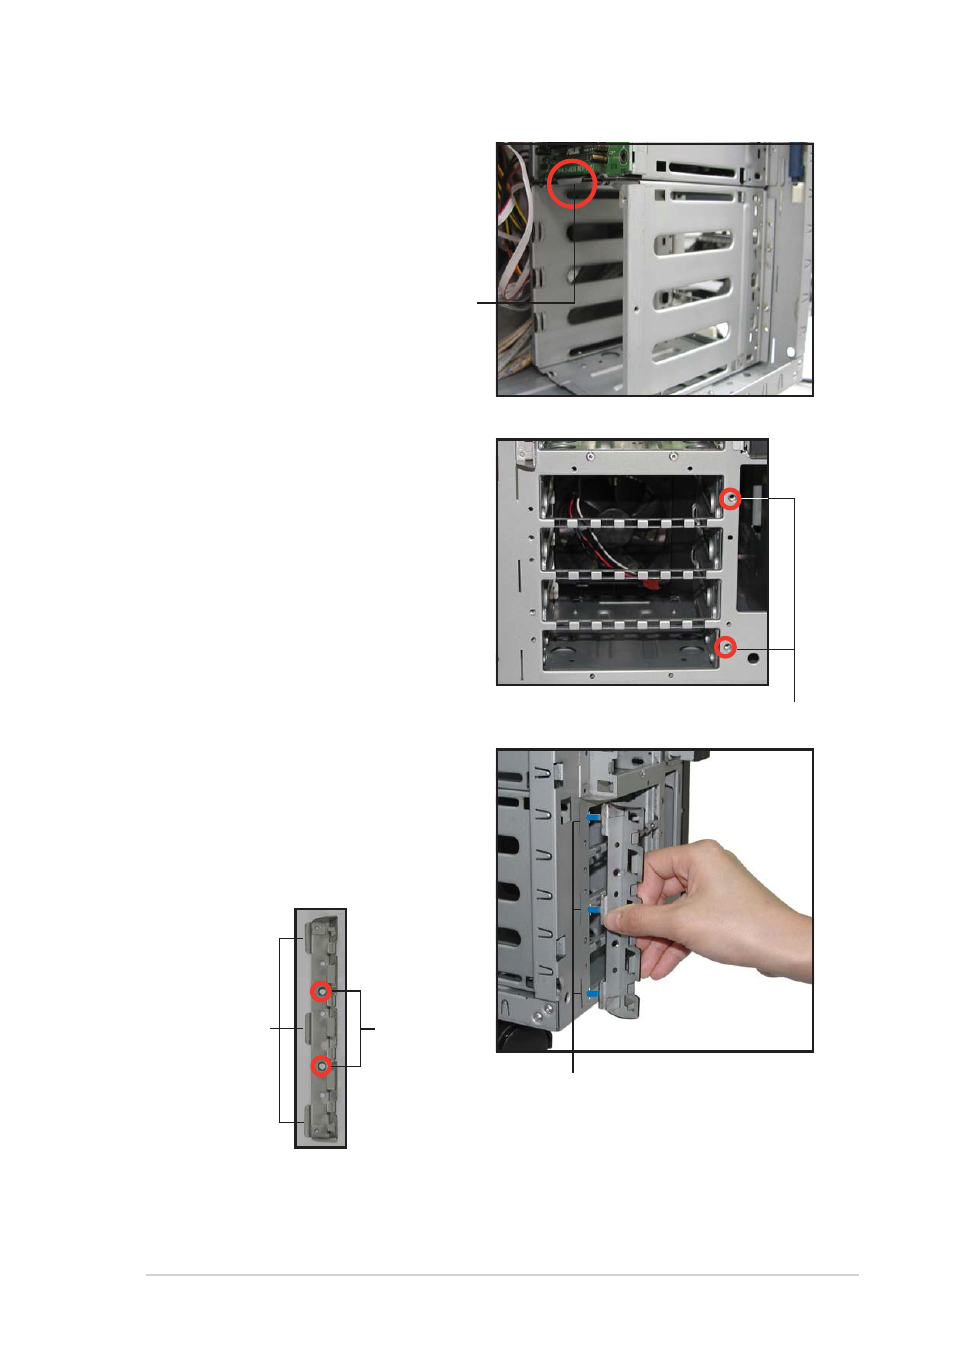
3.
Make sure that the cage lock
tab snaps to the bottom of the
first drive cage. When properly
installed, the cage should align
with the first drive cage.
C a g e l o c k t a b s n a p p e d
C a g e l o c k t a b s n a p p e d
C a g e l o c k t a b s n a p p e d
C a g e l o c k t a b s n a p p e d
C a g e l o c k t a b s n a p p e d
s e c u r e l y t o t h e b o t t o m
s e c u r e l y t o t h e b o t t o m
s e c u r e l y t o t h e b o t t o m
s e c u r e l y t o t h e b o t t o m
s e c u r e l y t o t h e b o t t o m
o f t h e f i r s t d r i v e c a g e
o f t h e f i r s t d r i v e c a g e
o f t h e f i r s t d r i v e c a g e
o f t h e f i r s t d r i v e c a g e
o f t h e f i r s t d r i v e c a g e
4.
From the front side, secure the
right side of the cage with two
screws.
F r o n t s c r e w h o l e s
F r o n t s c r e w h o l e s
F r o n t s c r e w h o l e s
F r o n t s c r e w h o l e s
F r o n t s c r e w h o l e s
5.
Position the support bracket for
the drive trays to the left side of
the cage with the three
protruding tabs matching the
elongated holes on the chassis.
S C S I d r i v e t r a y s u p p o r t
S C S I d r i v e t r a y s u p p o r t
S C S I d r i v e t r a y s u p p o r t
S C S I d r i v e t r a y s u p p o r t
S C S I d r i v e t r a y s u p p o r t
b r a c k e t
b r a c k e t
b r a c k e t
b r a c k e t
b r a c k e t
P r o t r u d i n g
P r o t r u d i n g
P r o t r u d i n g
P r o t r u d i n g
P r o t r u d i n g
t a b s
t a b s
t a b s
t a b s
t a b s
S c r e w
S c r e w
S c r e w
S c r e w
S c r e w
h o l e s
h o l e s
h o l e s
h o l e s
h o l e s
E l o n g a t e d h o l e s f o r b r a c k e t
E l o n g a t e d h o l e s f o r b r a c k e t
E l o n g a t e d h o l e s f o r b r a c k e t
E l o n g a t e d h o l e s f o r b r a c k e t
E l o n g a t e d h o l e s f o r b r a c k e t