Installing the stand (supplied) – Asus PQ321QE User Manual
Page 10
10
E
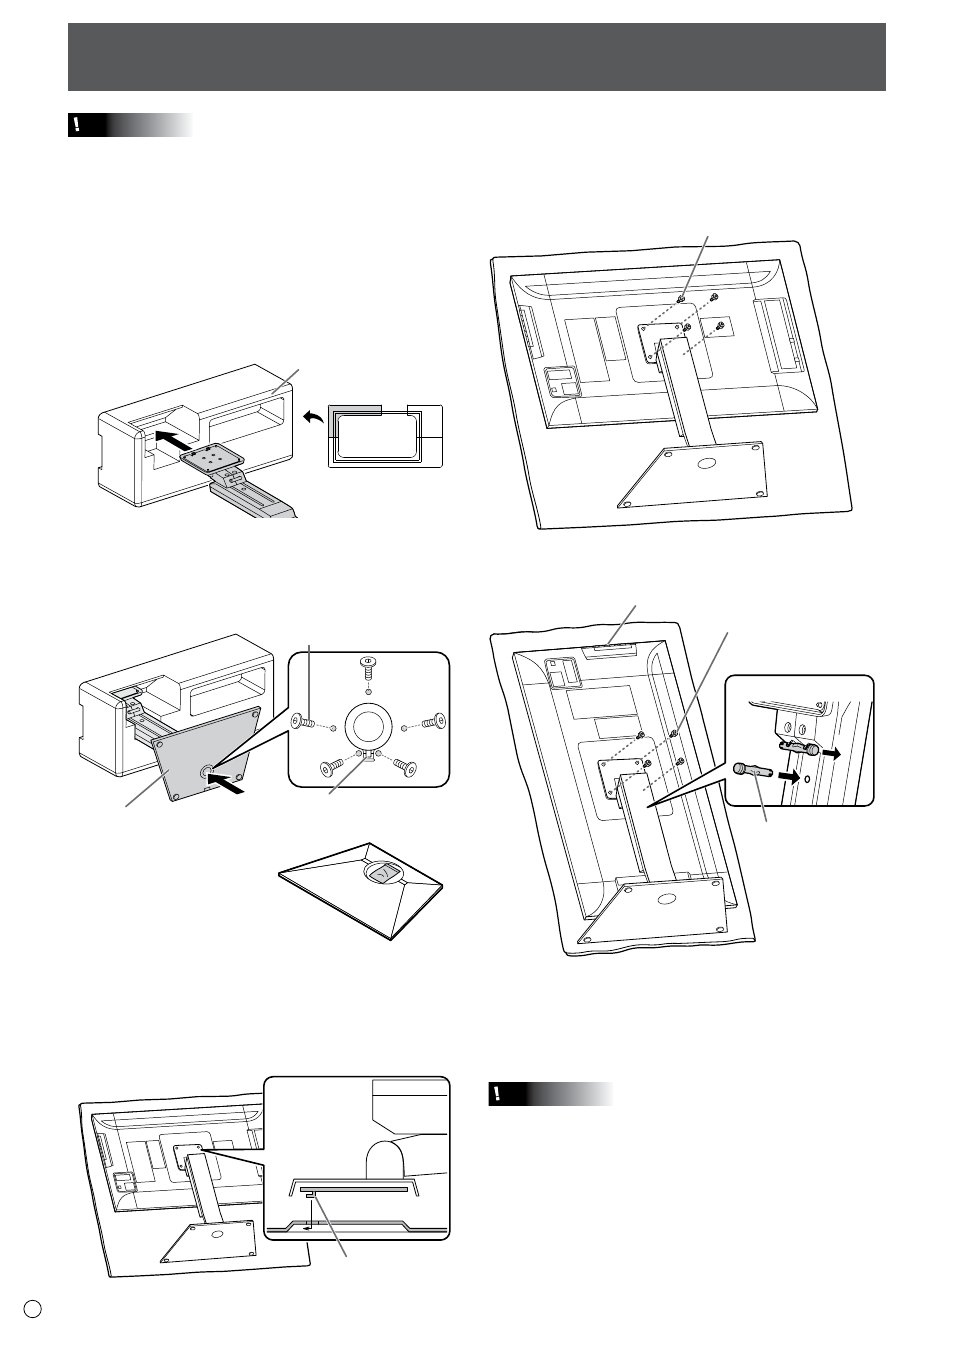
Installing the stand (supplied)
* If the monitor will be used in the portrait orientation, pull out
the fixing pin (1), and insert it into the hole (2) as shown
above.
* To remove the stand, place the monitor and stand as shown
above and remove the screws.
Caution
• Adhere to the following when installing the monitor in its
portrait orientation. Failing to adhere to the following may
cause malfunctions.
- Install the monitor such that the operation buttons are
located on the top side.
- Set the MONITOR on the MONITOR menu to PORTRAIT.
(See page 20.)
Operation buttons
Screw
(M4 x 10 with washers)
Front
Fixing pin
2
1
• Portrait
Screw
(M4 x 10 with washers)
5. Fasten the stand to the monitor with the supplied screws
(M4 x 10 with washers) (x4).
Use the supplied hex wrench.
• Landscape
Tab
3. Spread a thick, soft cloth (blanket, etc.) that will prevent
damage to the LCD panel on a stable flat surface where
the entire monitor can be placed, and place the monitor
with the LCD panel face down on the cloth.
4. Place the stand on the monitor.
Hook the tab on the stand under the mounting plate (pre-
installed on monitor).
* A bag containing the
screws (supplied) and
hex wrench (supplied) is
attached to the round hole
in the stand pedestal.
Countersunk screw
(M4 x 6 without washers)
Insert by hooking the tab
Pedestal
2. While supporting the stand pedestal with your hand,
fasten to the stand strut with the supplied countersunk
screws (M4 x 6 without washers) (x5).
Use the supplied hex wrench.
Front
Packing material
(upper left)
Caution
• Disconnect all cables from the monitor.
• Firmly tighten the installation screws (supplied) with the hex
wrench (supplied).
• Ensure that you have sufficient space to work.
n
Attaching the stand
Remove all packaging materials before starting work.
To prevent the table (etc.) from being damaged by the stand
pedestal, spread a thick, soft cloth (blanket, etc.) and work on
the cloth.
1. Insert the stand strut into the packaging material (upper
left) as shown.