Figure 4.7 connecting the hellodevice to ethernet, 3 configuring network, 1 setting ip address – SENA HD1200 User Manual
Page 15
Starter Kit and User Manual for the HelloDevice 1200
12
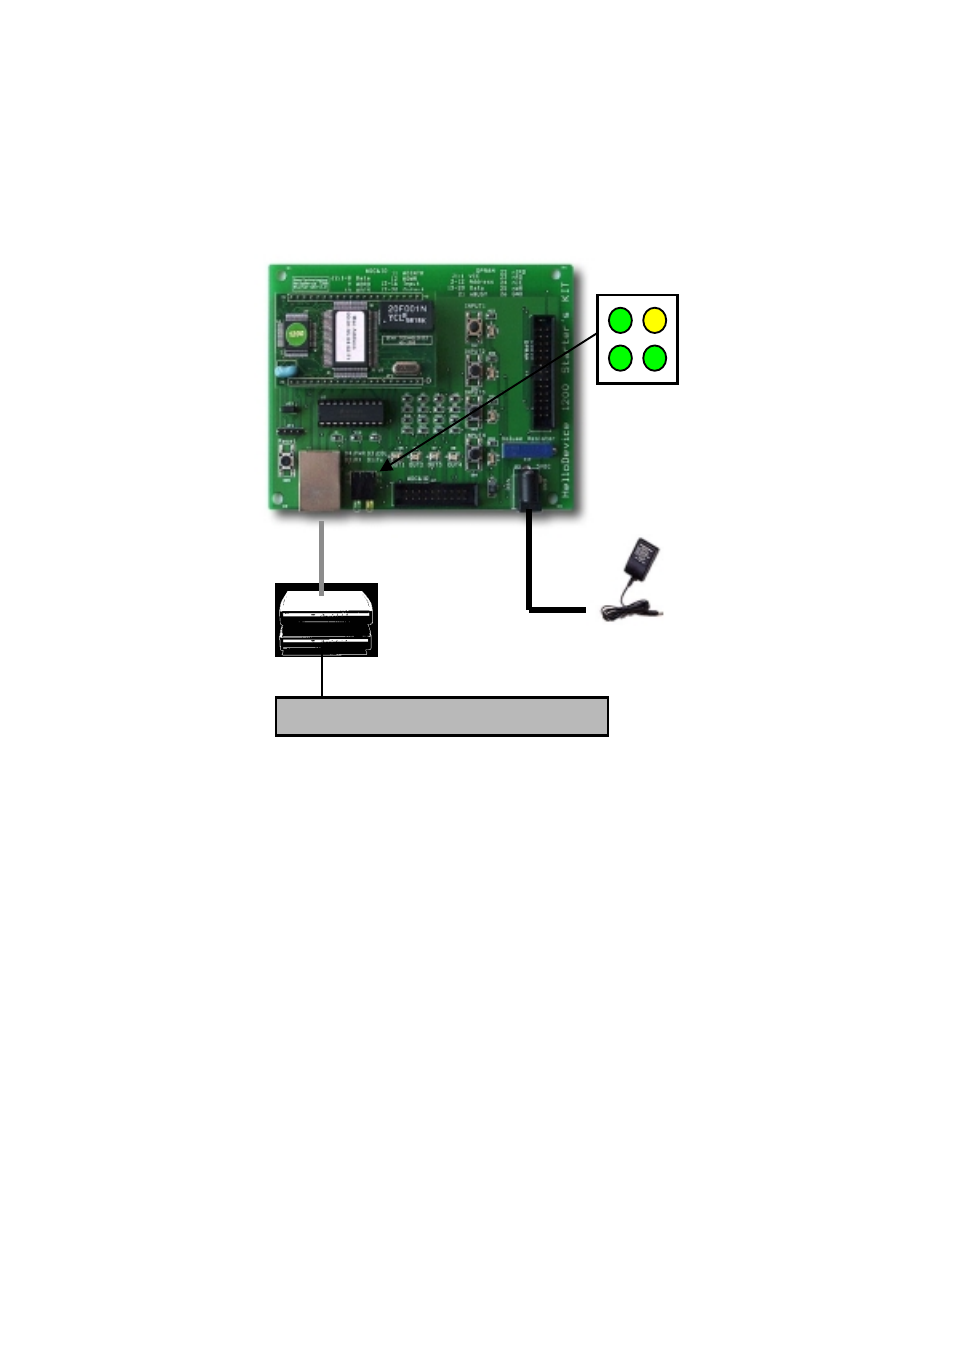
(3) Connect Ethernet cable between Ethernet Hub and RJ45 connector. (Refer to chapter 3, Hardware
Specifications for the specifications of RJ45 connector.)
Hub or Switch
Ethernet backbone
5V Power Supply
HelloDevice
1200
HelloDevice
Demo Board
110/220 V
Ethernet Cable
Rx
Collision
Power
Tx
Figure 4.7 Connecting the HelloDevice to Ethernet
(4) Check the status of the Tx LED on Demo Board.
Tx LED should be blinking every second. If not, there is a problem in the initial setting of the HelloDevice
hardware.
4.3 Configuring Network
In order for a HelloDevice to function as a server on the network, a static IP address must be set for the
HelloDevice. This section describes how to configure and change IP address for a HelloDevice.
4.3.1 Setting IP Address
The HelloDevice Utility Software is used to set up an IP address for a HelloDevice by utilizing BOOTP
(BOOTstrap Protocol), which is defined in the Internet protocol standard, RFC-951 and RFC-1542. The Utility
Software provides BOOTP a server function, and will respond to the BOOTP request of the HelloDevice.
Since the factory default setting of the HelloDevice IP address is 0.0.0.0, the HelloDevice sends BOOTP request