Swanstone STMK96-(xxxx) - Installation User Manual
Page 14
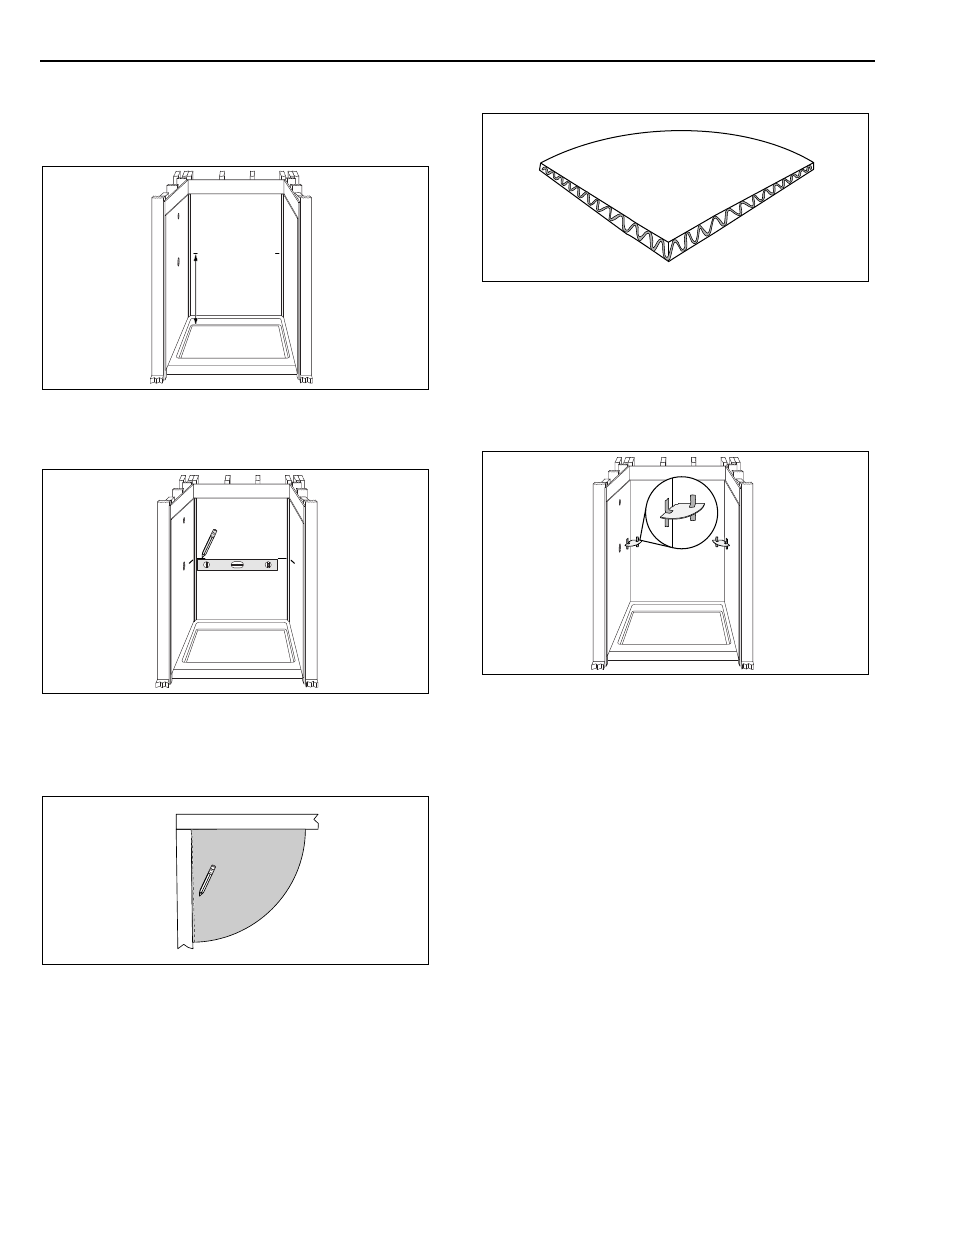
Installation of Corner Soap Dish
1.
Select a desirable height for mounting one or both soap
dishes. A height of at least 43” from the shower floor to
the soap dish is recommended.
2.
After marking the height, draw a 4” level line on both
walls. These lines will be used to align the top edges of
the soap dish.
3.
Dry fit the soap dish prior to applying silicone. If the wall
is not exactly 90 degrees square, it will be necessary to
sand the sides of the soap dish in order to achieve proper
fit, using a course grit (60 grit) sandpaper.
4.
Apply silicone to the edge of the soap dish.
5.
Align the soap dish with the lines and press it into place.
6.
Hold the soap dish securely in place and wipe off excess
silicone. You will want a uniform bead on both top and bottom.
7.
Temporarily secure the soap dish with masking tape, as
shown. Remove the tape after approximately two hours. Do
not place anything on the soap dish for at least 24 hours.
Corner Molding (optional)
Installing the corner molding is optional. If the panels were
scribed and cut to create a tight-fitting corner, then the corner
molding can be eliminated. If, however, there are gaps
between the front/rear panel, the corner molding should be
installed. Either option, if done properly, is acceptable.
If the optional soap dish was installed, cut one piece of
molding to fit above the soap dish and one for below the soap
dish.
Note: The silicone adhesive required for the installation of the
corner molding is the same as used for the installation
of the Swanstone wall panels. This kit contains enough
adhesive for both the wall panels and the corner
molding.
43"
The Swan Corporation – Swanstone
14
800-325-7008
Installation Procedure