Installation procedure, Installation options, Important notice – Swanstone SBF-3464 - Installation User Manual
Page 9
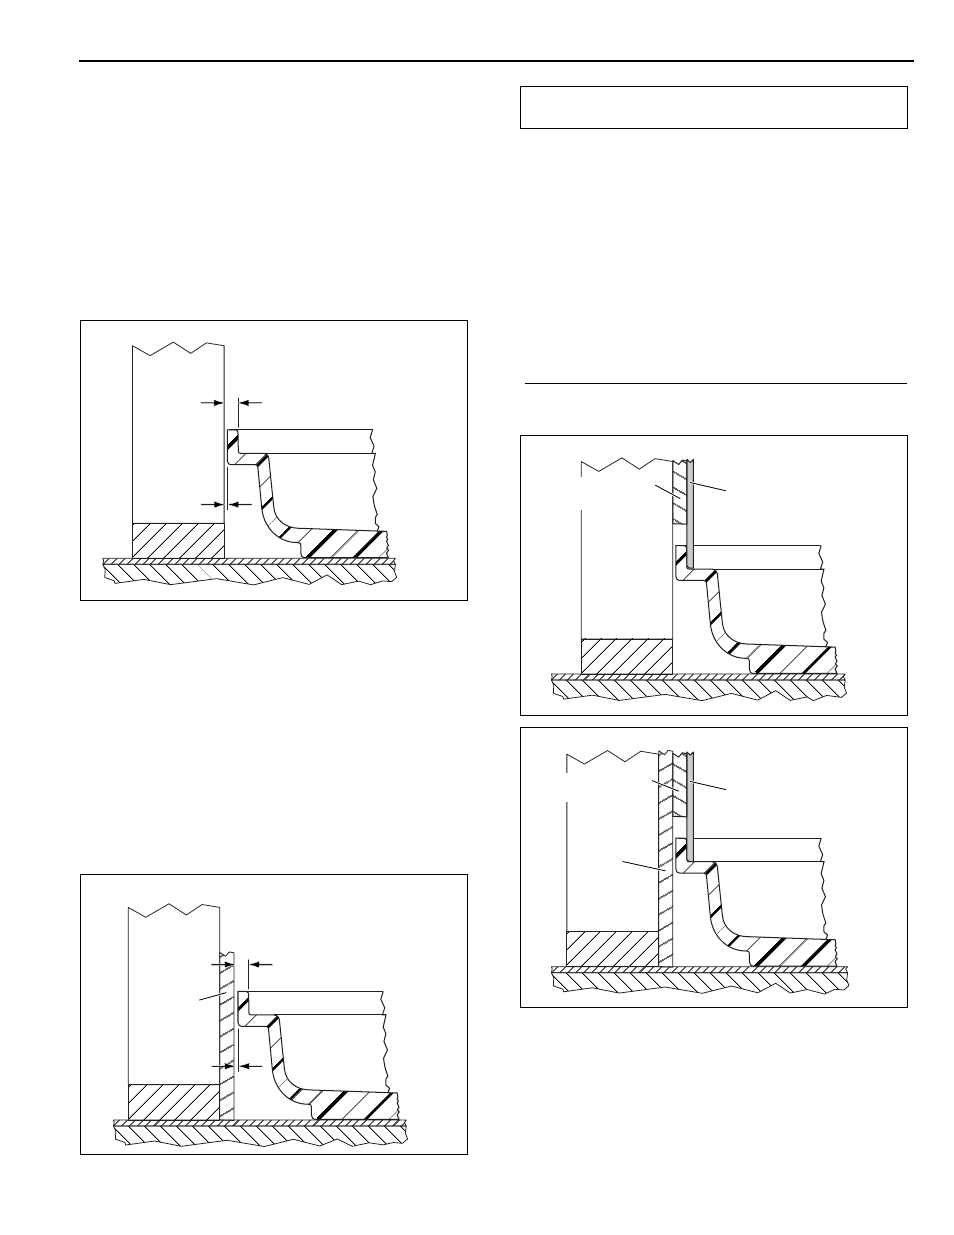
Installation Options
For new construction, the shower floor can be
installed with the flange directly against the stud wall
framework (1/16” gap) and 1/2” moisture-resistant
wallboard installed above the shower floor flange.
Dry fit the shower floor to make sure it fits correctly in
the shower enclosure framework. The ideal gap
between the shower floor flange, each side wall
framework, and the back wall framework is 1/16”, as
shown below.
For existing construction, the shower floor can be
installed with the flange against existing moisture-
resistant wallboard (1/16” gap) with a second layer of
1/2” moisture-resistant wallboard added above the
shower floor flange.
Dry fit the shower floor to make sure it fits correctly in
the shower enclosure framework. If necessary,
modify the framework to achieve the proper shower
floor fit. The illustration below shows the ideal
shower floor flange to existing wall surface gap of
1/16”.
The ideal installation occurs when the outside surface of
the wallboard and shower floor flange are flush, as
shown in the illustrations below. This dimension allows
the Swan wall panels, or alternate shower wall material,
to rest against the lip of the shower floor once the
moisture-resistant wallboard is installed.
If the barrier-free shower floor does not fit the stud wall
framework closely (a gap larger than 1/8” between the
flange and stud walls), the 1/2” moisture-resistant
wallboard must be shimmed out, or thicker moisture-
resistant wallboard such as 5/8” material can be used in
place of the 1/2” wallboard.
ADA-008
Swanstone
Wall Panel
Existing
Wall
Surface
Moisture-Resistant
Wallboard
ADA-002
Swanstone
Wall Panel
Moisture-Resistant
Wallboard
IMPORTANT NOTICE
1/16"
1/2"
Existing
Wall
Surface
ADA-004
ADA-003
1/16"
1/2"
800-325-7008
9
The Swan Corporation – Swanstone
Installation Procedure