MAX Power COMPACT User Manual
Page 9
English Manual: Compact Retract 12/24V, Version 2
14/04/2005
Thruster Unit
BOW
STERN
Hull
Hull
Alloy
Plate
Bracket
( d )
Shaved Down
Hull Cut-out
BOW
STERN
Hull
Hull
BOW
STERN
Hull
Hull
( b )
3.6
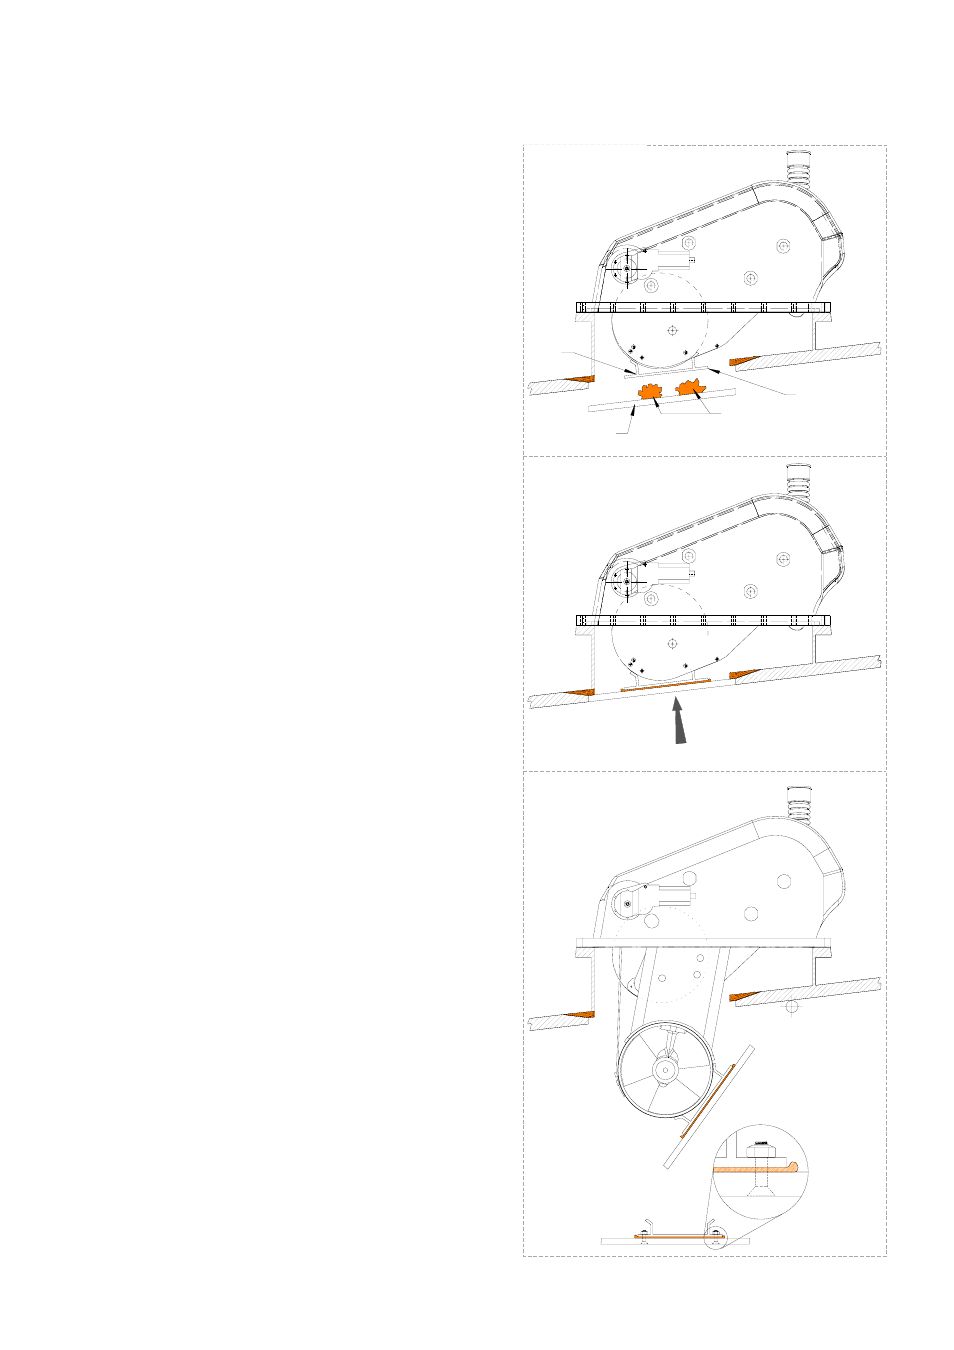
FITTING OF HULL CLOSING PLATE
Once the thruster unit is permanently bolted onto
the mounting base, and once all electrical
connections are completed you are now ready to fix
the mounting plate to the base of the turbine.
WARNING : Please keep in mind that the thruster
unit will automatically retract after 10 minutes, when
in ‘Normal Operation Mode’. Thus before doing any
work on the turbine, please ensure that thruster is in
“Manual / Installation Mode”. When in doubt remove
fuse in supply of the electronic control box.
A) Go into ‘Installation Mode’ (see section 4.4 of this
document for more detail on all operation modes)
which will automatically lower the turbine and bring
it back up, stopping 10mm short of the fully ‘Up’
position and switch off automatically.
B) Position & center the composite fixing bracket
onto the turbine, make sure the bottom of the
bracket is parallel to the hull line and mark the
position of the four fixing holes on turbine.
C) Go into ‘Manual Mode’ lower thruster completely
and drill these marked holes in turbine, mount the
plate onto the turbine using stainless steel bolts with
nylock nuts. After this is finished raise the thruster
completely and switch the unit into ‘Installation
Mode’, the thruster is now ready for the hull closing
plate to be fixed.
D) Place a sufficient amount of reinforced fibreglass
on the hull closing plate and firmly push the closing
plate into its rebate, leaving it close until resin has
set.
E) Once dry go into ‘Manual Mode’, lower unit and
remove bracket with closing plate, fill up and finish
off any gaps, after which the closing plate should be
fixed to the bracket by means off nuts and bolts. You
now have your closing plate
9