Step 6: installing clamps, Step 5: install tailgate end of pull strap, Do not tighten over 120-inch pounds – Pace-Edwards JR Series Ford (2000-2003 Only!) SuperCrew User Manual
Page 4
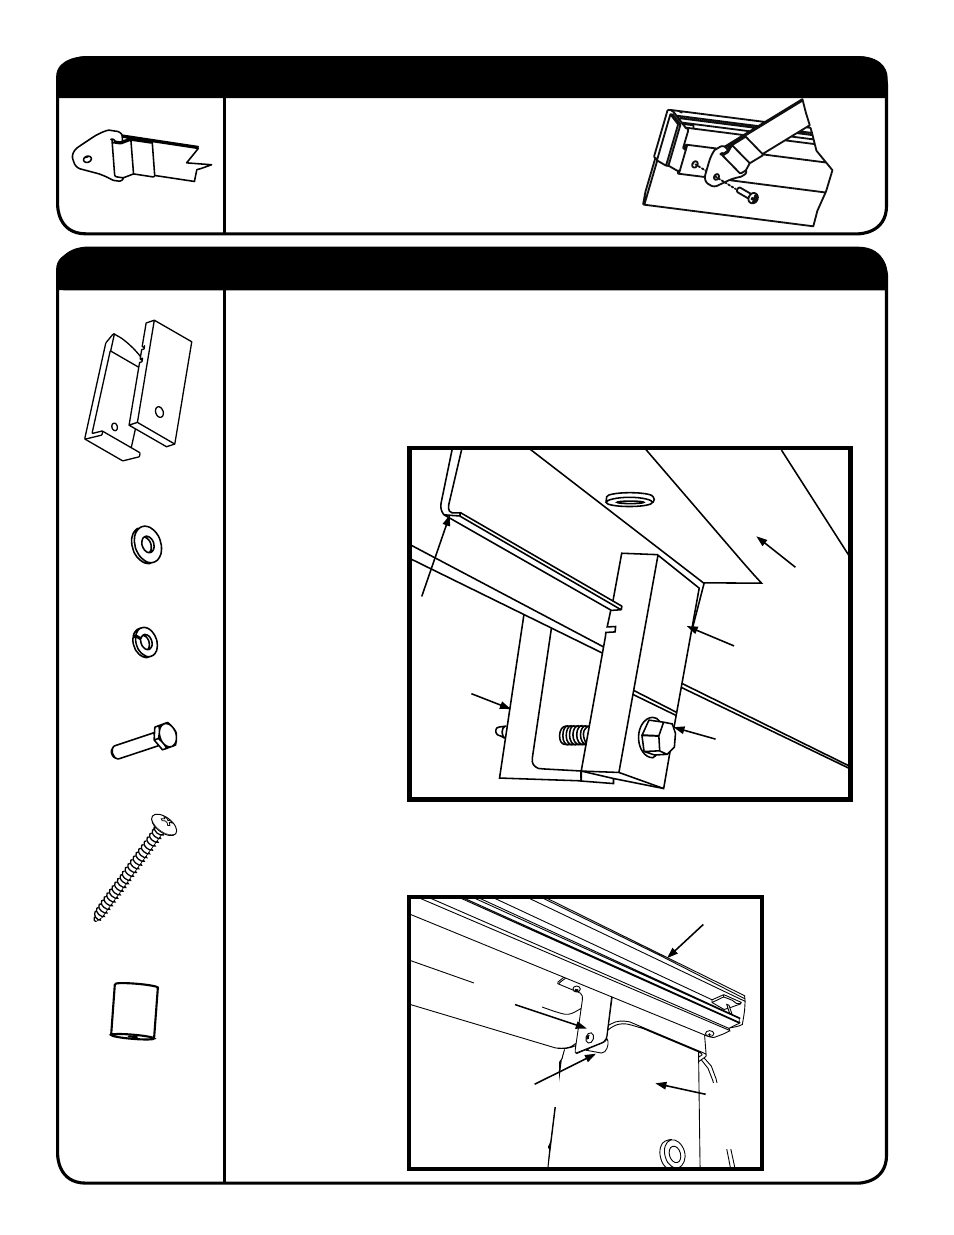
STEP 6: INSTALLING CLAMPS
HARDWARE USED:
Hold the rail level and against the side of bed, then install self-drilling Tek screw into the
vertical post at the rear of box (Figure 6B). Place the rubber grommet between the bracket
and post tighten screw securely but do not over compress the grommet.
Place the four clamps (Fig. 6A) over the rail brackets located on the underside of the rails.
Locate the upper groove of inner clamp bracket onto the lip of rail bracket.
Rotate the outer clamp bracket clockwise to tighten rail downward against bed rail.
Tighten bolt securely.
(Adjust pressure against tailgate by moving rails forward or backward as needed prior to
fi nal tightening of clamps.)
Do not tighten
over 120-inch
pounds!
Rail
Inner Clamp
Bracket
Bolt & Lock
Washer
Outer Clamp
Bracket
Rail Bracket
JACKRABBIT® SUPER CREW
4
FIG. 6A
Rail
Rear Rail
Bracket
Rubber
Grommet
Tighten screw
securely but
do not over
compress
grommet.
Install the tailgate end of the pull strap to the
underside of the drivers side rail using the #8-32 x
3/4 machine screw located at the tailgate end on the
underside of the rail.
STEP 5: INSTALL TAILGATE END OF PULL STRAP
HARDWARE USED:
PULL STRAP x 1
(TAILGATE END)
OUTER & INNER RAIL
CLAMPS x 4
1/4” FLAT WASHER x 4
1/4” LOCK WASHER x 4
RAIL CLAMP BOLT x 4
REAR RAIL BRACKET TEK
SCREW x 2
REAR RAIL BRACKET
RUBBER GROMMET x 2
Vertical
Post at
rear of
bed
FIG. 6B