Step 5: install tailgate end of pull strap, Step 6: installing clamps, Do not tighten over 120-inch pounds – Pace-Edwards JR Series Ford Flareside User Manual
Page 4
JACKRABBIT
®
FLARESIDE
4
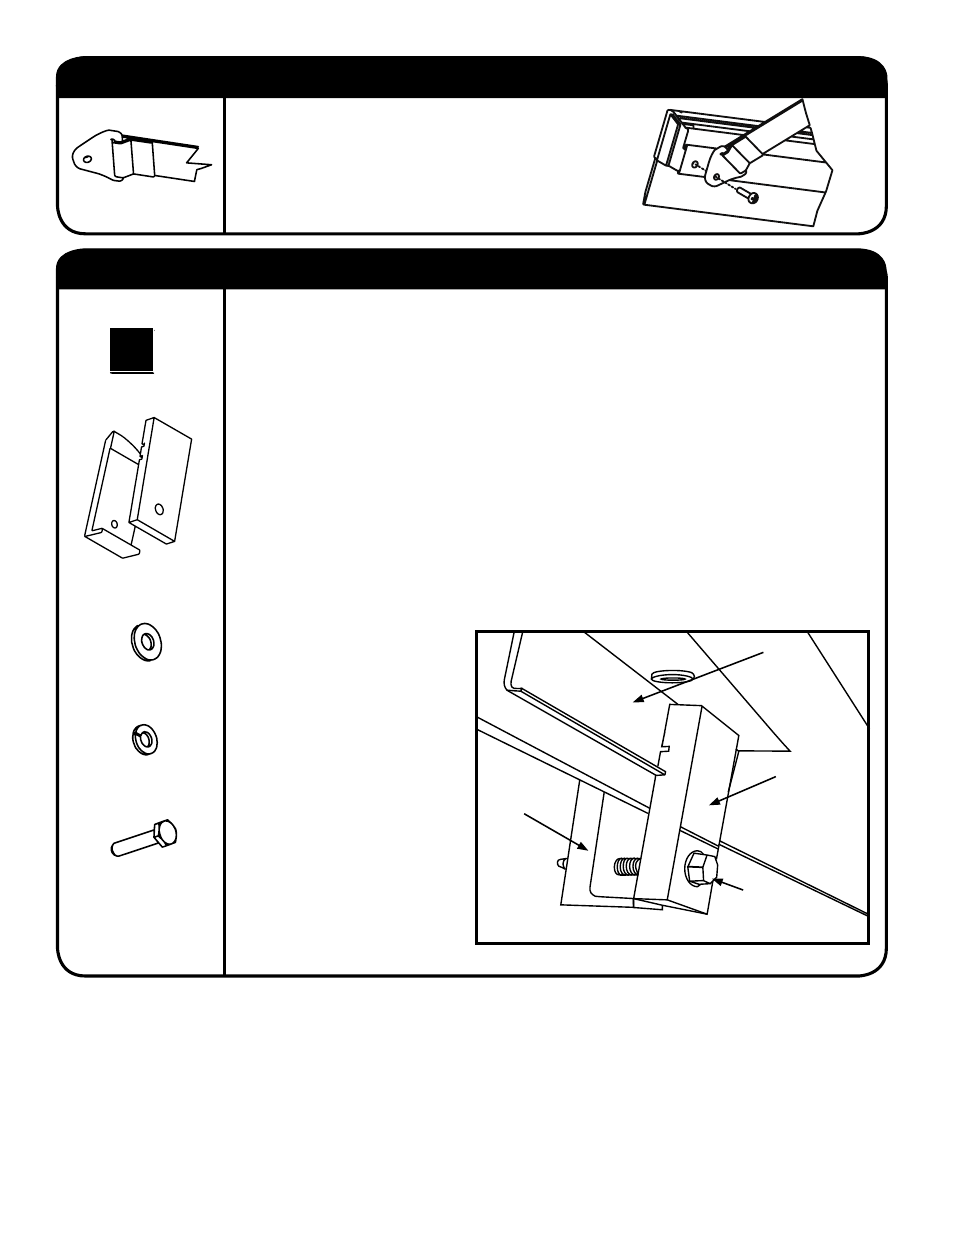
Before shimming and installing the rail clamps make sure the canister is centered between
the truck bed rails and resting forward against the truck bed sill.
Side rails have a rubber spacer on the end caps, at the tailgate end, to establish the correct
spacing to the tailgate (1/16”) and to prevent the tailgate from striking the side rails when
closing. Press the rails tightly against the closed tailgate.
Shims may be required to maintain a horizontal top surface on the rails.
Peel and stick the shims to the back side of the rail brackets (or the side that will be against
the truck).
Shims are provided in two thicknesses. Shims may need to be stacked on each other to
create the right thickness.
Repeat the same process on each side rail.
Place the four (4) clamps over the brackets located on the underside of the rails.
Apply downward pressure while tightening the clamps on the rails, especially on the tailgate
end. This will ensure a tight seal, fi rm seat, and good fi t on the truck bed.
Locate the LOWER groove of the inner clamp bracket onto the lip of the rail bracket (as
shown in Figure 6).
Rotate the outer clamp bracket
clockwise to tighten the rail
downward against bed rail.
Tighten bolt securely.
(Adjust pressure against
tailgate by moving rails forward
or backward as needed prior to
fi nal tightening of clamps.)
Repeat for all clamps.
Ensure that the canister is snug
up against the front sill of the
truck bed.
At this time you need to
completely tighten the Canister
stop (Installed in Step 3, Fig.
3A) as well.
DO NOT TIGHTEN OVER 120-INCH POUNDS!
RAIL
BRACKET
INNER CLAMP
BRACKET
BOLT, FLAT
WASHER &
LOCK WASHER
OUTER CLAMP
BRACKET
FIG. 6
Install the tailgate end of the pull strap to the
underside of the drivers side rail using the #8-32 x
3/4 machine screw located at the tailgate end on the
underside of the rail.
STEP 5: INSTALL TAILGATE END OF PULL STRAP
HARDWARE USED:
PULL STRAP x 1
(TAILGATE END)
STEP 6: INSTALLING CLAMPS
HARDWARE USED:
OUTER & INNER RAIL
CLAMPS x 4
1/4” FLAT WASHER x 4
1/4” LOCK WASHER x 4
RAIL CLAMP BOLT x 4
PLASTIC SHIMS x 4