Getting started – Moog Music MF-104M Analog Delay User Manual
Page 3
4
5
GETTING STARTED
Let’s get started by unpacking and setting up your MF-104M. Here are
some simple instructions on how to plug in and try your new MF-104M.
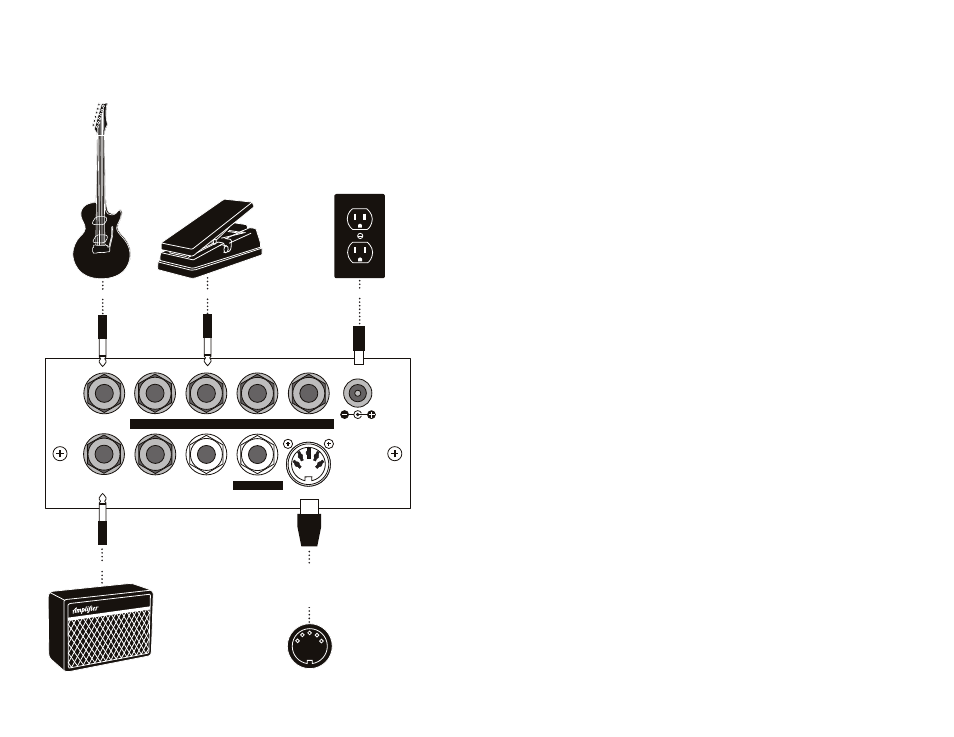
AUDIO IN
FEEDBACK
TIME
LFO RATE
MIX
MIX OUT
DELAY OUT
FB INSERT
LFO AMT
MIDI IN
+9V
400 mA
Guitar or Instrument
Expression Pedal
Power Supply
Amplifier
MIDI Out from
Computer, MIDI
Controller or
Drum Machine
Unpacking
1. Remove your new Moogerfooger from the packaging and allow it a few
moments to get its land legs after the long journey to its new home.
2. Inside the box you’ll find your Analog Delay, AC adapter, warranty card,
and this manual. Save the box in case you ever need to ship your MF-104M
back to Moog Music.
3. Don’t forget to register your Analog Delay. Why? Moog is constantly
updating its products. The only way to know about an update is by
registering. The easiest way is by visiting: www.moogmusic.com/register
Connecting
1. Connect an instrument cable from your sound source to the
AUDIO IN
jack on your MF-104M. You can feed virtually any instrument or line-level
signal through your MF-104M.
2. If you plan on using MIDI, connect a MIDI cable from the out on the MIDI
controller of your choice to the MF-104M’s MIDI IN.
NOTE: The Analog Delay defaults to MIDI Channel one. Make sure your MIDI controller
is transmitting on MIDI Channel one.
3. Connect an instrument cable from the
MIX OUT jack to a line-level input
on your amp or mixer.
4. Using the supplied power adapter, plug the cord into the +9V jack. Then,
plug the power adapter itself into a wall receptacle.
NOTE: The MF-104M requires a power supply of +9VDC, CENTER POSITIVE, rated for
at least 400mA.
5. Once the power supply is plugged in your Moogerfooger is ready to
work. You’ll notice that the
BYPASS indicator is red. This indicates the
effect is
OFF.