Drive motor and motor mount, Chapter 11 drive motor and motor mount, Drive motor mount assembly – Grain Systems Bucket Elevtors, Conveyors, Series II Sweeps PNEG-681 User Manual
Page 26: Drive, Motor mount assembly
26
PNEG-681 Series II Bucket Elevator
11. Drive Motor and Motor Mount
Drive
The following assembly instructions are for standard drives as purchased with the elevator. The standard
drive is designed using the Dodge Torque Arm II shaft mount reducer. Details for this application are
included in the appendix section
If you purchased a special drive or drive components from another source, refer to manuals supplied with
these materials.
1. The drive assembly is designed so that the same components fit a left or right hand drive application.
2. If facing the head side, the reducer is between you and the head and the head discharge is on the
right hand side of you, then you have a right hand drive application.
3. If the head discharge is on the left side of you, then you have a left hand drive application.
shown for a right hand application.
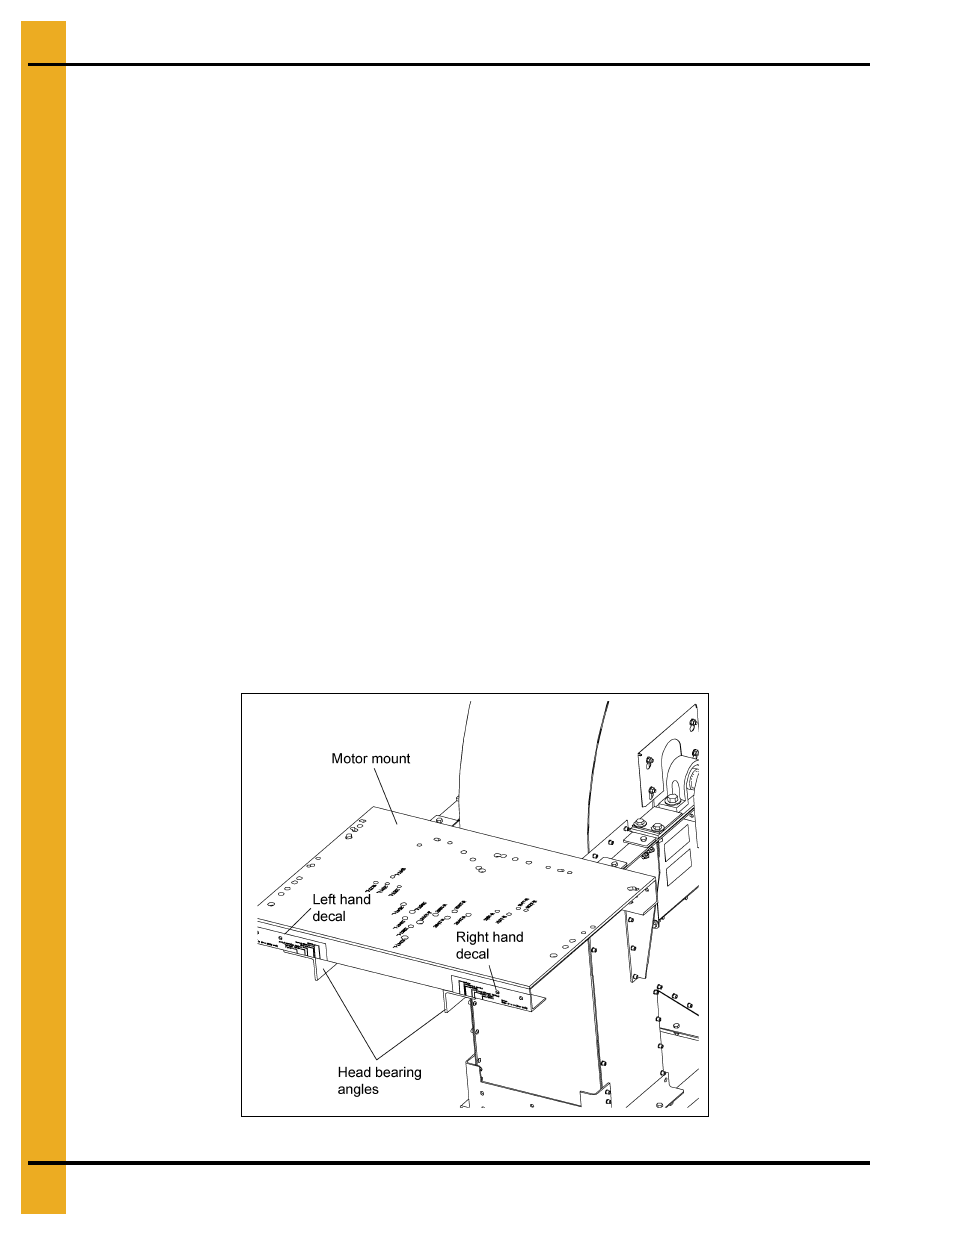
Motor Mount Assembly
1. Locate the side of the motor mount which has two (2) decals affixed.
One decal
will have “L.H.” for left hand and one will have “R.H.” for right hand.
2. Place the motor mount with decals facing away from the pulley towards the end of the head
bearing angles.
3. Note the horsepower, class rating and drive application side on the decals. Follow the indication line
next to those numbers to where it points down to the bottom of the motor mount.
4. Slide the motor mount in or out while keeping the decal correctly aligned with the outside toe of the
head bearing angle.
This will align the holes in the head bearing angles
to the proper holes in the motor mount assembly.
5. Using the proper hardware, bolt the motor mount down to the head bearing angles.
Figure 11A Motor Mount Plate