Velleman DVR4H3 Quick Installation Guide User Manual
Page 6
DVR4H3
Rev. 01
18/01/2012
©
Velleman nv
6
•
Connect the video output of the camera to either video input at the back of the DVR. The number
next to the input connectors represents the channel number. Connector type is BNC.
Connecting audio
•
The DVR supports four audio inputs. Connect the audio output of an audio source to an audio
input of the DVR. Make sure to connect the audio channel to the corresponding video channel.
Connector type is BNC.
•
There is also an audio output connector. Connect an audio device e.g. a speaker to this connector
when desired. Connector type is BNC.
Connecting Local Area Network (LAN)
•
Connect the DVR to a local network by plugging a network cable into the LAN port at the back of
the DVR. Connector type is 8P8C (RJ45). Setup is done through the OSD.
7.
Preliminary settings
•
Make sure the connected cameras are on and set the power switch at the rear of the device to the
on-position. It takes about 15 to 30 seconds to start up.
Menu overview
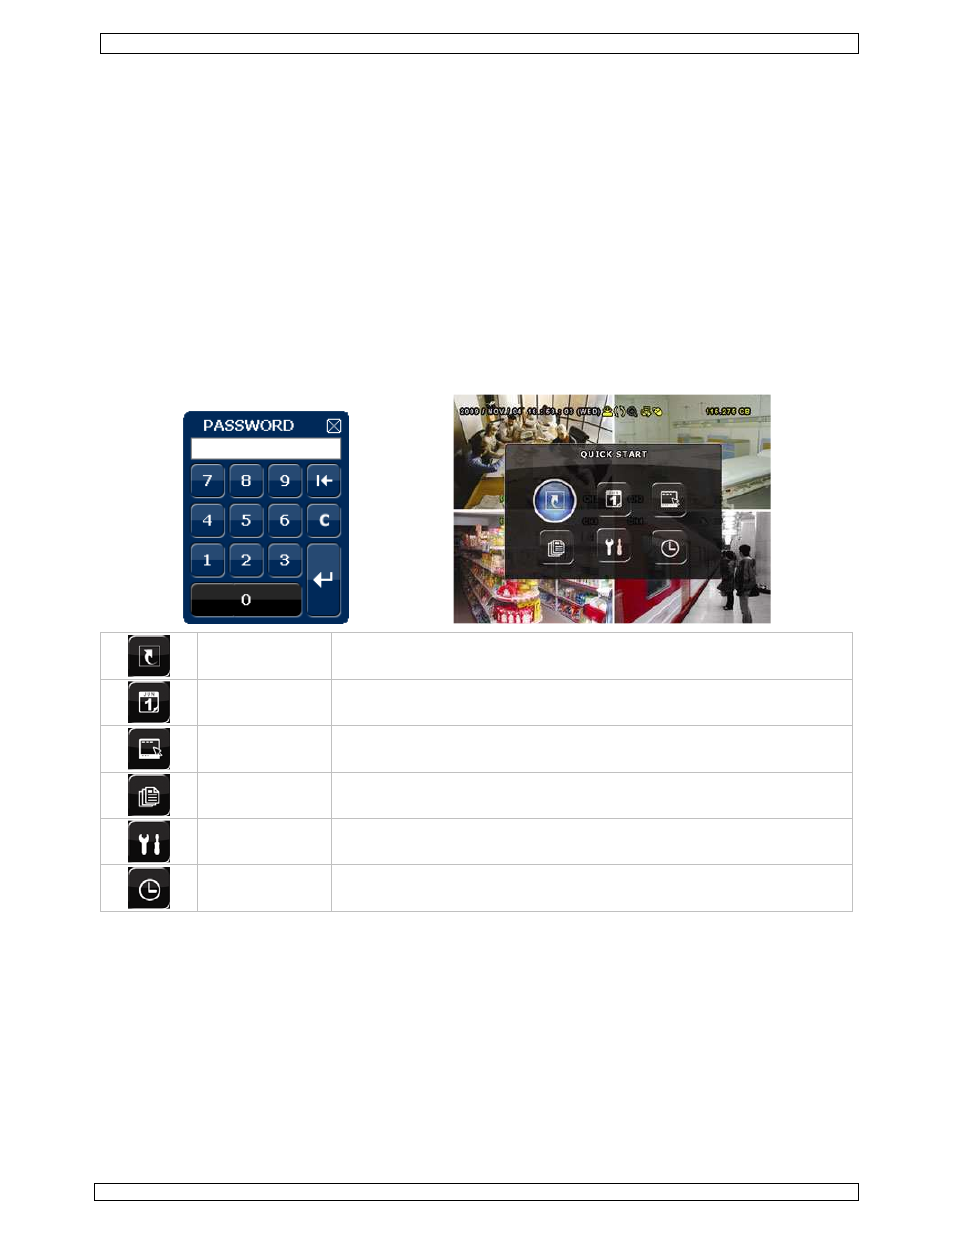
•
Press the MENU button and enter the password to go into the menu list.
Note: default admin password is “0000” (4 times zero).
QUICK START
GENERAL - TIME SETUP
DATE SETUP
DATE INFO - DAYLIGHT
SYSTEM
TOOLS - SYSTEM INFO – BACKUP DATA – BACKUP LOG
EVENT
INFORMATION
QUICK SEARCH - EVENT SEARCH - HDD INFO - EVENT LOG
ADVANCED
CONFIG
CAMERA – DETECTION – ALERT – NETWORK – DISPLAY – RECORD -
REMOTE
SCHEDULE
SETTING
RECORD – DETECTION - ALARM
For more details, refer to the full user manual.
Setting date and time
•
Before using the DVR the time and date should be set to get a valid time stamp.
•
Press the MENU button and enter the admin password to go into the menu list.
•
Select the QUICK START menu item.
•
Use the NAVIGATION button to move to the TIME SETUP menu item. Select it to set date and
time.
Note: once recording started, do not change date or time as this will make it very difficult to
find back the recorded files.
Note: when using the DVR for the first time and the correct time is set, leave it on for at
least 48 hours.
Password setting
•
Press the MENU button and enter the password to go into the menu list.