High Lifter Outlaw Clutch Kit for Kawasaki 360 Prairie (02-09) User Manual
Page 2
6. Place the belt on both clutches. Most belts have an arrow indicating direction of rotation. If your belt doesn’t, be
sure to install it so that you can read the part number. In either case, always run the belt the same direction as it
was new. Slide both clutches on the machine at the same time. Torque the primary clutch bolt to 69 ft/lbs. Torque
the secondary clutch nut to 69 ft/lbs.
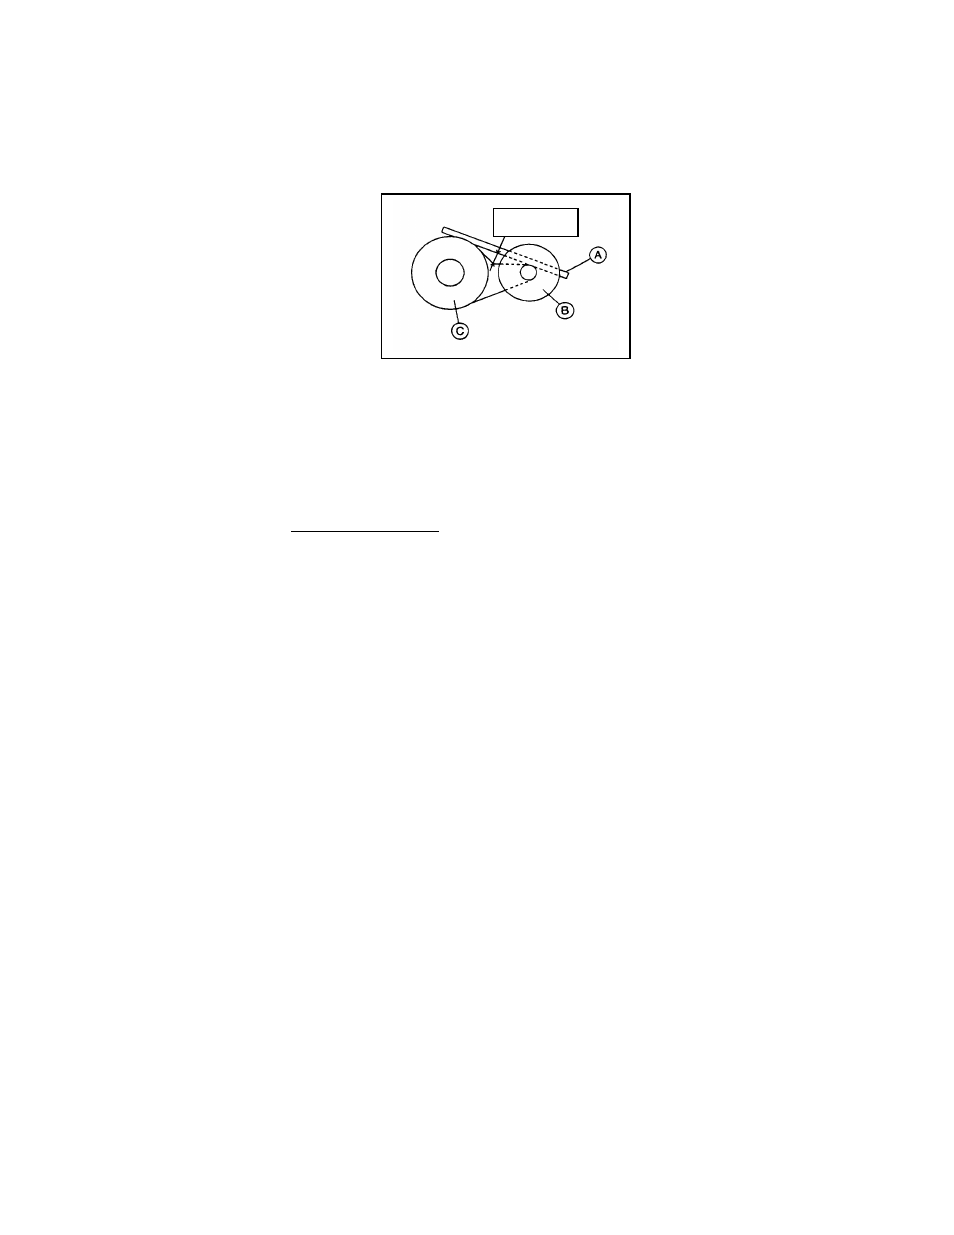
7. Check for proper belt deflection. Belt deflection should be 22-27mm (.87 - 1.06 inches). Using a straight edge on
top of the belt, push down lightly on the belt to remove any slack and measure the distance between the belt and
straight edge (see diagram). Refer to your service manual if a change is needed.
8. Make sure the sensor switch inside the clutch cover is in the ON position. Install the plastic clutch cover carefully to
get a good seal. Install the rear vent tube and reconnect the wires to the electric actuator and the small sensor.
9. Go out and ride your machine in your normal riding conditions. If the performance does not seem right, double
check to see if everything was installed properly.
NOTICE: Even with this clutch kit, you should be advised that using substantial throttle when the tires are not able to
spin can cause the belt to slip and damage may occur. EPI recommends that the transmission be shifted into low
range when high load, slower speed situations are encountered. EPI is not responsible for any damage to the drive
belt or any other original equipment component.
22-27 mm