Front lift installation instructions, Front lift illustrations – High Lifter Lift Kit for Suzuki King Quad 750i User Manual
Page 3
3
Front Lift Installation Instructions
**
Note** Sides of the ATV are described as if sitting on the ATV.
1. Place jack under center of the ATV front end and lift until front wheels clear the ground. Be careful to
support ATV properly so that it’s secure, but so that the A-arms and shocks can droop to full extension.
2. Remove front wheels and shocks.
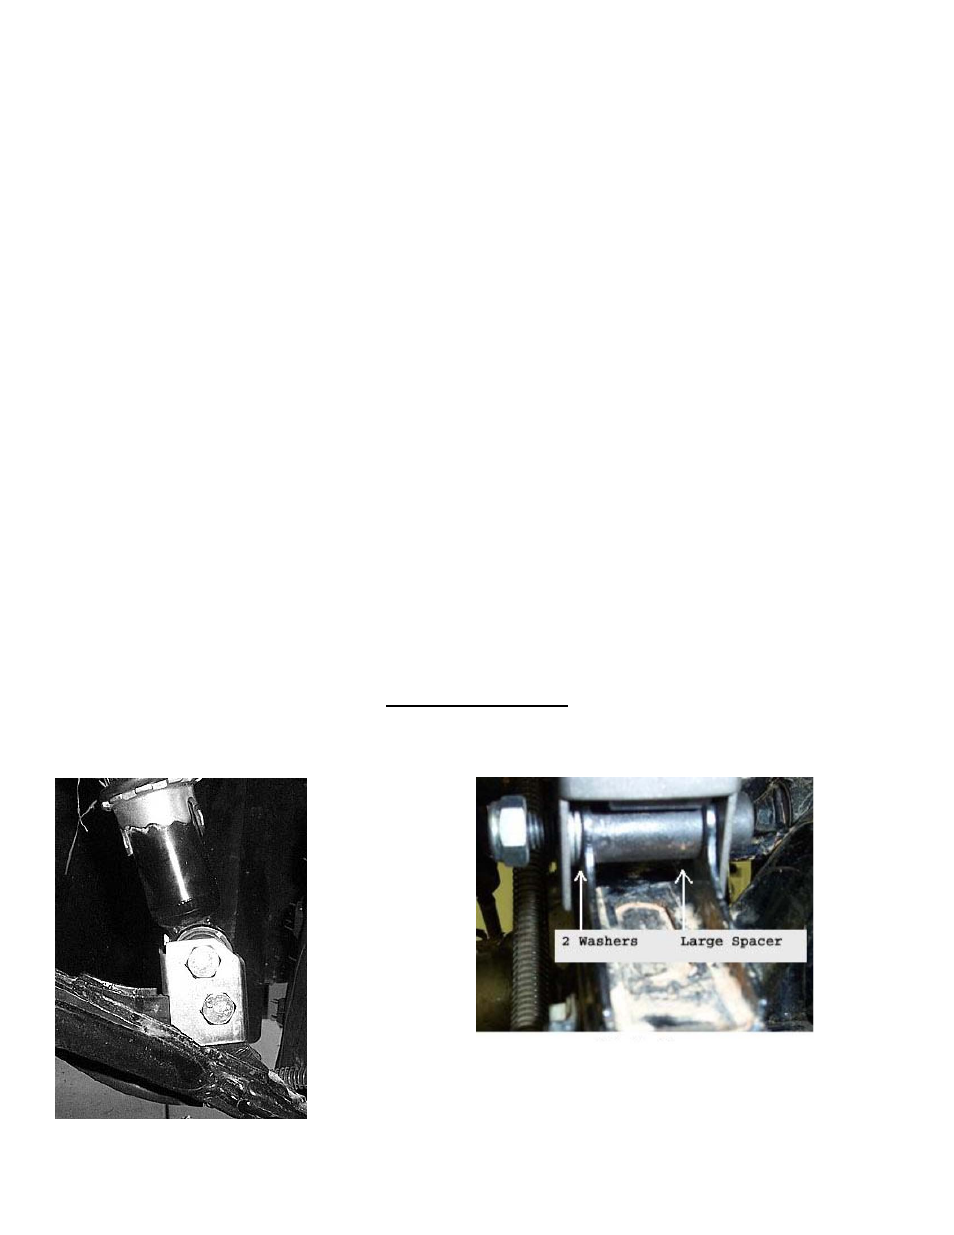
3. Place Front Tube Bracket onto the lower shock mount. Make sure that the angle side is facing to the
inside of the ATV.
4. Put large spacer into the shock mount.
5. Now insert the 10x55mm bolt into the brackets, aligning the holes, BUT do not go all the way through.
Between the shock mount and the inside of the bracket that is facing the front of the ATV insert
two10mm washers.
6. Push bolt through fasten tight with the 10mm lock nut.
7. Place the bottom of the shock into the top of the Front Tube Bracket. Position the shock, so that it is on
the inside of the tube bracket so that is flush against the side of the bracket that is facing the rear.
8. Insert the 10x55mm bolt, starting from the side that is facing the rear. Do not go all the way through.
Between the shock and the inside of the tube bracket insert a 10mm washer and small spacer. The
washer needs to be between the small spacer and shock.
9. Finish pushing the bolt through and fasten tight with the 10mm lock nut. Reattach the top of the shock
to the ATV.
10.
Repeat steps for opposite side. Torque all bolts to factory specifications. Place wheels on ATV and
lower jack.
Front Lift Illustrations