Stage one instructions, Stage two instructions – High Lifter DynoJet Jet Kit Honda 250 EX (06-08) User Manual
Page 2
STAGE ONE INSTRUCTIONS
1. Unscrew the carb top. Disconnect the throttle cable from the slide and
remove the slide. Using a pair of needle nose pliers gently squeeze the
white plastic needle retainer and pull up to remove.
2. Install Dynojet needle on groove #4 for applications below 5000 feet,
groove #3 for above 5000 feet, using all stock spacers. Install the Dynojet
washer above the E-clip.
3. Remove stock main jet and replace with Dynojet main provided. Use the
DJ092 below 3000 feet, DJ088 from 3000 to 6000 feet and DJ084 above
6000 feet. When using an aftermarket exhaust with a high flow baffle,
Use the DJ096 below 3000 feet, DJ092 from 3000 to 6000 feet and the
DJ088 above 6000 feet.
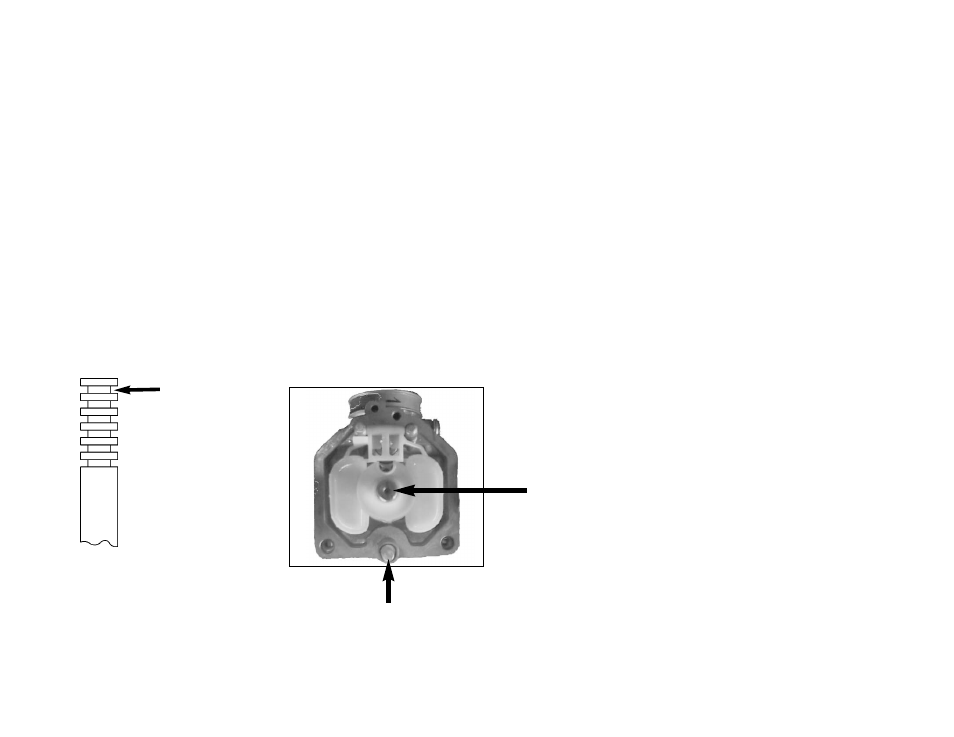
4. Locate the Fuel Mixture Screw (Fig.B). Using the tool provided DT008,
turn the mixture screw clockwise until it seats, then turn out 2.5 turns, 2
turns above 5000 feet.
Q117.001
This is Groove # 1
Fig.B
1. Remove the airbox lid.
2. Unscrew the carb top. Disconnect the throttle cable from the slide and
remove the slide. Using a pair of needle nose pliers gently squeeze the
white plastic needle retainer and pull up to remove.
3. Install Dynojet needle on groove #4 for applications below 5000 feet,
groove #3 for above 5000 feet, using all stock spacers. Install the Dynojet
washer above the E-clip.
4. Remove stock main jet and replace with Dynojet main provided. Use
the DJ106 below 3000 feet, DJ102 from 3000 to 6000 feet and DJ098
above 6000 feet. When using an aftermarket exhaust with a high flow baf-
fle, Use the DJ110 below 3000 feet, DJ106 from 3000 to 6000 feet and the
DJ102 above 6000 feet.
5. Locate the Fuel Mixture Screw (Fig.B). Using the tool provided DT008,
turn the mixture screw clockwise until it seats, then turn out 2.5 turns, 2
turns above 5000 feet.
STAGE TWO INSTRUCTIONS
Fuel Mixture Screw
Main Jet Location