High Lifter DynoJet Jet Kit for Kawasaki Prairie 700 (04-06) User Manual
Page 2
STAGE ONE INSTRUCTIONS
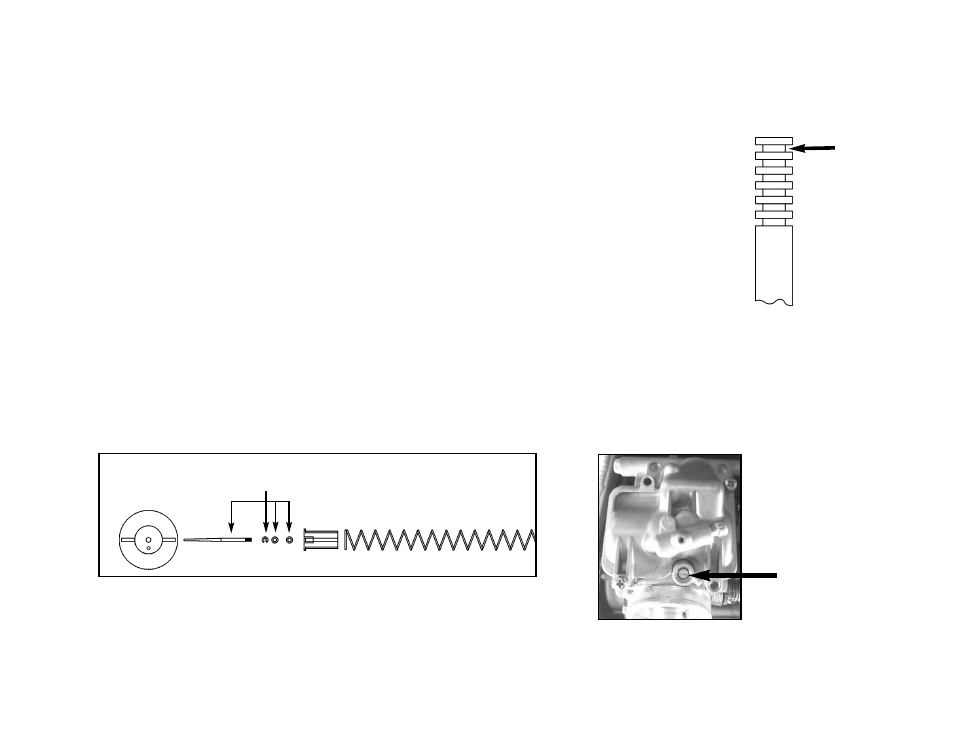
1. Remove vacuum slides from carbs. Remove stock needles & spacers, noting order of assembly (Fig.A).
2. Install Dynojet needles on groove #5 for applications below 5000 feet, groove #4 for above 5000 feet,
using all stock spacers. Install the Dynojet washers above the E-clip, 2 per needle (Fig.A).
3. Remove stock main jets and replace with Dynojet main jets provided. Use the DJ132 in the front carb and
the DJ136 in the rear carb below 3000 feet, DJ128 in the front carb and the DJ132 in the rear carb from 3000
to 6000 feet and DJ124 in the front carb and the DJ128 in the rear carb above 6000 feet. When using an
aftermarket exhaust with a high flow baffle, Use the DJ136 in the front carb and the DJ140 in the rear carb
below 3000 feet, DJ132 in the front carb and the DJ136 in the rear carb from 3000 to 6000 feet and the
DJ128 in the front carb and the DJ132 in the rear carb above 6000 feet. NOTE: When using a K&N filter you
will need to install a main jet that is 2 points larger. ie: if you are using the DJ132 main jets you will need to
install the DJ134 main jets.
4. Locate the Fuel Mixture Screws (Fig.B). Using a flat blade screwdriver, turn the mixture screws clockwise
until seated, then turn out 3 turns, 2.5 turns above 5000 feet.
Fig.A
Q216.002
This is Groove # 1
Fig.B
Mixture Screw
Dynojet Parts