Stage one instructions – High Lifter DynoJet Jet Kit for Yamaha Wolverine 350 (06-09) User Manual
Page 2
STAGE ONE INSTRUCTIONS
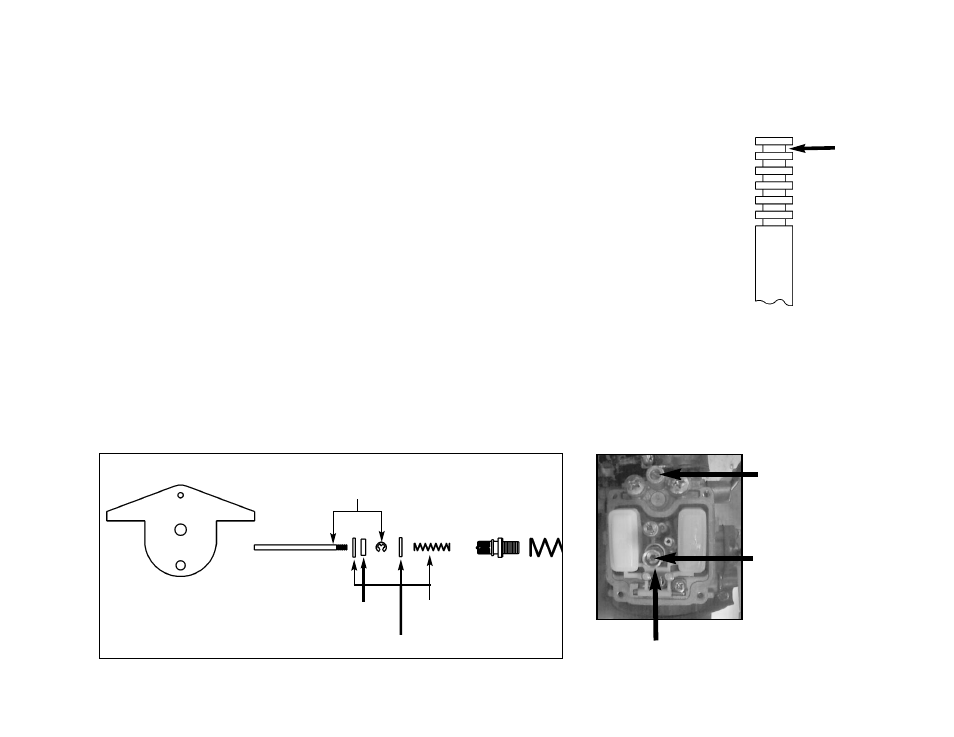
1. Remove vacuum slide from carb. Remove stock needle & spacers, noting order of assembly (Fig.A).
2. Install Dynojet needle on groove #4 for applications below 5000 feet, groove #3 for above 5000 feet, using
all stock spacers (Fig.A). NOTE: The DSP77 spring does not have to be used, it is supplied in case the stock
spring is misplaced.The Dynojet washer (DW0001) does not need to be installed at this time, it is for half
step adjustments. After installing the slides in the carbs, be sure to check slide movement manually before
airbox installation.
3. Remove stock main jet and replace with the Dynojet main jet provided. When using the stock exhaust
install the DJ128 below 3000 feet, DJ124 from 3000 to 6000 feet and DJ120 above 6000 feet. When using
an aftermarket exhaust with a high flow baffle, use the DJ132 below 3000 feet, DJ128 from 3000 to 6000
feet and the DJ124 above 6000 feet.
4. Locate the fuel mixture plug (Fig. B), if you see a screw head, proceed to adjusting procedure. With the
plug drill DD 5/32 provided, carefully drill thru the plugs. NOTE: the mixture screw is directly underneath this
plug, be ready to pull back on the drill the instant you break through. Use the screw provided to secure and
remove the plug. Using a flat blade screwdriver, turn the mixture screw clockwise until it seats, then turn out
3 turns, 2.5 turns above 5000 feet.
Fig.A
Q429.001
This is Groove # 1
Fig.B
Mixture Screw
Main Jet
Dynojet Parts
Main Jet cup must be
re-installed
Stock Parts
Thick Metal Washer
Thick Plastic Washer