High Lifter DynoJet Jet Kit for Suzuki Quad Runner 250 (88-99) User Manual
Page 2
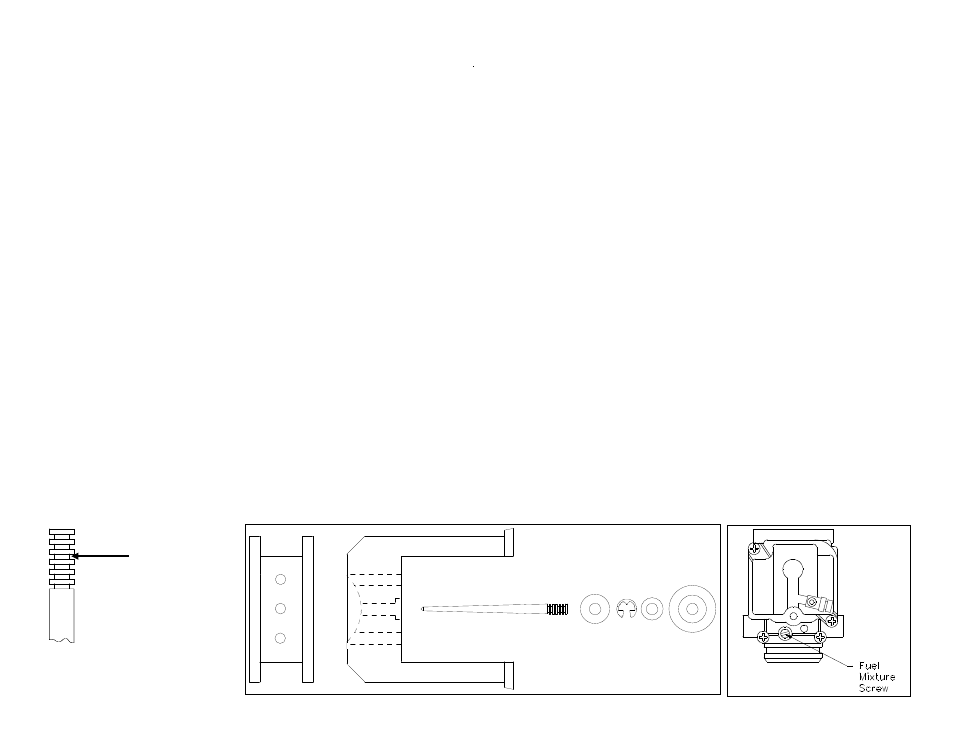
1. Remove vacuum slide from carbs. Remove stock needles & spacers, noting
order of assembly.
2. Remove stock main jet. Replace with Dynojet Main Jets provided. If you are
running the stock exhaust use the DJ116 below 3000 feet, DJ112 from 3000 to
6000 feet and DJ108 above 6000Feet. Be sure that the jet you are changing is
the main jet.
3. Install Dynojet needles on groove# 3, (Fig. A). Install the Dynojet washer above
the E-clip.
4. Locate the Fuel Mixture Screw (Fig.B). Using a flat blade screwdriver, turn the
mixture screw clockwise until it seats, then turn out 1 1/2 turns .
Q303.001
STAGE ONE INSTRUCTIONS
STAGE TWO REQUIRES AIR BOX LID REMOVAL.
1. Remove vacuum slide from carbs. Remove stock needles & spacers, noting
order of assembly.
2. Remove stock main jet. Replace with Dynojet Main Jets provided. If you are
running the stock exhaust use the DJ126 below 3000 feet, DJ122 from 3000 to
6000 feet and DJ118 above 6000Feet. Be sure that the jet you are changing is
the main jet.
3. Install Dynojet needles on groove# 3, (Fig. A). Install the Dynojet washer above
the E-clip.
4. Locate the Fuel Mixture Screw (Fig.B). Using a flat blade screwdriver, turn the
mixture screw clockwise until it seats, then turn out 1 1/2 turns .
STAGE TWO INSTRUCTIONS
Place E-clip in
groove #3 from the
top
Fig. B
Fig. A