1 installation, 2 service overview – AASTRA AMC+ Quick Reference Guide for Android EN User Manual
Page 2
2
1 Installation
Google Market: Search for “AMC+” and install it from there.
Web: Alternatively your administrator should have supplied you with a link where you can download and
install the Aastra Mobile Client plus (AMC+). Follow this link for installation.
2 Service Overview
Your Aastra Mobile Client plus (AMC+) enables you to perform your corporate communications efficiently.
Among the functionalities provided are:
• Integrated usage of mobile networks via your corporate PBX. All calls you make and receive are
company calls.
• Access to PBX features (Conference, Consultation etc.) as well as corporate voice mail integration
• Voice over IP (VoIP) telephony via WLAN or alternatively 3G connections
• Saving mobile telephony costs with Mobile Least Cost Routing (MCLR)
•
Unified Communications with Corporate Directory Access
3 Configuration Download (AMC Configuration & Provisioning
Server)
The configuration for your AMC+ can be downloaded automatically when opening it for the first time.
Before opening the AMC+:
1. Make sure that a data channel (WLAN or 3G) is available before opening
the AMC+.
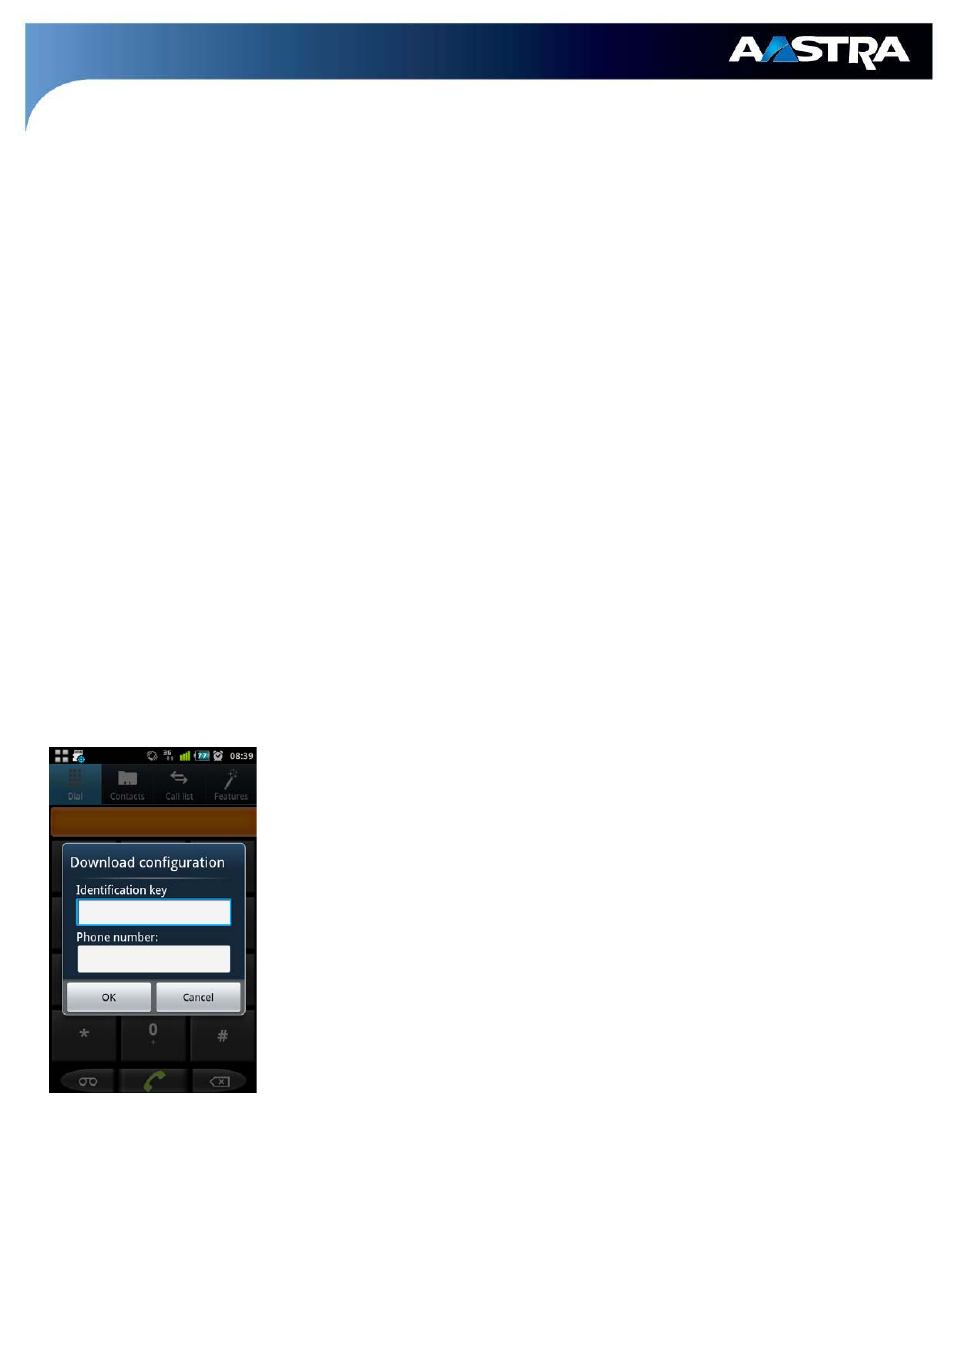
When you open the application a pop-up window will apear (see screenshot to
the left):
2. Enter your identification key provided by your administrator.
3. Enter your mobile phone number into the automatic pop-up window. It is
not necessary to enter it with a leading plus sign, but please provide the
number including the country prefix.
4. Press “OK” to begin the configuration download to your AMC+.
5. The AMC+ will notify you once the configuration download has ended
and if further steps are necessary.
After this, the configuration data provided will be saved and applied by your AMC+.
This deployment method might not be used
by your system administrator! Contact him if no pop-up
appears, or if there are errors during the process.