Blue Ox BX88181 User Manual
Page 2
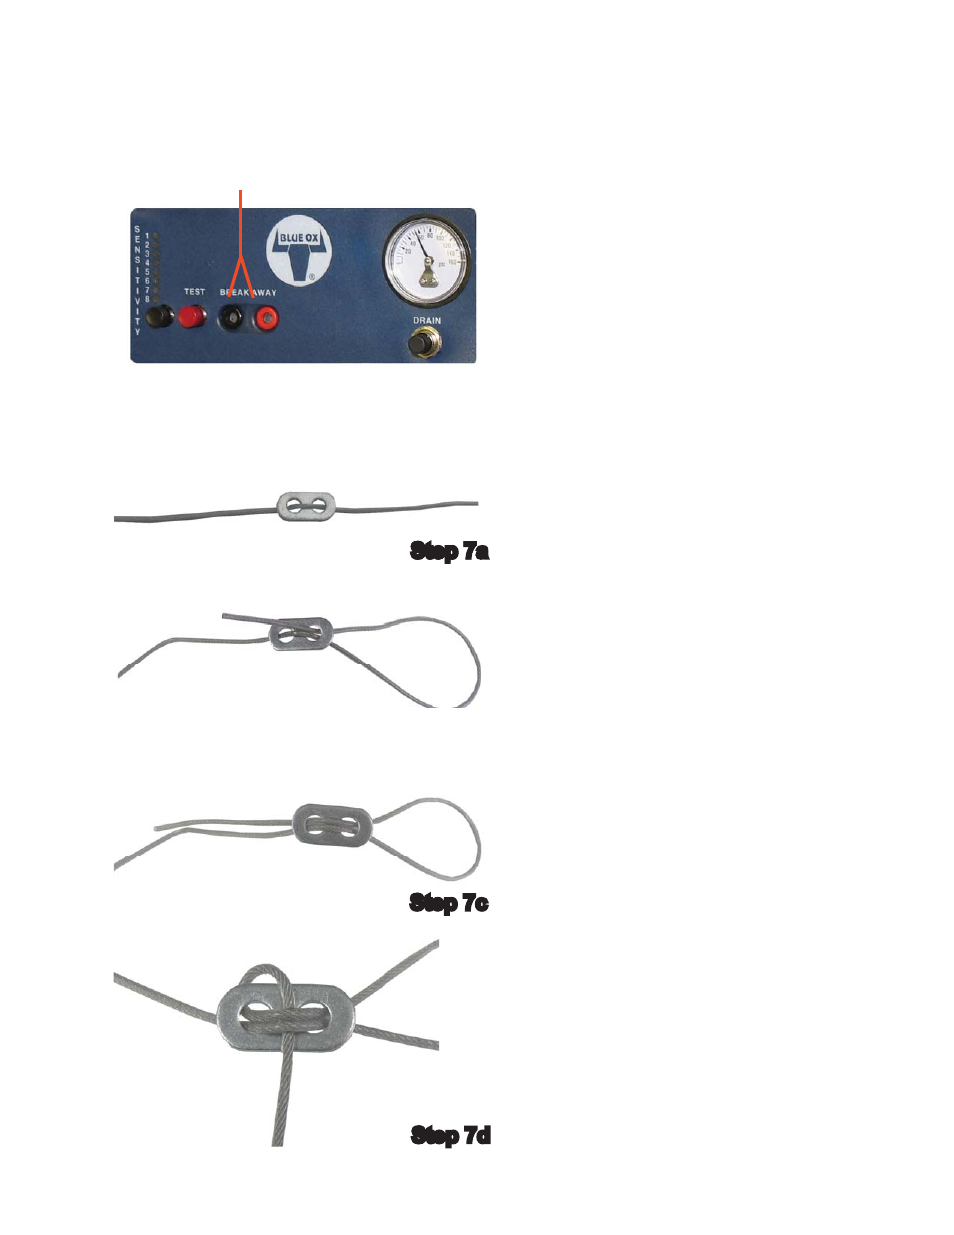
Breakaway
Receptacles
Step 5
Step 5
Step 7a
Step 7c
Step 7d
Page 2 of 3
292-6188
12/5/08
4. Strip ¼” of insulation from the end of the
wires. Insert the stripped wire end into the
color-coded banana clip (black wire to black
banana clip, red wire to red banana clip) and
tighten the set screw on pin. Ensure the wire is
securely tightened.
5. Plug banana clips into the color coded
Breakaway receptacles on the Apollo control
panel. Excess wire may be coiled under the
dash and secured with a wire tie or stored
under the fl oor mat or carpet.
6. Th
read the cable through the included cable
adjustor plate as illustrated in the photos and
trim or tuck away the excess cable.
7. Slip the S Hook through the loop at the end of
the lanyard cable. Using a Vise grip, pinch the S
Hook to keep the cable inside the S
Hook.
8. Run the lanyard from the breakaway switch
attached to the front of the towed vehicle and
attach it to the receiver hitch on the rear of the
coach. Allow enough cable slack for turning.
A good indicator is if the cable can be moved
up and down a total distance of six inches (i.e.,
three inches up, three inches down) near the
center of the cable.
9. When not in use, unplug the lanyard cable.
Aft er unplugging the lanyard cable, simply
insert the replacement plug into the Breakaway
switch. Use the replacement plug to keep the
Breakaway switch free of debris when not in
use.
Step 7b
Step 7b
Step 7c
Step 7c
Step 7a
Step 7a
Ste
Ste