Disassembly / assembly instructions – Blue Ox BX8894 User Manual
Page 8
DISASSEMBLY / ASSEMBLY INSTRUCTIONS
292-2215 7/02 5 of 10
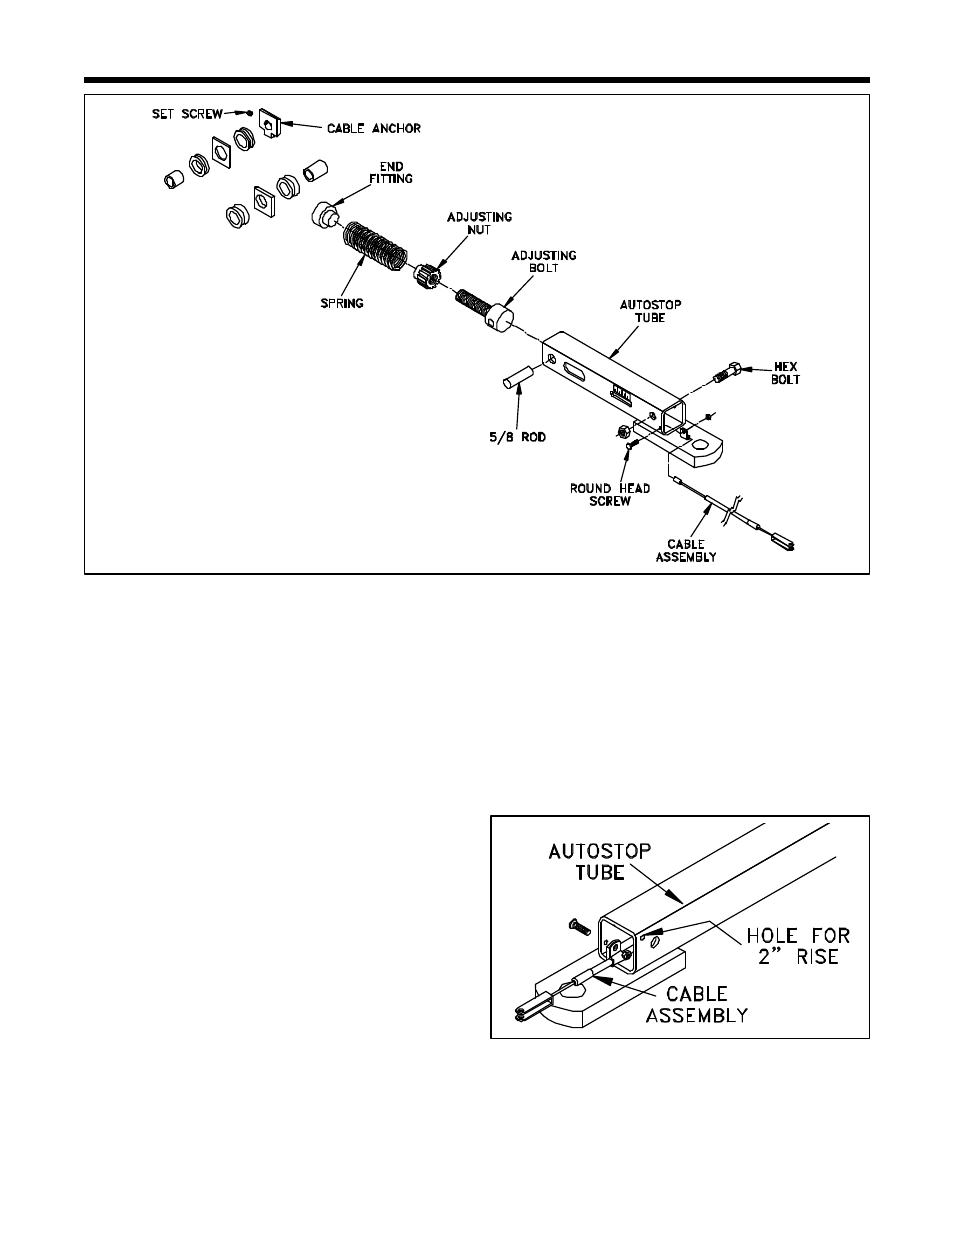
Figure 10
unwind when removed from of tube. This is normal,
reassembly will be explained in a later section.
4.
Remove the round head screw holding the cable
clamp, then pull the cable assembly out of the
AutoStop tube.
5.
Clean all parts with a mild solvent such as WD-40
and be sure to dry all parts thoroughly. Use a
brush to insure the inside of the AutoStop tube is
clean as well.
MAINTENANCE
The AutoStop and the inside of the receiver tube
should be cleaned and lubricated with silicon spray at
1,000 mile intervals to prevent the buildup of road dust
preventing the action to slide with ease. The AutoStop
should be disassembled, thoroughly cleaned and
lubricated every 10,000 miles. At this time the
actuating cable should be replaced if there are any
signs of cable wear. Pages 5 - 9 show actuator cable
routing and parts assembly of the AutoStop.
DISASSEMBLY INSTRUCTIONS
If your AutoStop becomes sluggish or you are in
need of replacing a broken part, the following
disassembly instructions will step you through how to
dismantle, clean and reassemble your AutoStop.
1.
Remove the AutoStop from the receiver hitch.
Remove the hex bolt. (Figure 10)
2.
Loosen the set screw in the cable anchor and
remove the 5/8 rod going through the AutoStop
tube. NOTE: You may need to tap out the 5/8 rod
with a punch.
3.
At this point, slide the pulleys and adjusting bolt
assembly out of the AutoStop tube. NOTE: Use
caution when removing the pulleys. The cable is
coiled around the pulleys several times and may
Figure 11