Power supply, Removing the power supply – Dell XPS 210 User Manual
Page 27
4.
Install the new modem:
a.
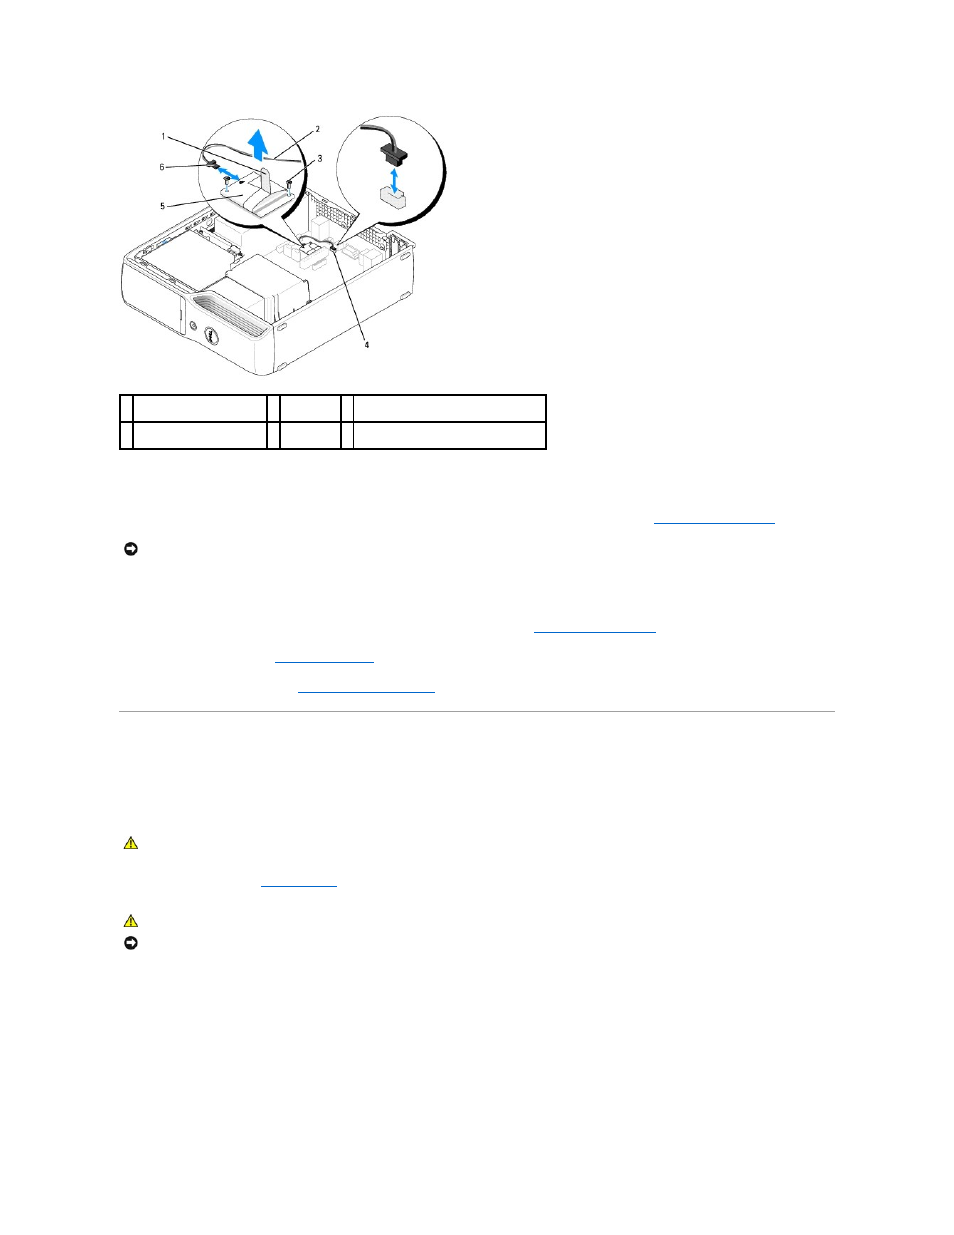
Connect the T-shaped connector of the modem cable to the modem.
b.
Align the modem with the screw holes and press the modem into its connector on the system board (see
System Board Components
).
c.
Replace and tighten the two screws to secure the modem to the system board.
d.
Replace the other end of the modem cable to the RJ11 internal connector.
5.
Connect the power cable to the power connector (POWER) on the system board (see
System Board Components
).
6.
Replace the hard drive (see
).
7.
Replace the computer cover (see
Replacing the Computer Cover
).
Power Supply
Removing the Power Supply
1.
Follow the procedures in
Before You Begin
.
2.
Disconnect the AC power cable from the power supply connector.
3.
Disconnect all DC power cables from the system board and drives.
4.
Remove the three power supply screws.
1 pull tab
2 modem
cable
3 screws (2)
4 RJ11 internal connector
(RJ11INT)
5 modem
6 T-shaped connector attached to the
modem cable
NOTICE:
The connectors are keyed to ensure correct insertion. If you feel resistance, check the connectors for proper orientation, then try again.
CAUTION:
Before you begin any of the procedures in this section, follow the safety instructions in the Product Information Guide.
CAUTION:
To guard against electrical shock, always unplug your computer from the electrical outlet before opening the cover.
NOTICE:
Before touching anything inside your computer, ground yourself by touching an unpainted metal surface, such as the metal at the back of the
computer. While you work, periodically touch an unpainted metal surface to dissipate any static electricity that could harm internal components.