Acroprint ESP180 Time Stamp User Manual
Page 10
10 Setup
2.4
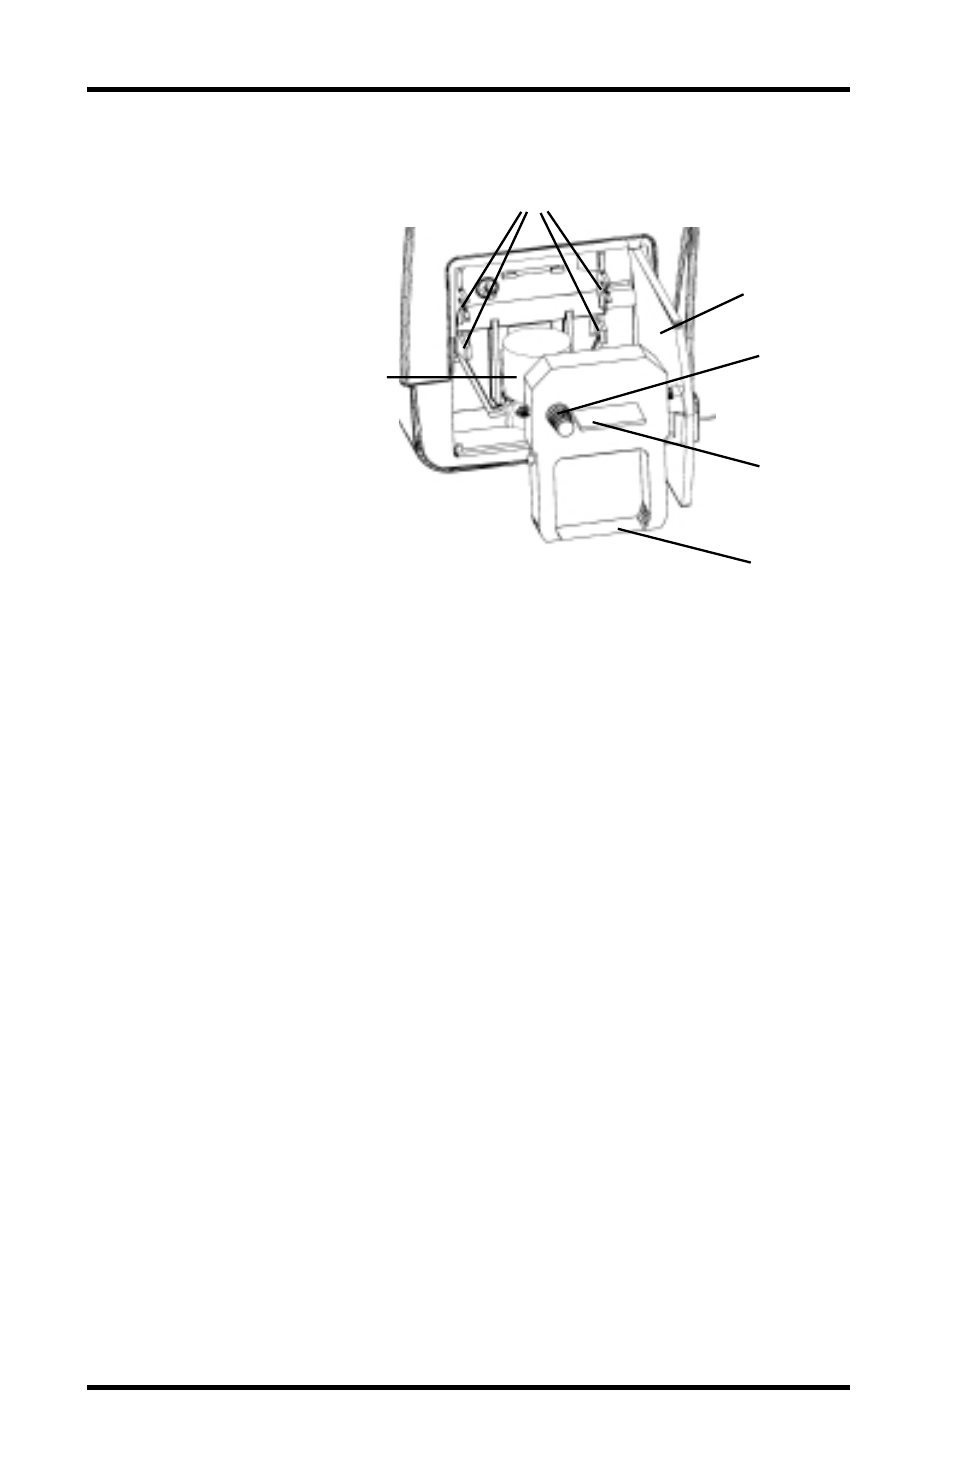
Installation and removal of ribbon cartridge
The ESP180 is
shipped without
the ribbon
cartridge
installed. Please
use the
following
instructions to
install the ribbon
cartridge.
To install the ribbon cartridge:
1. Remove the new ribbon cartridge from its box.
2. Insert key in access door, turning clockwise ¼ turn. Open
door. Remove key from door.
3. Turn the knob on the ribbon cartridge clockwise to remove
any ribbon slack.
4. Slide the cartridge’s exposed ribbon under the printhead.
5. Snap the ribbon cartridge into place taking care that the pins
on the side of the cartridge are pushed into their clips. If
necessary, turn the knob on the ribbon cartridge clockwise
while snapping the ribbon cartridge into place. Be sure to
press on the ribbon cartridge to snap it behind the bottom
two clips located approximately halfway down the ribbon
cartridge. Remove any slack in the ribbon.
6. The door should be closed by pressing on it until it snaps.
Do not use the key.
7. After the power is connected, take a sample print to confirm
that the ribbon is correctly installed.
To remove an old ribbon:
1. Insert the key into the ribbon access door.
2. Open the door by turning the key clockwise.
3. Remove the key from the door.
4. Grasp the ribbon by the tab and pull it straight out.
5. See ribbon installation instructions.
Tab
Printhead
Knob
Ribbon
Access
Door
Clips
Ribbon