Operating instructions – RIDGID HC-300 User Manual
Page 13
HC-450/HC-300 Hole Cutting Tools
11
When using an extension cord, the GFCI on the
Hole Cutting Tool does not protect the extension
cord. If the outlet is not GFCI protected, it is ad-
visable to use a plug in type GFCI between the
outlet and the extension cord to reduce the risk
of shock if there is a fault in the extension cord.
Operating Instructions
WARNING
Always wear appropriate eye protection. Cutting
tools can break or shatter. Cutting produces chips
that can be thrown or fall into eyes.
Do not use for hot tapping. When cutting into an
existing system, the pipe must be drained and de-
pressurized prior to cutting. This reduces the risk of
electrical shock and other serious injury.
Do not wear gloves or loose clothing when operat-
ing machine. Keep Sleeves and jackets buttoned. Do
not reach across machine. Clothing can be caught
by the machine resulting in entanglement.
Keep fingers and hands away from rotating chuck
and saw. This reduces the risk of entanglement and
cutting injuries.
Follow operating instructions to reduce the risk of
injury from electrical shock entanglement, crush-
ing and other causes and prevent Hole Cutter dam-
age.
1. Confirm that the Hole Cutting Tool and work area
are properly set up and that the work area is free of
bystanders and other distractions.
2. Assume a proper operating position that will al-
low:
• Control of the Hole Cutting Tool, including the ON/
OFF switch and the feed handle. On the HC-300
you must be on the same side as the switch and
the feed handle. Do not turn the tool ON yet.
• Good balance. Be sure that you do not have to
over reach.
3. Move the ON/OFF switch to the ON position. Ob-
serve the rotation of the hole saw and pilot drill,
making sure it is running straight and true. If they
wobble, or any other issues are noted, move the
switch to OFF and unplug tool, fix any issues prior
to using. Keep fingers, hands and clothes away
from the turning chuck to help reduce the risk of
entanglement.
4. Place both hands on the hand wheel and advance
the pilot drill into contact with the pipe. Apply firm
pressure, and start drilling the pilot hole. Do not
force the pilot drill/hole saw. This can overload the
hole saw and the tool motor and cause premature
failure.
Once the hole saw is in contact with the pipe, con-
tinue to apply firm pressure. Depending on the
size and wall thickness of the pipe and the size of
the hole being cut, the hole saw may need to be
retracted slightly at times for chip removal.
If needed, the Hole Cutting Tool can be shut off and
a small amount of appropriate cutting lubricant
applied to the work piece. Do not apply lubricant
while the tool is running, this increases the risk of
entanglement. Take appropriate steps to prevent
the lubricant from dripping or being thrown dur-
ing use.
As the hole saw moves through the pipe and as the
cut is completed, there will be an interrupted cut
at times. Decrease pressure as this occurs to help
prevent jamming of the hole saw.
5. Once the hole is complete, retract the hole saw
from the pipe and turn the ON/OFF switch OFF.
6. Reverse the mounting procedure to remove the
Hole Cutting Tool from the pipe. Make sure you
have secure grip on the Hole Cutting Tool prior to
loosening the chain or pulling the plunger on the
HC-300.
7. If the pipe slug needs to be removed from the hole
saw, always make sure that the ON/OFF switch is in
the OFF position and the Hole Cutting Tool is un-
plugged before removing. Remove the slug with
care, the slug may be hot and edges can be sharp.
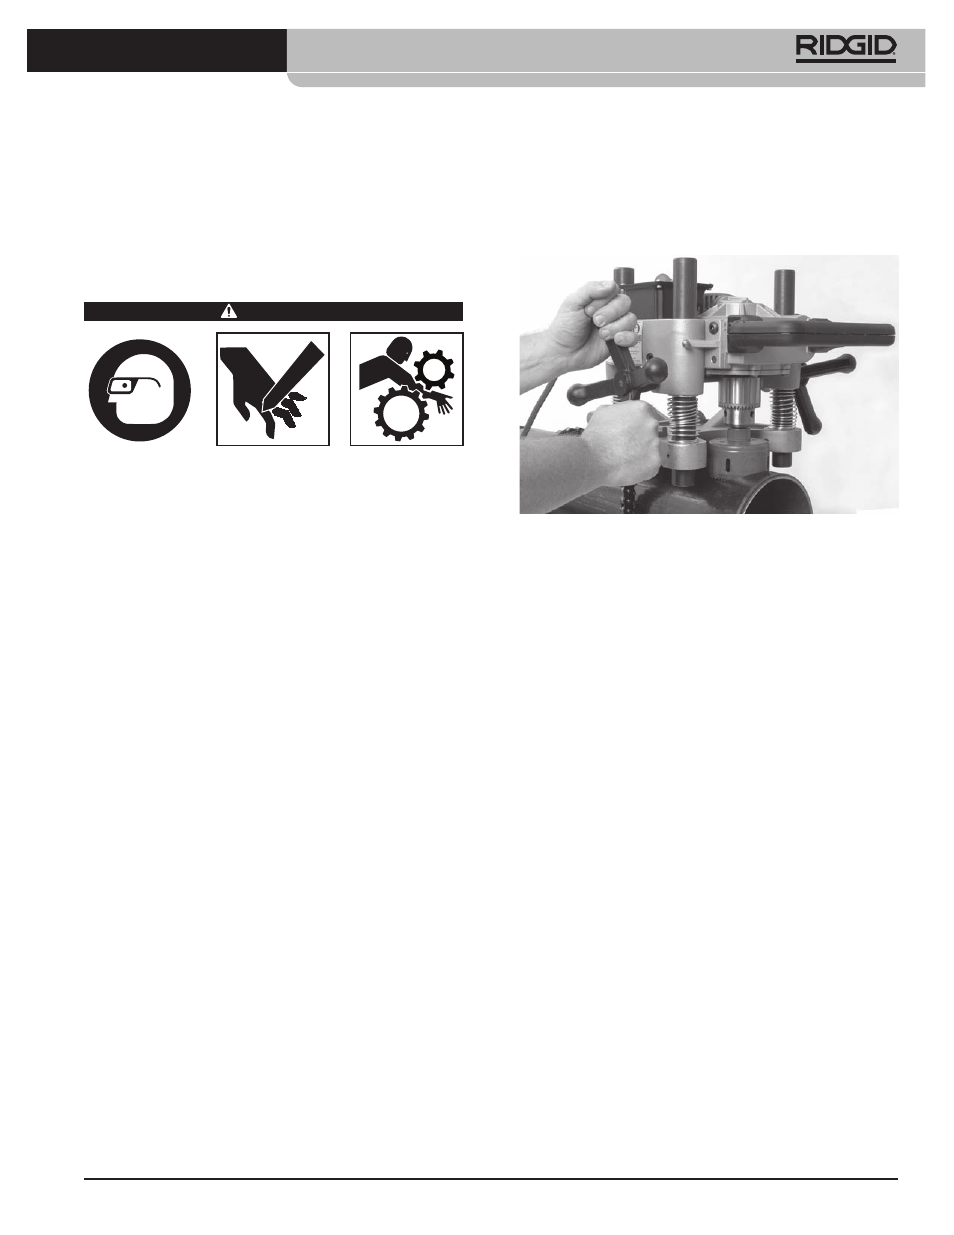
Figure 11 – Operating the Hole Cutting Tool