Instructions for installation and use – Dimplex PLX 3000 User Manual
Page 4
Instructions for Installation and Use
PLX 500 – PLX 3000 Convector Heater
453321.66.94gb 01/06/B
1. Important Information
Please read carefully all the information provided in these
instructions. Keep the instructions in a safe place and if
necessary give them to any future owner.
-
The device may only be installed by an authorised and
qualified technician.
-
The unit may only be used for space heating in en-
closed rooms.
-
Any examination of the heater or repair work may only
be carried out by a qualified electrician.
-
Disconnect the heater from the power supply if it is
faulty or is not used for a long time. Disconnect or un-
screw fuse.
-
Do not cover the heater in any way
(risk of fire).
-
Warning: Outer surfaces become hot
when heater is switched on.
-
The heater must not be operated by children or other
persons not capable of using the appliance in a safe
manner. Children must be prevented from playing with
the appliance.
-
Do not insert any objects into the openings.
-
Do not use the heater in rooms containing flammable
materials (e.g. solvents, etc.).
-
Do not place the connecting lead on top of the appli-
ance.
-
Warning: If the heater is switched on automatically,
there is a danger of fire if it has been in any way cov-
ered or blocked.
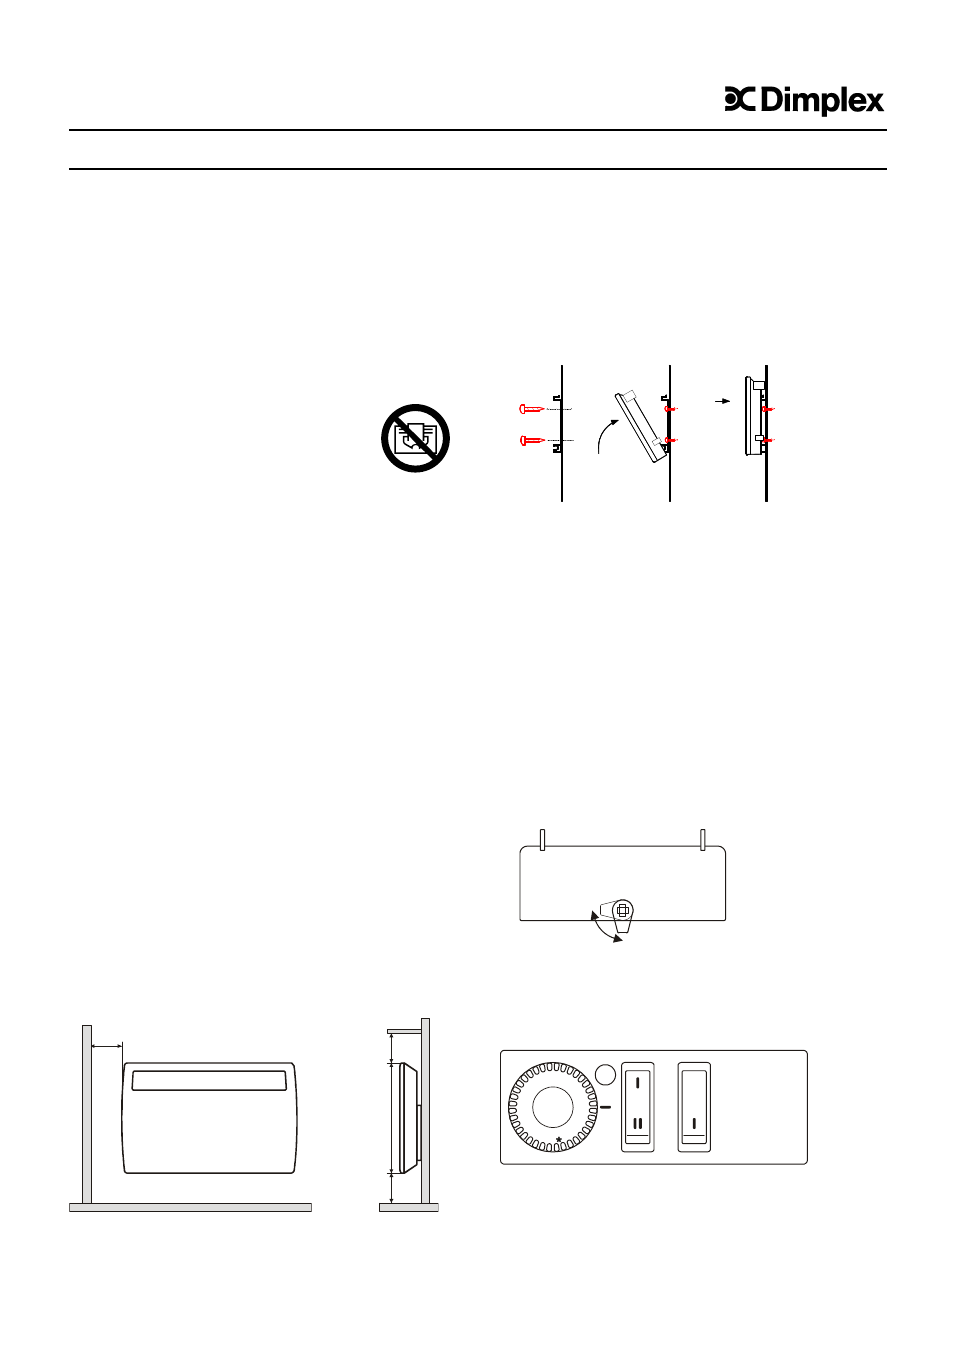
2. Positioning, Installation, Minimum Clearances
When installed, the heater must be aligned horizontally on a
vertical wall, as shown in the illustration.
The minimum clearances shown below must be complied
with.
In addition, a minimum distance of at least 500 mm must be
maintained in front of the heater.
The heater must not be located directly beneath a wall
socket outlet.
Do not install the heater where the controls can be reached
by a person bathing or showering.
Caution: Do not place near flammable objects.
Ensure that air can enter and leave the heater freely, at the
inlets below and the outlets above.
The mains socket must be accessible after the appliance
has been mounted.
Wall Mounting
IMPORTANT-
The original wall brackets supplied attached to the rear of
the unit must be used.
-
Drill mounting holes for the wall brackets.
-
Screw the brackets securely to the wall.
-
Hang the heater from the wall brackets using the slits in
its rear wall.
-
Secure the heater at the top on the wall brackets.
3. Electrical Connection
It is imperative that all current standards and relevant instal-
lation provisions be adhered to.
The heater models PLX 2500 and PLX 3000 are fitted with
a supply cord without a plug. The supply cord must be con-
nected to a suitable connection box.
The hardwired electrical installation must be provided with an
all-pole disconnecting device with a contact gap of at least 3 mm
(e.g. automatic circuit breaker.
If the connecting lead is damaged, it must be replaced; a
special new lead can be obtained from the manufacturer or
from after-sales service.
4. Heater Operation
The heater controls are protected underneath a locking
cover. To open the cover, turn the lock in clockwise direc-
tion. Once the desired functions have been selected, the
cover must be locked again.
4.1 Heaters without timers
The power switch (O-I) is used to switch the heater on and
off. The off-position is identified by "O“.
The switch marked
I-II (except PLX 500) provides a choice
of heat output:
I half heat or II full heat.
0
2
1
3
4
5
6
Thermostat Selector Switch On/Off
GB
150
150
150
430