Dimplex ECW 937 T User Manual
Page 5
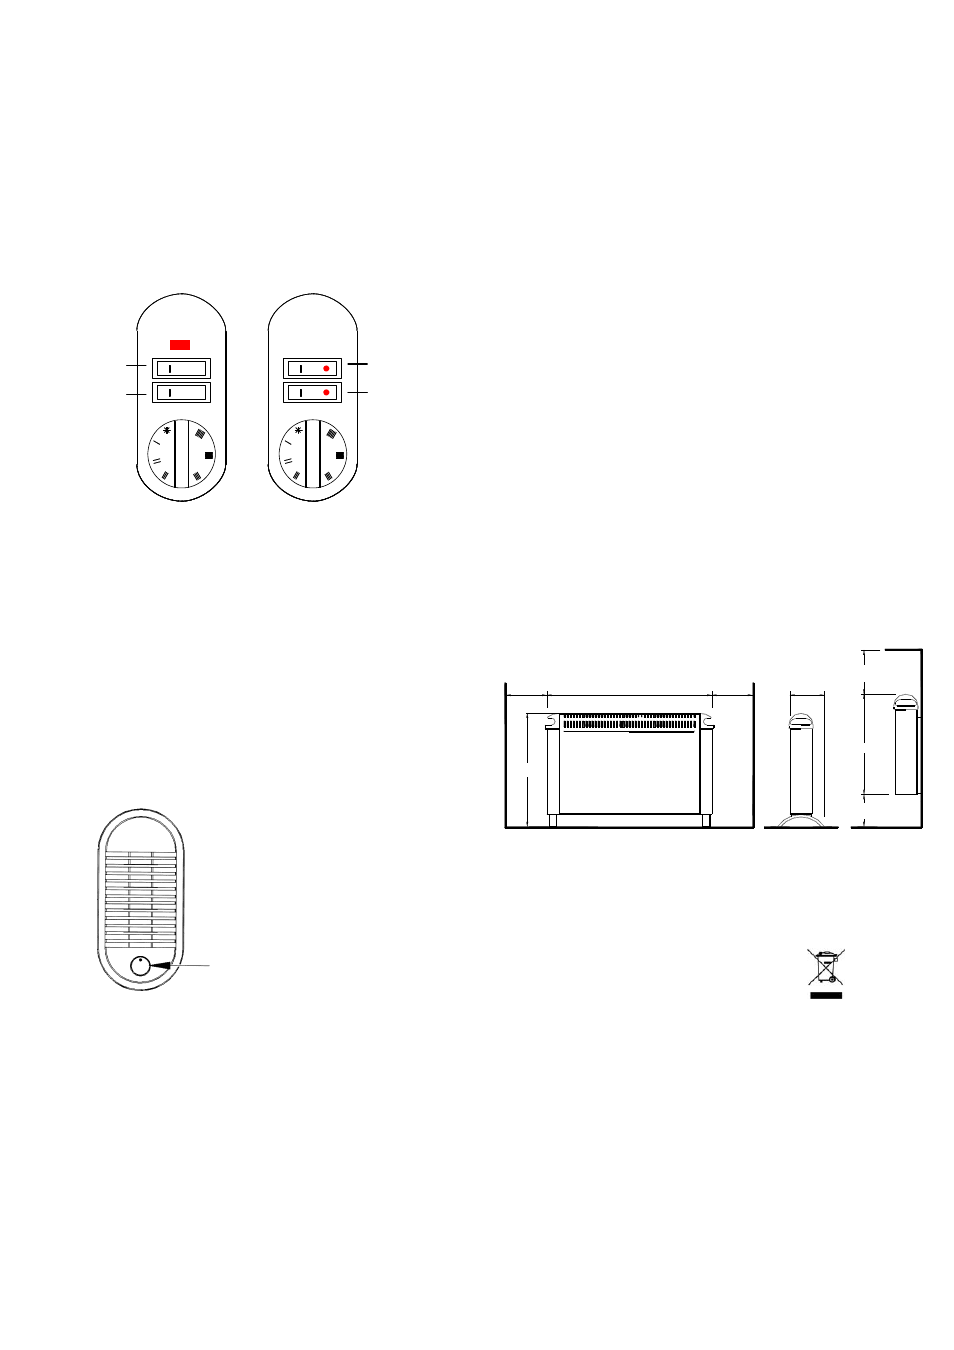
5
357
432
MIN
230
230
MIN
577
230
156
MIN
450 MIN
3. Electrical Connection
The heater is supplier with an attached plug.
If the connecting lead is damaged, it must be replaced; a
special new lead can be obtained from the manufacturer or
from after-sales service.
The heater must not be located directly beneath a wall
socket outlet.
The plug must be accessible after installation.
4. Heater Operation
All switch functions are explained below.
ECW 934
ECW 937 T
The heater is equipped with a thermostat, by means of
which the desired room temperature can be set.
The setting * represents a room temperature of about 6°C
(protection against freezing).
Turning the thermostat knob to the right (clockwise)
increases the temperature setting, while turning to the left
(anticlockwise) reduces the desired temperature.
Warning!
Depending on the size of the room, heat requirement and
thermostat setting, rooms may overheat if the heating is not
controlled. This can be dangerous for people who are not
able to leave the room as it gets too hot.
4.1. Fan Operation (only ECW 937 T)
The ECW 937 T heater has an
additional fan for faster air
circulation and quicker heat
convection.
The fan can also be used as a cold
air blower.
Fan on/off
5. Anti-Overheat
The heater is protected against overheating. If the air
circulation is impeded (e.g. by covering or blocking of the air
grille), the unit automatically switches off.
If this occurs, switch the heater off for a few minutes (turn
the switch to “0” or pull the plug out), so that the unit can
cool down sufficiently. Before switching the unit on again,
remove the cause of overheating.
Keep the air inlets and outlets free of dust to ensure that
maximum heat output is available. Before the start of the
heating season, vacuum-clean the heater to remove any dirt
or dust.
6. Possible Faults
If the heater does not give out any warmth, check that it is
switched on and that the thermostat is set to the
correct temperature. Then check the fuse or miniature circuit
breaker.
If the cause of the fault cannot be identified, contact the
nearest after-sales service center.
You must state the unit E-number and FD-number, as
indicated on the type plate (wiring compartment cover).
Any examination of the heater or repair work may only be
carried out by a qualified electrician or after-sales service
technician.
7. Cleaning
Before cleaning, ensure that the heater is disconnected from
the power supply and that it has cooled down. The outer
surface can be wiped with a soft damp cloth. Do not use
scouring powder or furniture polish, as these can damage
the surface.
Dust that collects within the unit can be removed from the
outside using a vacuum cleaner.
8. Technical Data
Power supply voltage
1/N/PE~ 230V, 50Hz
Heat output
2000 W
Protection class I
Protective earth terminal
Weight
ECW 934:
3.5 kg
ECW 937 T: 4.0 kg
9. Warranty
Authorized dealers can provide information on the terms and
conditions of warranty. The warranty is not valid without a
sales receipt marked with the date of purchase.
Disposal Notice
The product should not be disposed of with
your other household waste
I
II
O
I
On/off
1000 W,
2000 W
Thermo-
stat
1000 W
1000 W