Hdd recording, Copying from a cd onto the hdd, Copying all tracks on a cd – Yamaha CDR-HD1500HDD User Manual
Page 32: 26 ■ copying all tracks on a cd, Push enter, Min max optical, Coaxial analog, You can copy all tracks on a cd onto the hdd
26
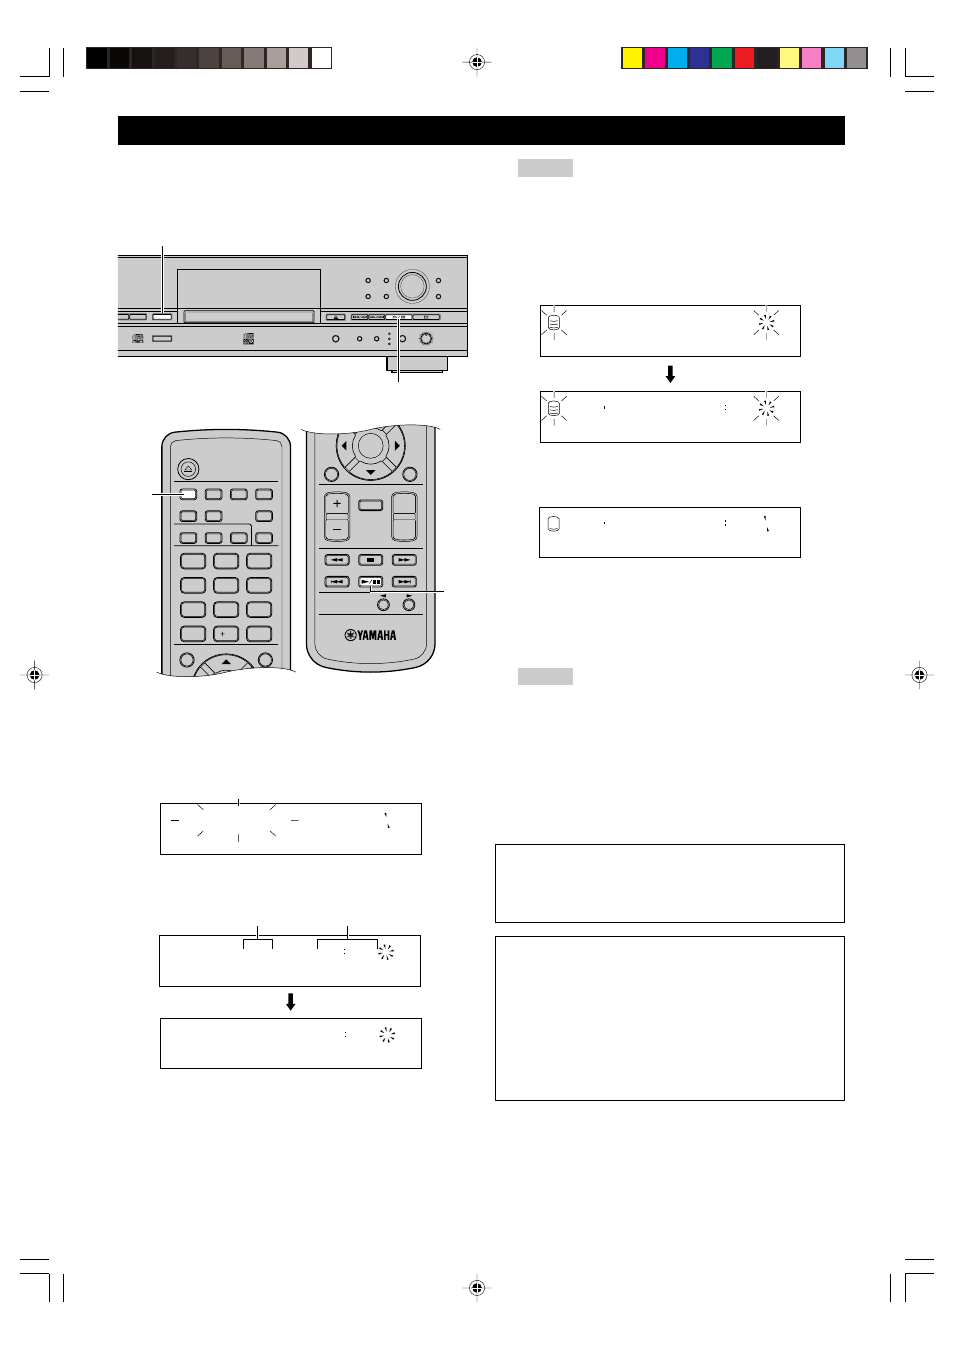
■ Copying all tracks on a CD
You can copy all tracks on a CD onto the HDD.
1.
Set the CD in the disc tray.
This unit starts reading the information (type and capacity of
the CD) when the CD is loaded.
The following message appears during reading (the process
may take 10 to 20 seconds depending on the disc condition).
When reading the information has been completed, the display
changes as follows, and this unit becomes ready for operation.
2.
Press COPY once.
The following message appears on the display, and this unit
enters the HDD copy standby mode. Copying has not been
started yet at this stage.
COPYING FROM A CD ONTO THE HDD
HDD/CD RECORDER
TEXT/TIME
MODE
MULTI JOG
DIGITAL REC LEVEL
PUSH ENTER
TRACK NO.
FINALIZE
ERASE
BOOKMARK
COMPLETE
MENU
CLEAR
MIN
MAX
OPTICAL
ANALOG REC LEVEL
INPUT
REC
COAXIAL
ANALOG
COPY
A.M.Q.R.
CDR
HDD
w
/d
COPY
ENTER
COMPLETE
TRACK NO.
WRITE
HDD
CDR
GROUP SKIP
CLEAR
OPEN/CLOSE
COPY
FINALIZE
REPEAT
1
A B C
2
D E F
3
G H I
4
J K L
5
M N O
6
P Q R
7
S T U
0
SPACE
MODE
MENU
8
V W X
10
SYMBOL
BOOKMARK
9
Y Z
A. M. Q. R.
ERASE
RANDOM
TIMER REC
INTRO
REC
INPUT
TEXT/TIME
W
/D
COPY
L
R
dB
–30 –10
–6
–2
0
R e a d i n g
1 4
6 8 1 7
TOC GROUP
CD
L
R
dB
–30 –10
–6
–2
0
1
TOC GROUP
CD
L
R
dB
–30 –10
–6
–2
0
Total number of tracks
Total time
Memo
• In the HDD copy standby mode, you can specify the settings
for HDD copy. For details, refer to “Setting the HDD copy
mode” (P.28) and “Settings HDD copy menu” (P.29).
• You can specify a disc to where data is copied. For details,
refer to “Selecting a target disc” (P.28). (When no disc is
specified, the unit automatically selects the smallest disc
number that does not contain any data.)
3.
Press w/d to start copying.
The progress of the copy process is shown in the display.
The unit applies the following settings (default) if the HDD
copy menu settings (P.29) are never changed.
• Copy Method:
“Digital Copy”
• Copy Level:
0dB
• Copy Speed:
“Best Effort”
Memo
• It takes a few seconds for this unit to become ready to start
copying after w/d has been pressed.
• This unit may create some vibration and rotation noise while
performing the copying process by rotating a CD at high
speed.
To cancel copying, press a.
When copying has been completed, the operation of
the HDD and the CD automatically stops.
CD TEXT
If the CD to be copied contains CD TEXT that can be copied,
CD TEXT is automatically copied when the CD is copied onto
the HDD.
Output of the signals during copying
• During copying at 1x speed, signals are output both from the
ANALOG LINE OUT (PLAY) jack and from the DIGITAL
OUTPUT (OPTICAL/COAXIAL) jacks.
• During copying at 2x speed, signals are output only from the
ANALOG LINE OUT (PLAY) jack.
• During copying at other than 1x or 2x speed, signals are
output neither from the ANALOG LINE OUT (PLAY) jack
nor the DIGITAL OUTPUT (OPTICAL/COAXIAL) jacks.
H D D
π
C D - R W
DIG
REC
TOC GROUP
CD
L
R
dB
–30 –10
–6
–2
0
ALL SYNC
0 0 1
1
π
1
0 0 0
DIG
REC
TOC GROUP
CD
L
R
dB
–30 –10
–6
–2
0
ALL SYNC
0 0 1
1
π
1
0 0 1
DIG
REC
TOC GROUP
CD
L
R
dB
–30 –10
–6
–2
0
ALL SYNC
103_HD1500(E)26-37.p65
3/18/05, 15:37
26