How to use the pyrolytic cleaning function – Zanussi ZBP 1165 User Manual
Page 22
2 2
How to use the pyrolytic cleaning
function
Before activating the pyrolytic cleaning
function, remove any excessive spillage and
make sure that the oven is empty.
Do not leave anything inside the oven cavity
(e.g. pans, grids, baking tray, dripping pan,
etc.) as this could heavily damage them.
Before activating the pyrolytic cleaning
function, remove the oven shelves and shelf
supports.
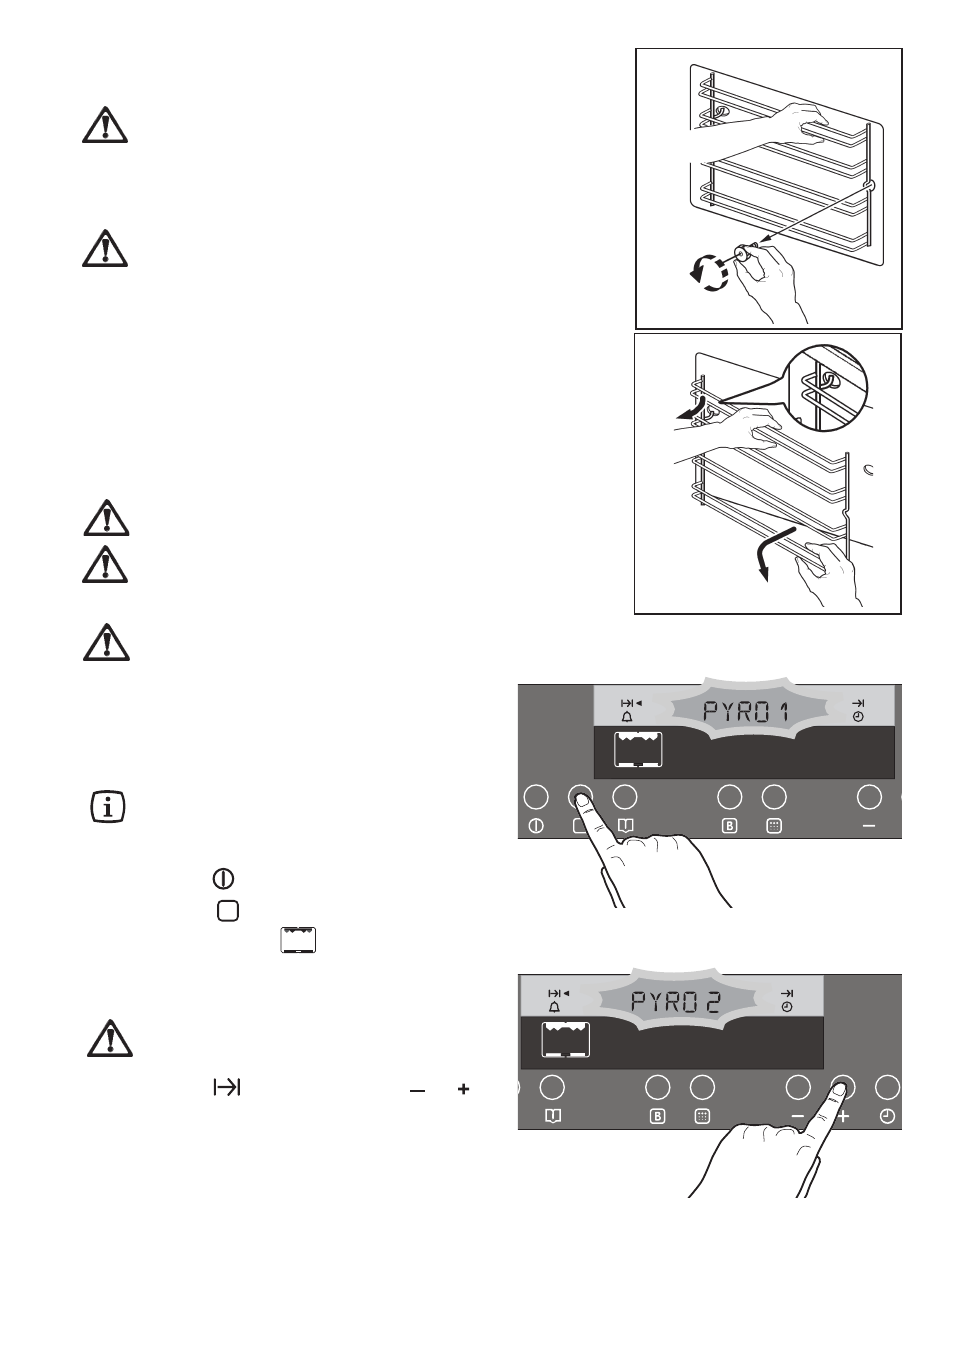
To remove the oven shelves and the shelf supports
proceed as follows:
1) remove the front screw while keeping the shelf support
in position with the other hand (see diagram 1);
2) disengage the rear hook and take off the shelf support (see
diagram 2);
3) once the cleaning is carried out, refit the shelf supports
following the procedure in reverse.
Please, ensure the retaining nuts are secure when
refitting the shelf support.
Ensure that the oven door is closed before
activating the pyrolytic cleaning function.
When the pyrolytic cleaning function is on, it is
advisable not to use a hob if it is fitted above
the oven. This could cause overheating and
damage to both appliances.
During the pyrolytic cleaning cycle the oven door
becomes hot. Children should be
kept away
until
it has cooled.
The following pyro levels are available:
Pyrolytic 1 (PYRO 1) time : 2 h = 30 min heat-up +1 h
at 480°C + 30 min cooling down.
Pyrolytic 2 (PYRO 2) time : 2 h 30 min. = 30 min heat-
up +1 h 30 min at 480°C + 30 min cooling down.
The pyro duration time cannot be changed.
To activate the pyrolytic cleaning function proceed
as follows:
1. Touch control
to switch on the oven.
2. Touch control
as often as necessary, until the
“Pyro“ function symbol
(PYRO 1-level 1) will
appear on the display (Fig. 25).
The indication
“REMOVE SHELF SUPPORTS”
will
appear on the display.
Remove the shelf supports and all oven ac-
cessories before activating the pyrolytic
cleaning cycle.
3. While symbol
flashes, touch controls ' ' or ' '
to select the pyrolytic 1 (PYRO 1) or pyrolytic 2
(PYRO 2) function (Fig. 26).
4. Once you have chosen the desired pyrolytic function,
the “Pyro” writing will flash on the display waiting for
confirmation to start the pyrolytic cleaning function.
1
2
Fig. 25
Fig. 26