3label roll installation, 3 label roll installation – Wasp Bar Code Wasp WPL606 User Manual
Page 13
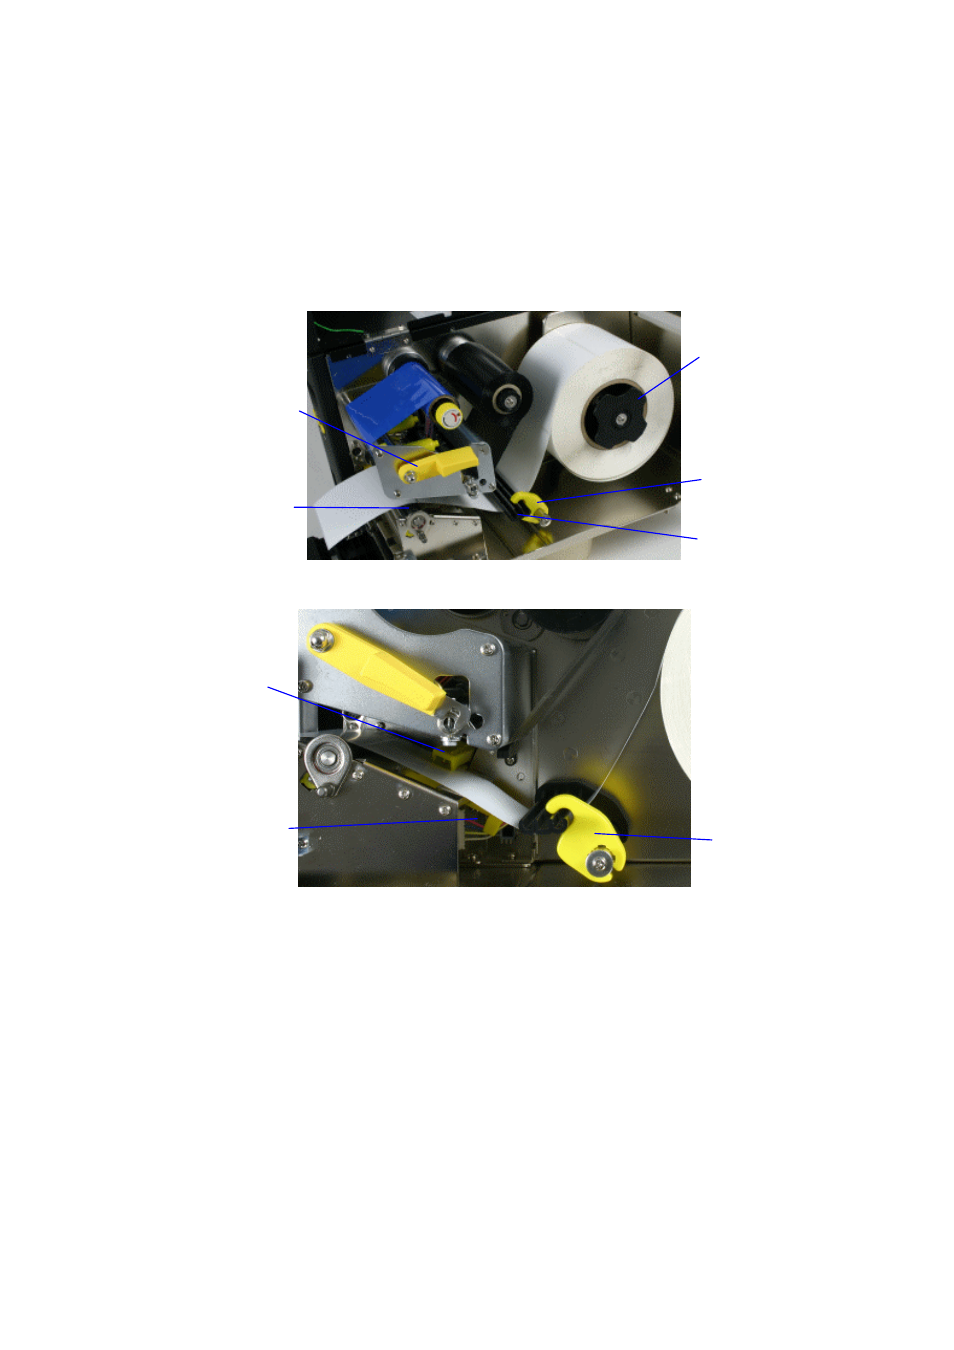
3.3 Label Roll Installation
1. Open the printer panels and the print head lift lever
2. Rotate the Label Guide clockwise away from the Media Guide Bar
3. Insert a new label roll into the label spindle
4. Pull labels leading edge forward under the black media guide bar, through
the gap/black mark sensor and place the label leading edge onto the Platen
Roller
Label
Spindle
Figure 10: Insert a label roll into label spindle.
Media
Guide Bar
Gap /
Black Mark
Detector
Label
Guide
Label
Guide
Gap
Detector
Handle
Platen
Roller
Print Head
Lever
Figure 11: Media guide bar the gap/black mark detector
5. Adjust the label guide by sliding it along its bar to meet the width of the label.
Then rotate the Label Guide counter-clockwise and secure it to the Media
Guide Bar
6. Adjust the Gap Detector to overlap at least one inch of the label by moving
the yellow Gap Detector Handle located under the media and just in front of
the media guide bar
7. Close the print head lift lever
8. Close the lower front panel and printer cover
9. Turn the power on
10. Go to section 4.2 Gap / Black Mark Detector Sensor Calibration and
calibrate the labels
9