4 adjustment of the valve rod seal, Gm 2000 eac - en – Wagner SprayTech GM 2000 EACF User Manual
Page 23
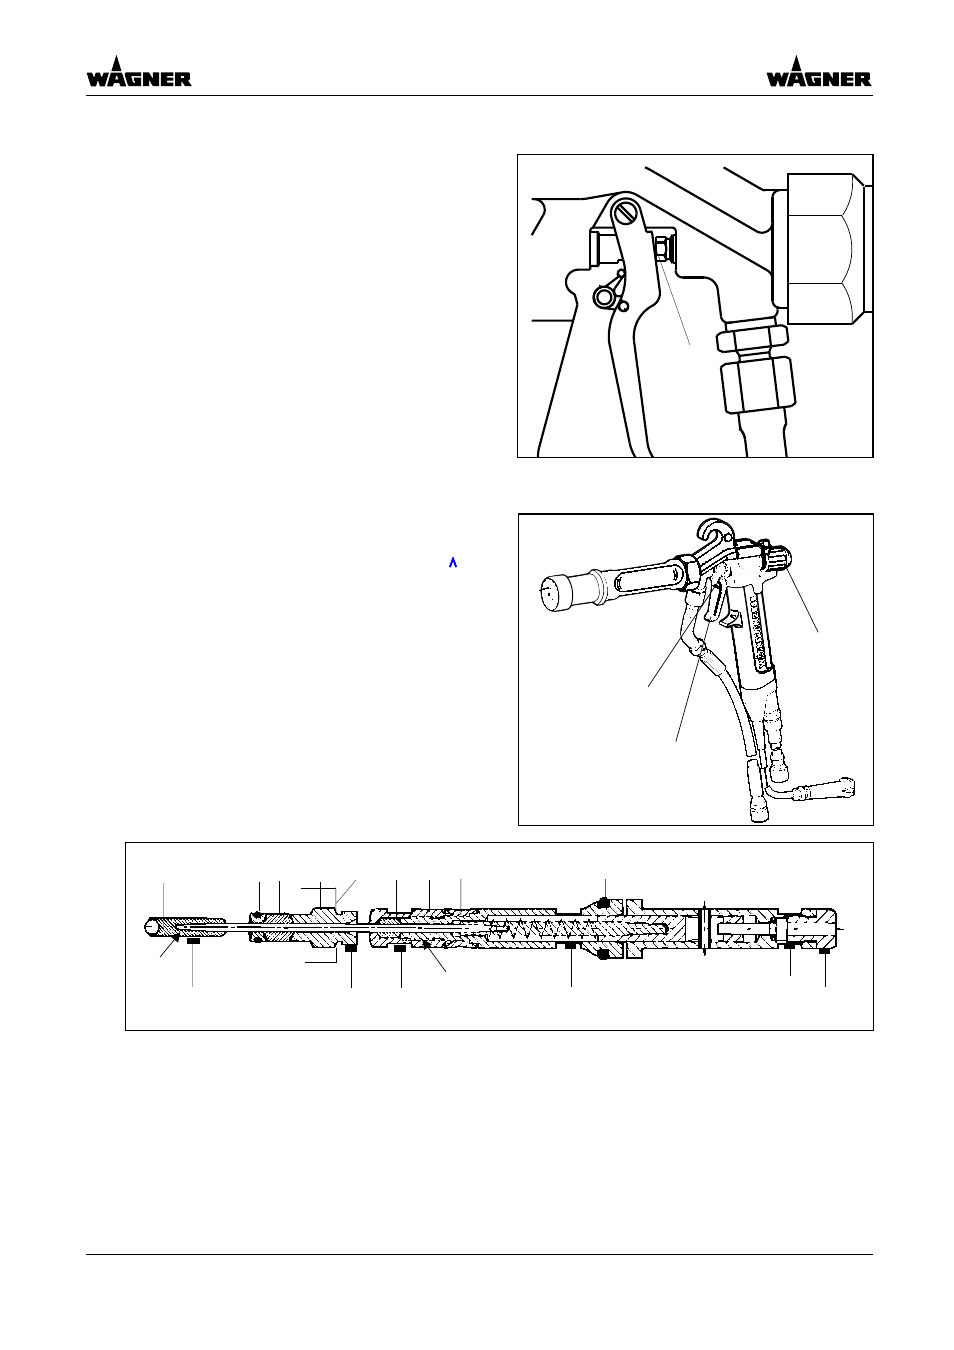
5.4
Adjustment of the valve rod seal
In case paint leaks at the valve rod
near the trigger:
1. Pull trigger and throughly
clean paint channel with solvent.
2. Tighten the sealing screw (A) ca-
refully with universal spanner
3. If leaking continues, see chapter
5.5.
5.5
Exchange of complete valve rod, or of valve rod seals
1. Pull trigger (Y) and unscrew
locking nut (X); remove compres-
sion spring.
2. Remove flat-head screw (Z) and
take off trigger (Y).
3. Unscrew sealing screw (4/B)
from sealing sleeve (5).
4. Carefully remove complete valve
rod at surface (F) and replace.
To replace seals:
5. Hold with universal spanner at
surface (E) and unscrew valve
sealing element (1/A) using uni-
versal pliers.
6. Remove compression ring (2) and packing (3).
7. Hold with spanner at surface (D) and unscrew at surface (C), removing push-rod
cap (7).
8. Exchange compression ring (with O-ring) (2), front seal (3), rear seal (4), push-rod
seal (8) and replace air valve seal (9) of the air valve.
9. Reassemble in reverse order and secure thread with Loctite 243.
10. Place locking nut (X) with compression spring in position. Actuate trigger (Y) and
tighten the locking nut (X) until a noticeable resistance is felt.
GM 2000 EAC - EN
5.3
A
X
Z
Y
7
8
1
2
3
4
5
6
9
A
B
C
D
E
F
Loctite 243
Loctite 243