Operation, Front control panel – VIEWSONIC Optiquest V75 User Manual
Page 8
7
Optiquest V75
Operation
E
N
G
L
I
S
H
Adjust your Optiquest V75 monitor using the buttons on the front control
panel as shown below. The buttons scroll down the OnView
®
Main Menu
(page 8) and adjust each control (pages 8 through 12).
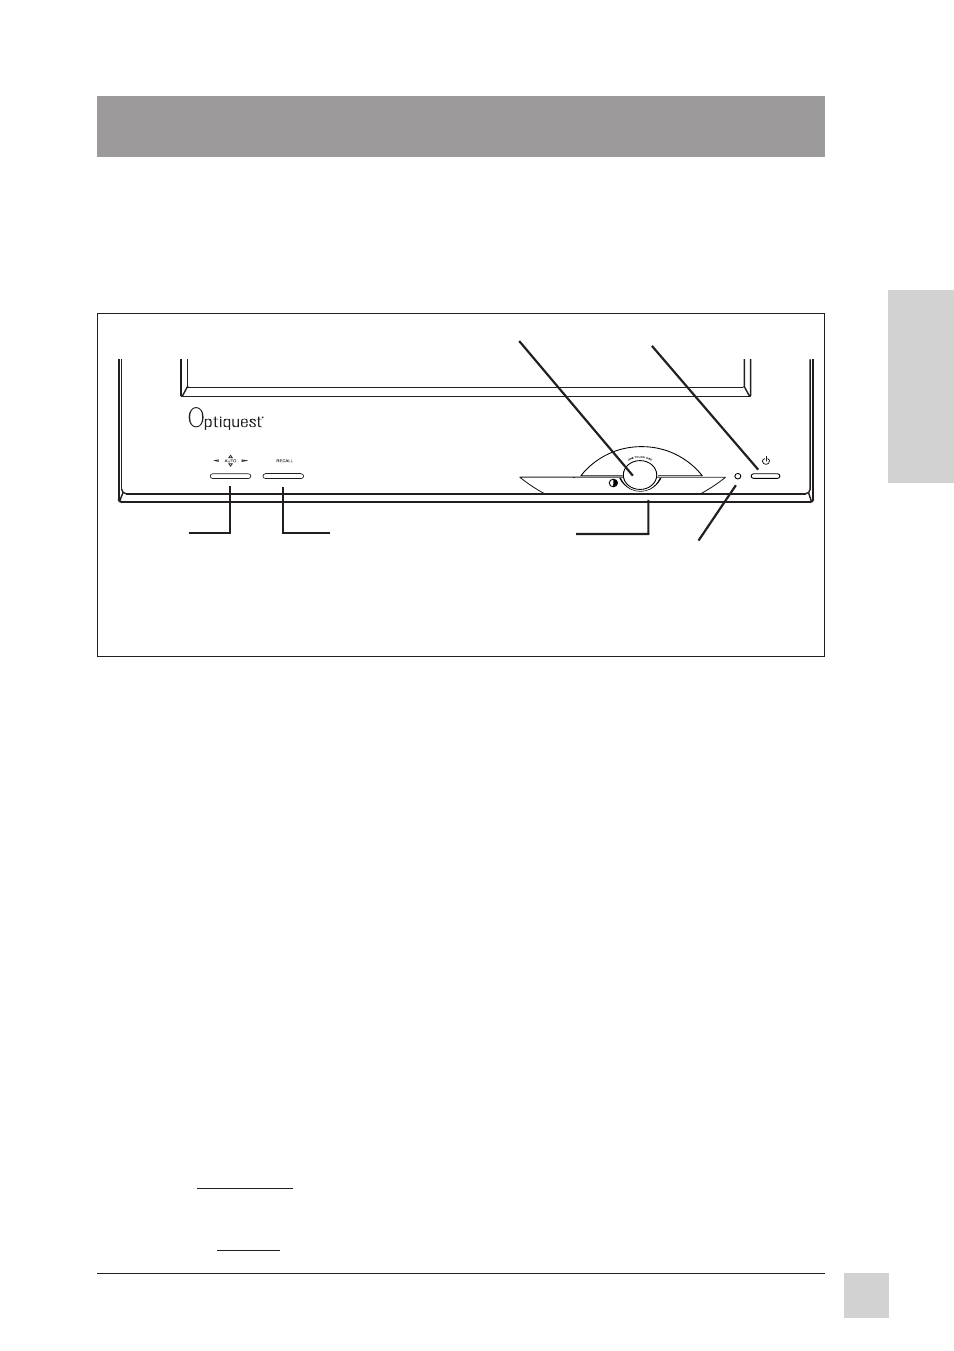
Front Control Panel
To adjust the monitor, follow the numbered steps in sequence as shown below:
1
To display the OnView Main Menu, push the OSD button.
2 To select the control you want to adjust, turn the Control Wheel
(located
under the OSD button). Clockwise scrolls down the Main Menu; counter-
clockwise scrolls up. NOTE: For some controls you must first select
another menu from the Main Menu (see page 8).
3 With your selection highlighted, push the OSD button again. The control
adjustment screen displays.
4 To adjust the control you selected, turn the Control Wheel. The number
on the side of the adjustment screen changes accordingly.
5 When finished making adjustments, press the OSD button to save your
changes and return to the Main Menu.
6 To exit the Main Menu, turn the Control Wheel until EXIT is highlighted,
and press the OSD button. Shortcut: Press and hold the OSD button.
Power light:
Green = On
Orange = power
(Flashing) saving
mode
ONE TOUCH
OSD Button
Power* On/Off
Button
Control Wheel
(under OSD button)
RECALL
Button
AUTO
Button
(automatically sizes
screen image)
Operation
* The monitor automatically
degausses
each time you turn it on, removing the buildup of magnetic
fields that can affect color purity and convergence. To prevent possible damage, if you turn the
monitor off, wait 20 minutes before turning it on again. Do not turn the monitor on and off
repeatedly. To manually degauss the monitor, see the instructions on page 10.