Using the pc setting, Adjusting the picture size/position 1, Adjusting the clock phase of the picture – Toshiba 26A3000A User Manual
Page 25: Adjusting the sampling clock, Resetting the pc setting
25
Connecting your TV
Signal names for mini D-sub 15 pin connector
Using the PC setting
• In the PC input mode, you cannot select the Color, Tint,
Sharpness, Black stretch, MPEG NR and DNR in the
Picture setting menu and Cinema mode (- page 16).
• In the PC input mode, the Manual setting (- page 19) is
not displayed.
• First press o until the video input mode list appears on the
screen, then press u or U and Q in order to select the PC
input mode (- page 19).
• This function may not be available for some signal or if no
signal is received.
• The optimum points of the clock phase and sampling clock
adjustments may be incomprehensible according to the
input signals.
Adjusting the picture size/position
1
Press
M, then press I or i to display the SET UP menu.
2
Press u or U to select PC Setting.
3
Press
Q to display the PC Setting menu.
4
Press u or U to select an option you want to adjust. Press
I or i to adjust the settings as required.
Adjusting the clock phase of the picture
If the clock phase, which synchronize the PC signal and LCD
display, is not optimized, the picture will blur.
This function enables you to adjust clock phase and display a
clear picture.
1
From the PC Setting menu, press u or U to select Clock
phase.
2
Press I or i to obtain a clear picture.
Adjusting the sampling clock
If the sampling clock does not match with the dot clock
frequency of the PC, blurred picture detail will occur, or screen
width will change, or drift patterns in vertical lines may be
apparent.
This function enables you to adjust it and optimize the picture.
1
From the PC Setting menu, press u or U to select
Sampling clock.
2
Press I or i to optimize the picture.
Resetting the PC setting
The Reset function adjusts the PC Setting to the factory
settings.
1
From the PC Setting menu, press u or U to select Reset
on the 2nd page.
2
Press
Q.
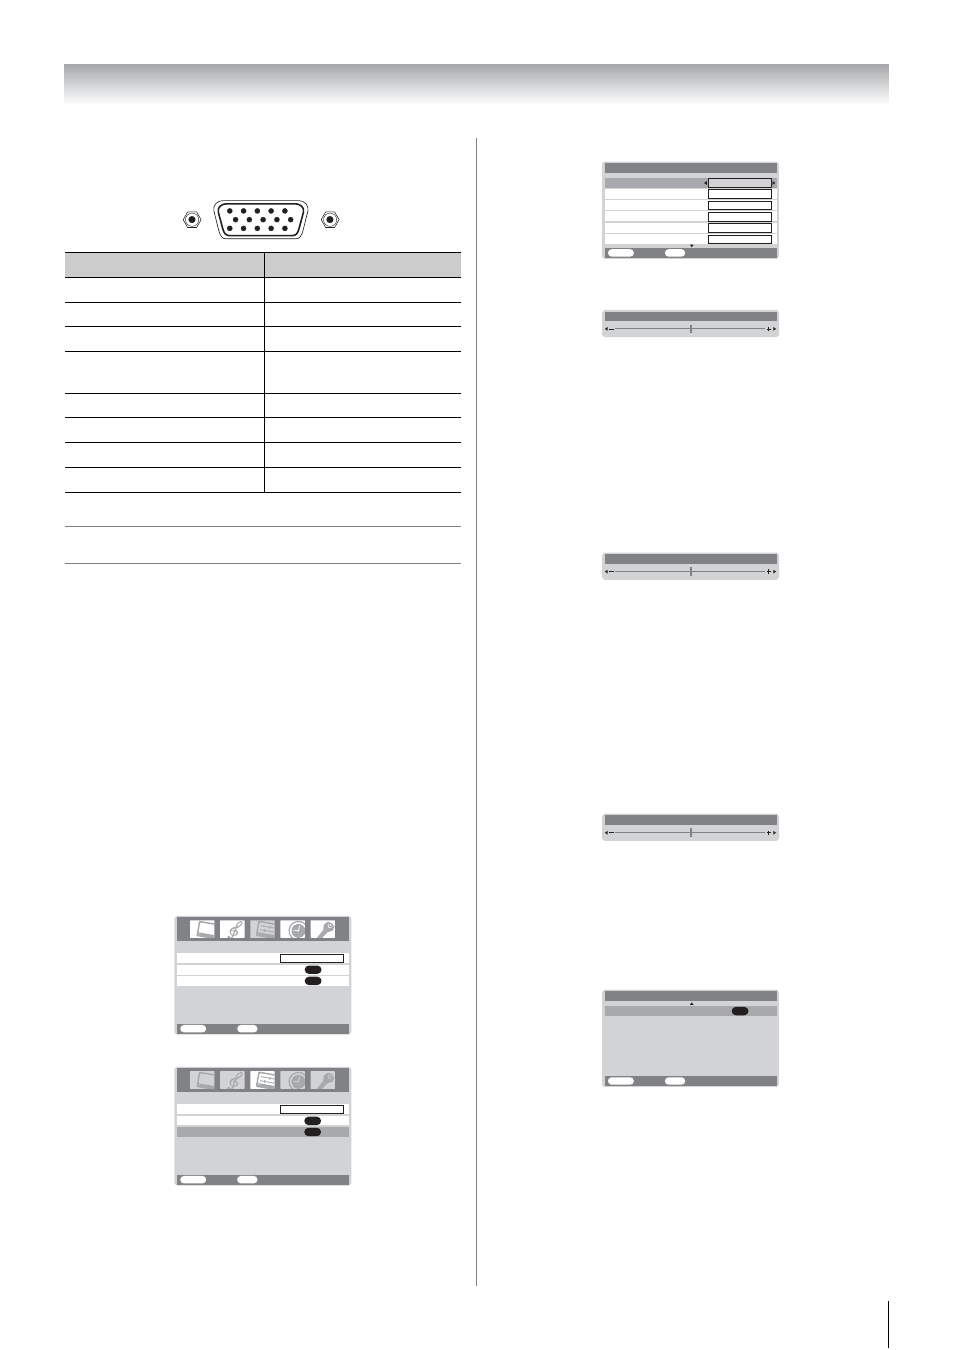
Pin No.
Signal name
Pin No.
Signal name
1
R
9
NC
2
G
10
Ground
3
B
11
NC
4
NC (not
connected)
12
NC
5
NC
13
H-sync
6
Ground
14
V-sync
7
Ground
15
NC
8
Ground
5
10
6
15
11
1
Pin assignment for RGB/PC terminal
AV connection
OK
Language
SET UP
English
OK
PC Setting
MENU
Back
Watch TV
EXIT
Language
SET UP
MENU
Back
Watch TV
EXIT
English
AV connection
OK
PC Setting
OK
Vertical height
Vertical position
MENU
Back
Watch TV
EXIT
0
0
0
Clock phase
Horizontal position
0
PC Setting
1/2
Horizontal width
0
0
Sampling clock
Horizontal position
0
Clock phase
0
Sampling clock
0
0
OK
MENU
Back
Watch TV
EXIT
PC Setting
2/2
Reset