Features, Switching the tv on/off, Initial settings – Toshiba 29VH36/37 User Manual
Page 6: Operating with the onset buttons
ENGLISH - 5 -
Features
Infra red remote control
100Hz flicker free
User friendly menu system
On-screen functional display
Frequency synthesis tuning
Comb filter
Sleep timer
100 program storage locations
S-band (S1-S20)
Hyper band reception (S21-S41)
Digital-CTI (Color Transient Improvement)
Digital noise reduction
Auto, 4:3, 16:9
Built-in 2 speakers
Volume controlled Headphone output, and headphone termi-
nals (jacks)
Balance control
5-Band equaliser
3 x Euro AV plug (Scart)
75 Ohm Aerial socket
Fastext
German + Nicam Stereo
Real Flat (Dynamic Focus)
S-VHS (via SCART or SVHS connector)
Front-AV
Multi system reception (PAL SECAM B/G D/K L/L)
NTSC Playback
Automatically switch off after 5 minutes when no signal.
Automatic VCR detection
Digital Scan
Switching the TV ON/OFF
You can operate your TV either using the remote control
handset or directly using the TV onset buttons.
To switch the TV on
Your TV will switch on in two steps:
1- Press the power button located on the front of the TV. Then
the TV switches itself to standby mode and the RED LED
located below the TV turns on.
2- To switch on the TV from stand-by mode either:
Press a digit button on the remote control so that a program-
me number is selected,
or,
Press Standby / Power Button or Programme Up and Down
buttons on the front of the TV or on the remote control re-
spectively, so the TV will switch on and the RED Led will turn
GREEN.
IMPORTANT:
If no aerial signal is received at the selected program for a
period of 5 minutes then your TV automatically switches
into stand-by mode.
To switch the TV off
Press the stand-by button on the remote control, so the TV
will switch to stand-by mode and the GREEN LED will be-
come RED, or,
Press the power button located on the front of the TV.
NOTE: If you have switched off the TV set from the power but-
ton instead of the remote control, next time you press the
power button, the TV set will switch on without going to the
stand-by mode.
Initial Settings
The message PLEASE CHECK ANTENNA CABLE! will be
displayed when you turn on your TV for the first time.
Ã
QG@6T@ÃÃ8C@8FÃÃ6IU@II6ÃÃ867G@Ä
G6IBV6B@
@IBGDTC
8PVIUS`
VF
TU6SU
@YDUÃÃÃÃÃ86I8@G
@Y@8VUDPIÃ6QT
Note: If you connect Video Recorder to your TV via antenna in-
put (ANT socket); to tune the VCR channel automatically you
must set the VCR in play mode before you start APS.
1- Select LANGUAGE with or button, then press
the or button to select a menu language.
2- Select COUNTRY with or button, then press the
or button to select the correct country.
3- Select START with or button, then press the
button to start APS.
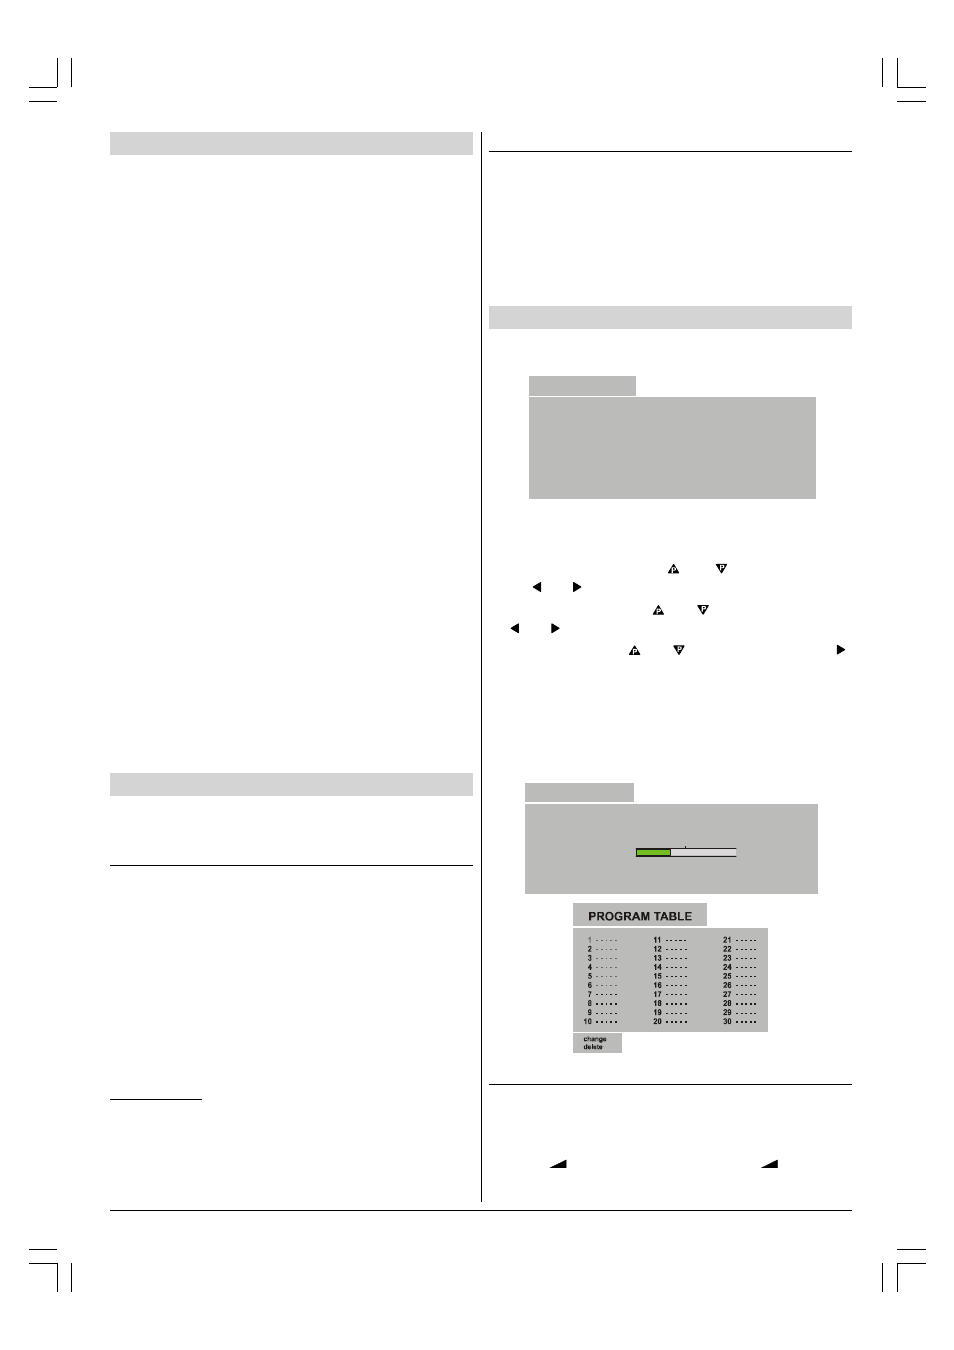
APS, (Automatic Programming System) automatically pro-
grammes the received channels in your TVs programme
numbers. During APS, APS IS RUNNING PLEASE WAIT
message will be displayed. After APS is finalized, the PRO-
GRAM TABLE appears.
To cancel APS, press the EXIT button.
@Y@8VUDPIÃ6QT
Ã
6QTÃÃDTÃÃSVIIDIBÃÃQG@6T@ÃÃX6DUÄ
QSPBS@TT
8C6II@GÃÃÃÃÃÃÃ
@YDUÃÃÃÃÃ86I8@G
"$È
Operating with the onset buttons
Volume setting and programme selection can be made using
the buttons on the front panel.
Volume Setting
Press -
button to decrease volume or
+ button to
increase volume, so a volume level scale will be displayed
on the screen.
01-2919&ENG-2143-AK53-RF-ST10P-50051716.p65
27.04.2004, 11:44
5