Installation – Toastmaster TW240 User Manual
Page 7
2-1
SECTION 2 - INSTALLATION
SECTION 2
INSTALLATION
A. UNPACKING
IMPORTANT
IT IS THE CUSTOMERS RESPONSIBILITY TO
REPORT ANY CONCEALED OR NON-CONCEALED
DAMAGE TO THE FREIGHT COMPANY.
1. Remove the staples from the shipping carton.
2. Lift out the foam packaging and poly bag from around
the toaster.
3. Carefully lift the toaster out of the carton.
4. Remove all loose materials from the carton, including
the information packet.
5. Remove any parts or packaging materials from inside
the toasting chamber.
6. Retain all shipping materials until it is certain that
the toaster has not suffered concealed shipping
damage.
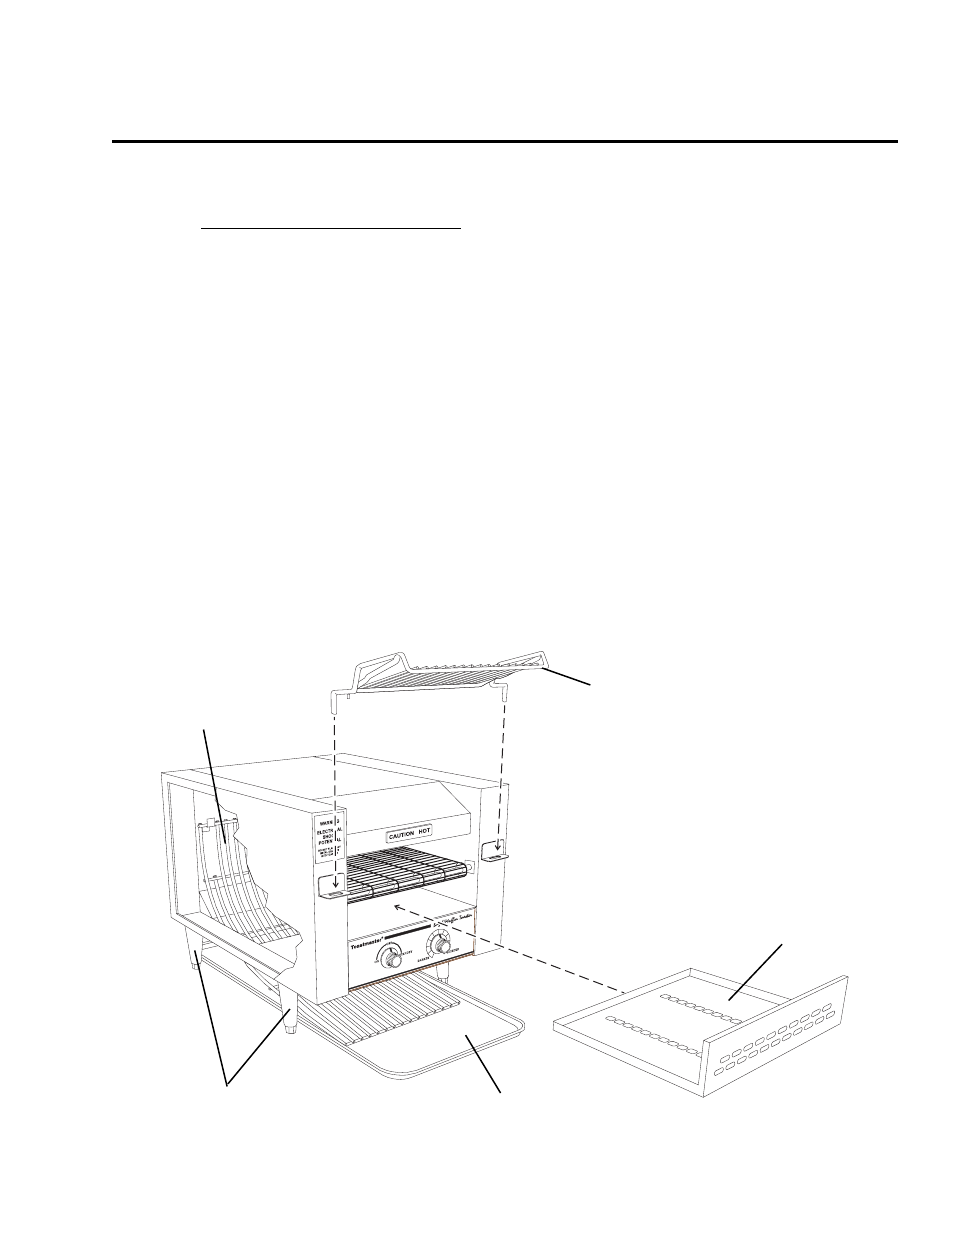
Figure 2-1 - Assembly
Exit rack
secures on hooks
on inside rear wall
of toaster
Legs (4)
thread into holes
in bottom of toaster
Entry rack
drops into holes
on brackets
Slide-out crumb tray
slides into opening
in front of toaster
Return crumb tray
slides underneath
exit rack
B. ASSEMBLY
1. Thread the 4 (102mm) legs into the four holes on
the bottom of the toaster. See Figure 2-1. Then,
place the toaster in the desired location.
2. Install the entry rack, exit rack, return crumb tray,
and slide-out crumb tray as shown in Figure 2-1.