Locating, Leveling – True Manufacturing Company TMC-34-SS User Manual
Page 7
............ www.truemfg.com ............
INSTALLATION / OPERATION INSTRUCTIONS
True Food Service Equipment, Inc.
5
5
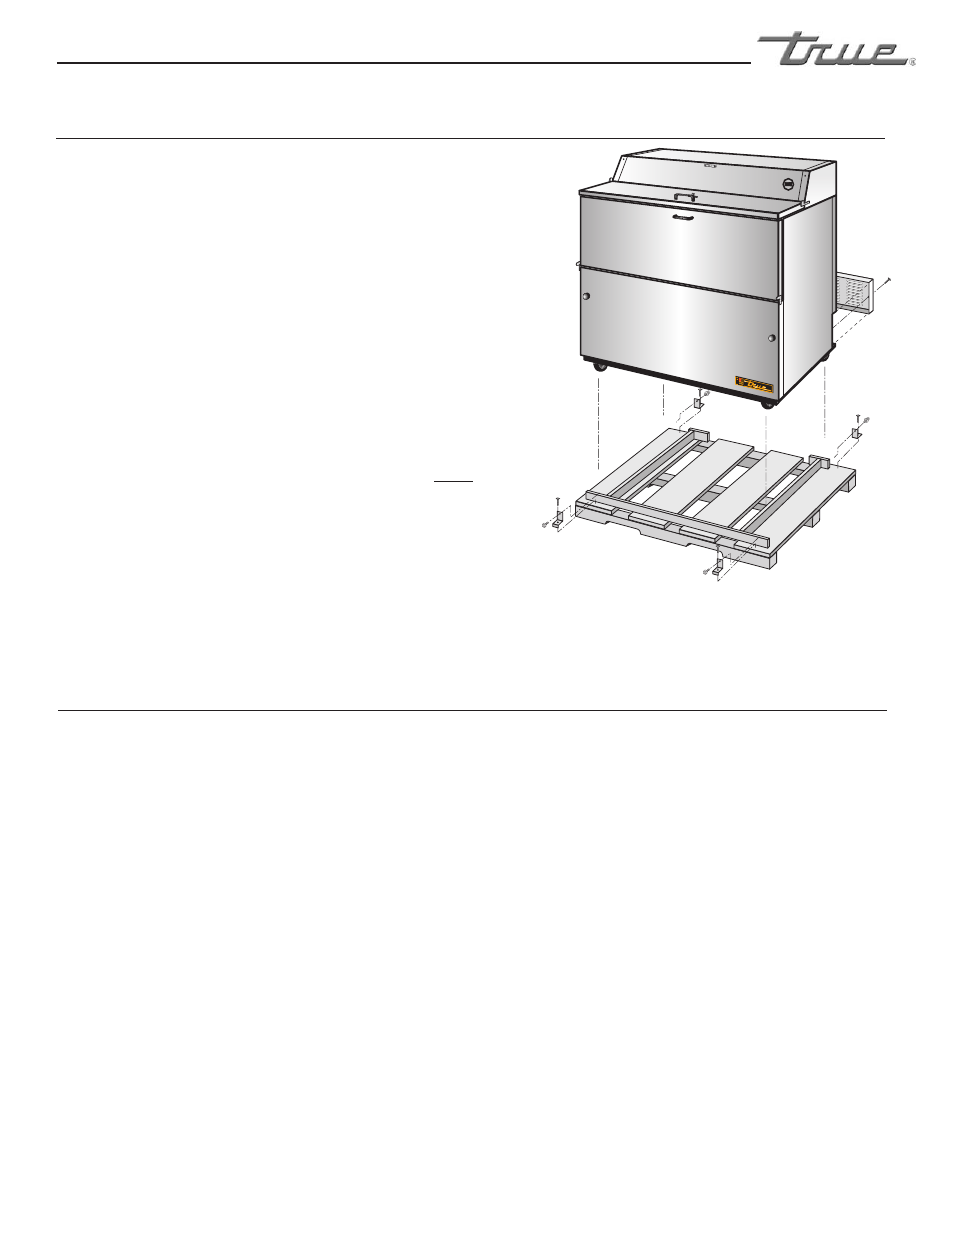
A. Remove skid by using a phillips head screwdriver and
an adjustable wrench.
B. For easy removal from the skid, unscrew and remove
grill from the back of the cooler.
C. Remove the four brackets from the base
of the cooler.
D. Carefully move the cooler off the back of the skid.
Tilt the cooler backwards just enough to remove the
skid from under the cooler.
E. Free plug and cord from inside the lower rear of the
cooler (do not plug in).
F. Place grill back onto rear of the cooler.
G. The merchandiser should be placed close enough to
the electrical supply so that extension cords are never
used.
H. Applicance tested according to the climate classes 5
and 7 for temperature and relative humidity.
WARNING
Cabinet warranties are void if OEM power cord is tampered
with. TRUE will not warranty any units that are connected to
an extension cord.
LOCATING
A. Set unit in its final location. Be sure there is
adequate ventilation in your room. Under extreme
heat conditions, (100 F+, 38 C+), you may want to
install and exhaust fan.
WARNING
Warranty is void if ventilation is insufficient.
B. Proper leveling of your TRUE cooler is critical to
operating success. Effective condensate removal and
door operation will be effected by leveling. (See
image 2)
C. When the cooler is in its final position adjust the
castors as needed to level the unit. The unit should
be leveled front to back and side to side with a level.
To insure proper ventilation for the compressor,
keep the cabinet 1” (2.54 cm) from rear wall. 1”
(2.54 cm) rubber bumpers are attached to the back
of some cabinets.
LEVELING CASTORS
Four sets of shims have been provided in warranty
packet for leveling castored units positioned on uneven
floors. Shims must be positioned between cabinet and
castor mounting plate. (See image 3)
Loosen castor bolts with an adjustable wrench enough
to slide shims between the castor mounting plate and
cabinet bottom.
F
°
35
°
®
Image 1
LEVELING
Important Safeguard for installation of leg/castor (Images 2-3 demonstrate procedure)