Image projection with the document camera, P.36, P.37 – Toshiba TLP-T70M (XGA) User Manual
Page 19: Operations, Using the document camera (continued)
37
Operations
36
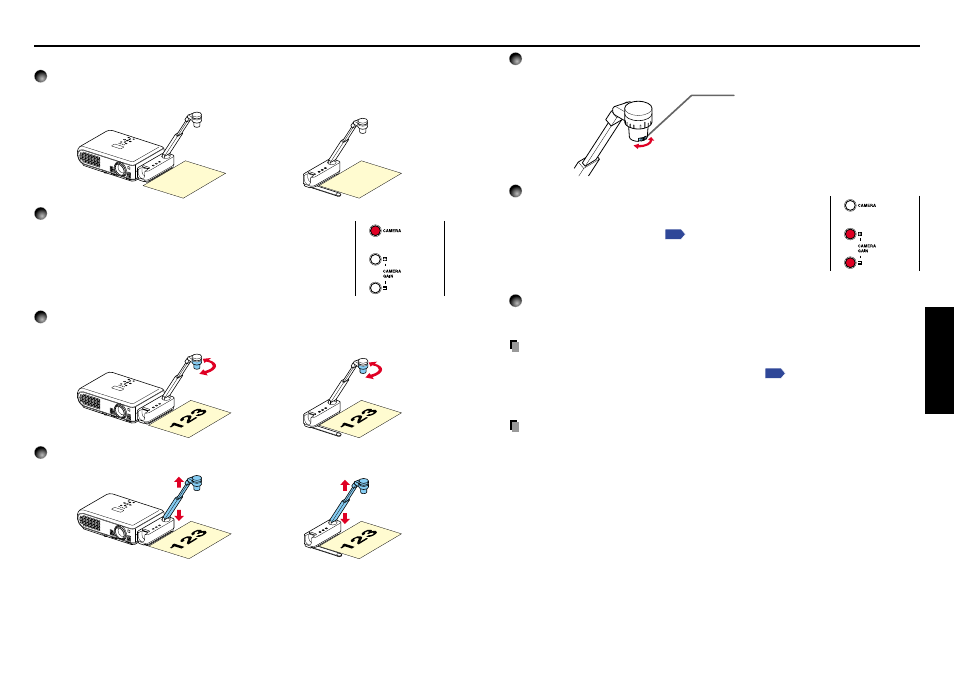
5
Adjust the focus using the focus ring on the camera head
Rotate the focus ring to either NEAR or FAR, whichever is better in focusing.
6
If the screen is too dark or too bright, use the
CAMERA GAIN (+/–) buttons to make it easier to see.
The Sharpness of the camera image can also be adjusted using
the Image adjustment menu
.
7
After use, turn off the light, and fold up the document camera.
Fold up the camera using the opposite order from Preparation of the document camera.
PRECAUTION
• If the room’s fluorescent lighting causes the image to flicker, either turn off the fluorescent
light, or set the Shutter speed from the Default menu
. Note that changing the
Shutter speed setting may not eliminate the flicker, depending on the lighting, state of
the document, or image adjustment.
Note
• No audio is output when camera input is selected.
Turn the focusing ring to adjust
the focus.
• Near : 100 mm to 300 mm
Far
: 300 mm to 5 m
Using the document camera (Continued)
■ Image projection with the document camera
1
Place the document.
Set the document at the top of or the side of the projector.
2
Press the CAMERA button, and select camera input.
• The input returns to the previous input when the CAMERA
button is pressed again.
• Camera input can also be selected by pressing the remote
control or camera’s INPUT button.
3
Rotate the camera lens to align the orientation of the document for
shooting.
4
Move the camera head up and down to adjust the image size.
• Closeup shot with the distance shorter than 100 mm cannot be performed.
Farther: Smaller image
Closer: Larger image