Creating and editing a ‘special day’ schedule, 6 sensor, Creating a ‘special day’ schedule – Toshiba EVR64-X User Manual
Page 59: Deleting a ‘special day’ schedule
44
4.5.7
Creating and Editing a ‘Special Day’ Schedule
Creating a ‘Special Day’ Schedule
1)
Press the ‘NORMAL DAY MODE’ button to enable the ‘SPECIAL DAY MODE’.
2)
Select a day from the calendar by clicking on the CALENDAR drop down list.
3)
Highlight the time-blocks within the Recording Schedule Window for the camera(s) you wish to schedule. Once the
desired Time-Blocks are highlighted, press a RECORDING MODE button.
4)
When you have finished creating the schedule press the ‘SAVE SPECIAL DAY’ button. The special day should
now appear as a date within the Special Day Schedules.
Deleting a ‘Special Day’ Schedule
5)
Select a Special Day from the Special Day Schedules List and press the ‘DELETE SPECIAL DAY’ button.
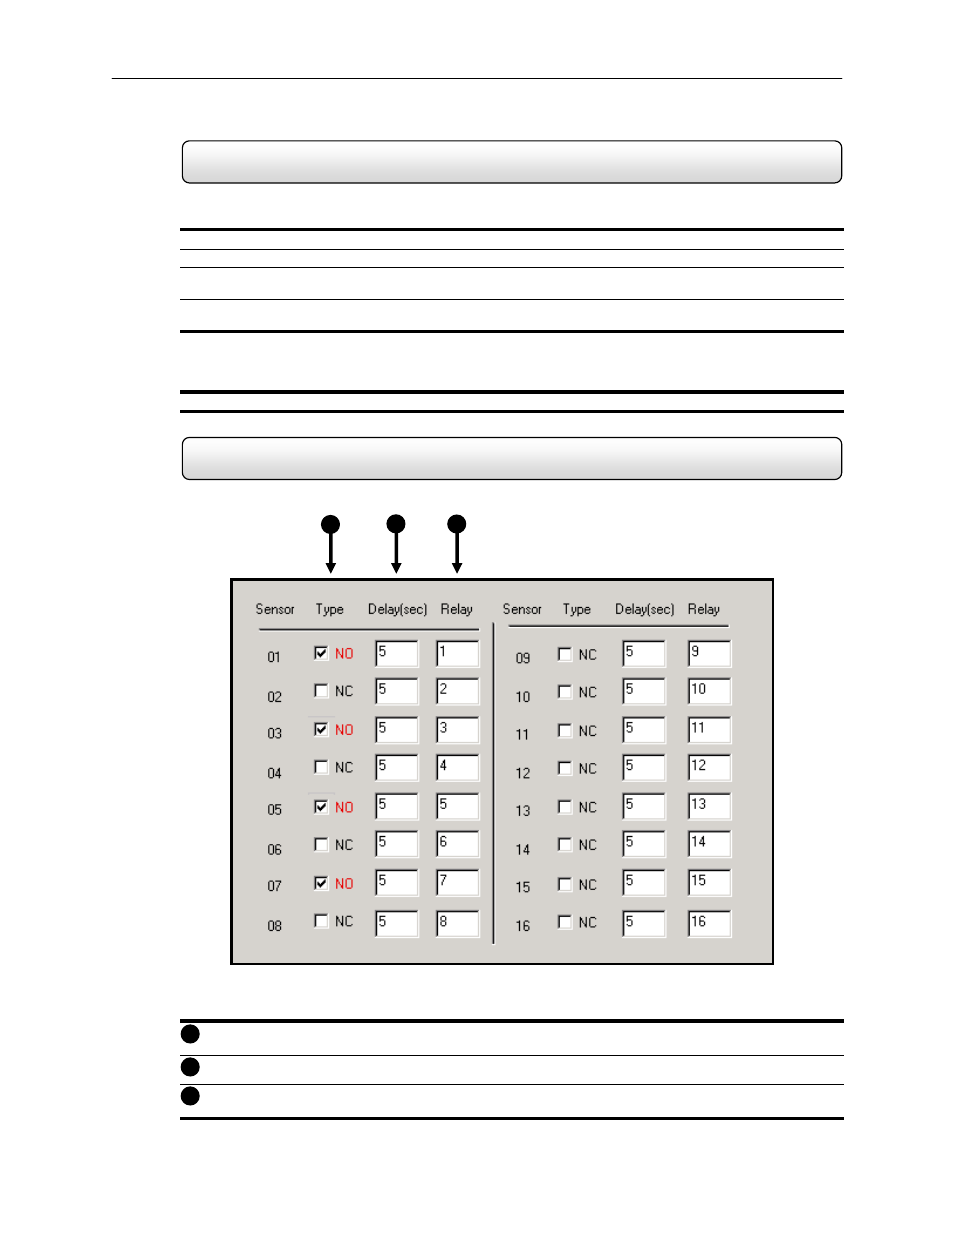
4.6 Sensor
The Sensor Window allows you to enable, disable and configure Sensors.
Type – Selects whether the Sensor will be Normally Open (NO) or Normally Closed (NC).
Delay
(sec)
– Adjusts the amount of time (in seconds) to ignore the sensor if it is continuously activated.
Relay
– Selects the Control Output to activate once the Sensor has been tripped.
2
1
3
1
2
3
Figure 4.6
Figure 4.6
Sensor