Connecting the av receiver —continued, Connecting a vcr or dvd recorder for recording – Onkyo HT-R640 User Manual
Page 28
28
Connecting the AV Receiver
—Continued
If you have two video recorders (e.g., a VCR and a DVD recorder), connect one recorder to the VIDEO 1 OUT jacks, as
shown here, and connect the other recorder to the VIDEO 2 OUT jacks in the same way.
Notes:
• The AV receiver must be turned on for recording. Recording is not possible while it’s in Standby mode.
• If you want to record directly from your TV or playback VCR to the recording VCR without going through the AV
receiver, connect the TV/VCR’s audio and video outputs directly to the recording VCR’s audio and video inputs. See
the manuals supplied with your TV and VCR for details.
• Video signals connected to composite video inputs can only be recorded via composite video outputs. If your
TV/VCR is connected to a composite video input, the recording VCR must be connected to a composite video output.
Similarly, video signals connected to S-Video inputs can only be recorded via S-Video outputs. If your TV/VCR is
connected to an S-Video input, the recording VCR must be connected to an S-Video output.
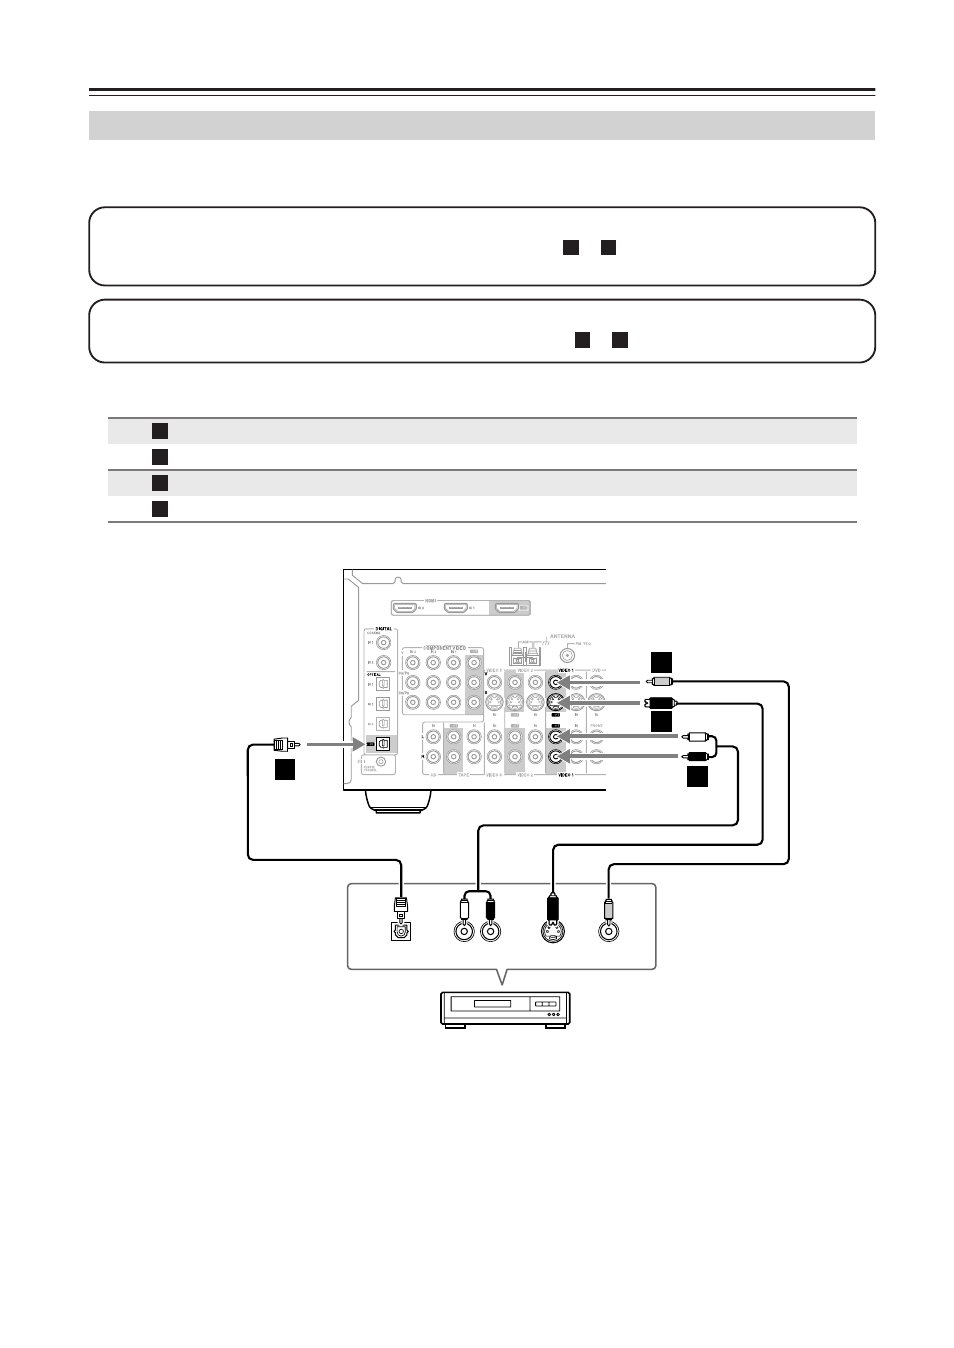
Connecting a VCR or DVD Recorder for Recording
Connection AV
receiver
Signal
flow
VCR or DVD recorder
Picture quality
VIDEO 1 OUT S
⇒
S-Video input
Better
VIDEO 1 OUT V
⇒
Composite video input
Standard
VIDEO 1 OUT L/R
⇒
Audio L/R input
DIGITAL OPTICAL OUT
⇒
Digital optical input
Step 1: Video Connection
Choose a video connection that matches your VCR or DVD recorder (
or
), and then make the connection. The
video source to be recorded must be connected to the AV receiver via the same type of connection.
A
B
Step 2: Audio Connection
Choose an audio connection that matches your VCR or DVD recorder (
or
), and then make the connection.
a
b
A
B
a
b
S VIDEO
IN
AUDIO
IN
VIDEO
IN
L
R
OPTICAL
IN
b
B
C
A
a
B
VCR,
DVD recorder