Start playing the source. to stop recording, Press – Onkyo K-505TX User Manual
Page 13
13
Befor
e Using
Connections
Other Information
Operation
B (Dolby B NR)
C (Dolby C NR)
The indicator goes off.
9
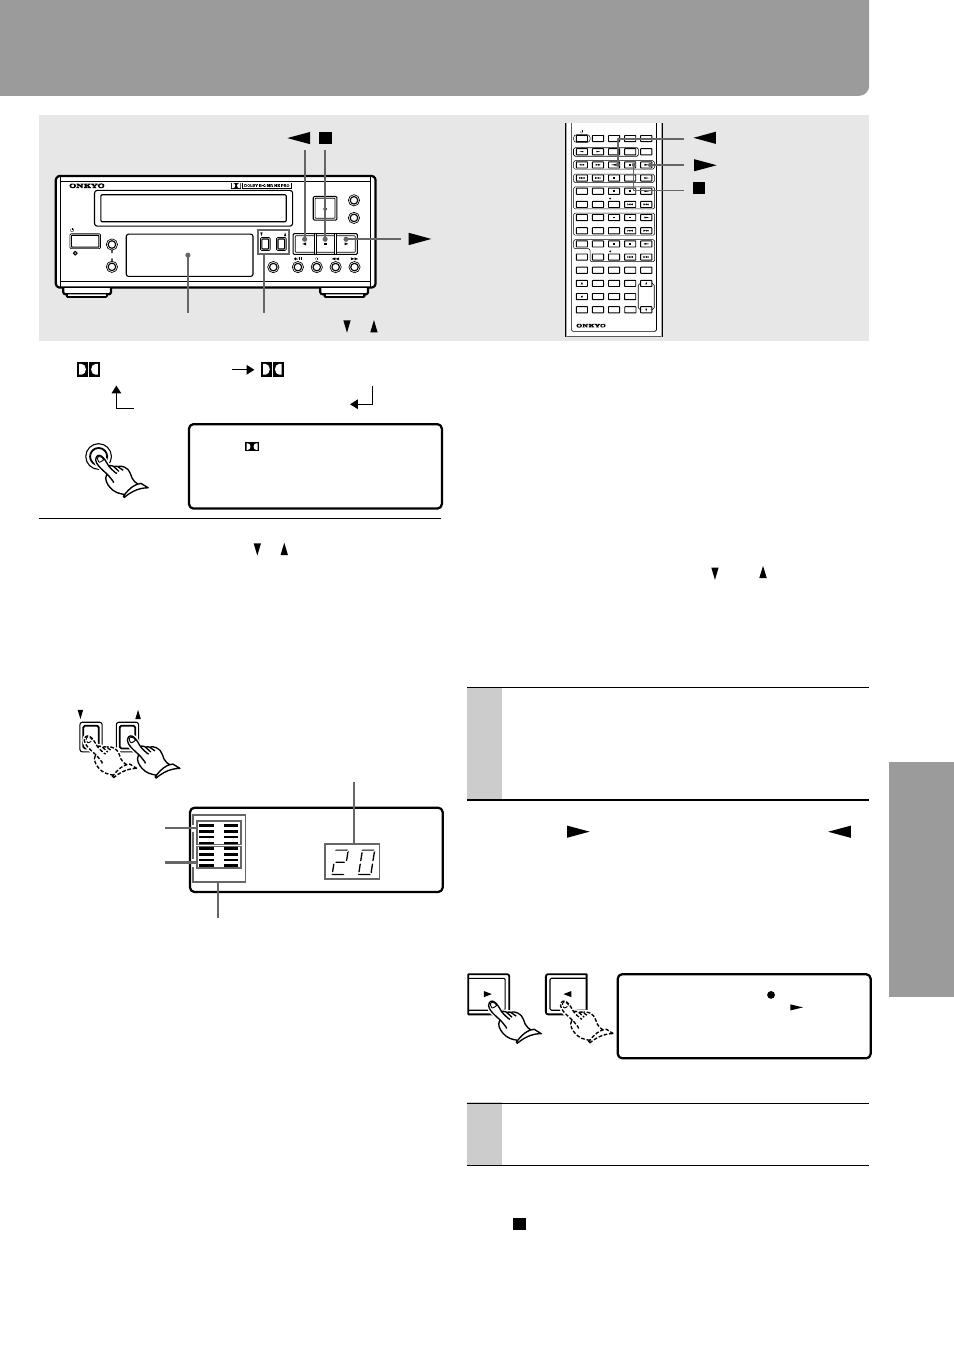
Press REC LEVEL / to adjust
the recording levels (0 to 50).
The recording level indication appears in
the display instead of the digital counter.
The level between 14 and 24 should suit
most recording cases.
• When using NORMAL (TYPE I) or
HIGH (TYPE II) type cassette
Check the incoming signal level
indicator. The bottom red bar should
light constantly, and the second red bar
from the bottom should light
occasionally.
• When using METAL TAPE (TYPE IV)
cassette
Check the incoming signal level
indicator. The second red bar from the
bottom should light constantly, and the
third red bar from the bottom should
light occasionally.
(The remote controller is
supplied with A-905TX
or R-805TX.)
(Continued on the next page)
B
R
L
Recording level indication
Red
Yellow
Incoming signal level indicator
Display
REC LEVEL /
STANDBY/ON
STANDBY
STEREO CASSETTE TAPE DECK
ALBUM
DOLBY NR
REV. MODE
COUNTER RESET
REC LEVEL
CD DUBBING
FADE
CASSETTE LOADING MECHANISM
DOLBY NR
REC LEVEL
CLOCK
SLEEP
EFFECT
GRAPHIC EQ
MODE
1
2
3
4
5
6
7
8
9
10 / 0
- - / - - -
VOLUME
PRESET
F M
A M
PLAY MODE
PLAY MODE
REPEAT
CLEAR
SCROLL
MEMORY
REPEAT
CLEAR
DISC
REPEAT
CLEAR
ACOUSTIC
PRESENCE
TONE
RANDOM
TIMER
UP/DOWN
ENTER
MUTING
INPUT
TUNER
M D
DVD
C D
CDR
TAPE
REC
REC
PAUSE / STEP
STANDBY/ ON
REMOTE CONTROLLER
RC -
456S
or
Note
• If you do not set the proper recording level
for the tape type, the sound may be
distorted.
• After setting the recording level, if the unit
is unplugged, the recording level will revert
to its default value (20).
Tip
To immediately set the recording level to “00,”
press and hold REC LEVEL and at the same
time for more than two seconds. This is
convenient when recording with “00”
recording level to erase the recorded tape.
10
Set the source component to
start playing at the point you
want to start recording from.
11
Press
to start recording (or
to record on the reverse side).
Let the tape run for a while if you are
starting recording from the beginning of
the tape. This is because no sound will be
recorded on the leader.
12
Start playing the source.
To stop recording
Press .