Installation, First fire, Screen door – Regency I1200S User Manual
Page 17
I1200 Regency Wood Insert
17
FIRST FIRE
When your installation is completed and in-
spected, you are ready for your fi rst fi re.
1) Open draft control fully.
2) Open
fi rebox door and build a small fi re using
paper and dry kindling, wait a few minutes
for a good updraft in the fl ue to establish the
fi re. Leaving the door slightly open will help
your fi re start more rapidly.
CAUTION: Never leave unit unattended
if door is left open. This procedure is for
fi re start-up only, as unit may over-heat
if door is left open for too long.
3) With the draft still in the fully open position,
add two or three seasoned logs to your fi re.
Form a trench in the ash bed to allow air to
reach the rear of the fi rebox prior to closing
the door.
4) After about 15 to 20 minutes, when your
wood has begun to burn strongly, adjust
your draft control down to keep the fi re at a
moderate level.
WARNING: Never build a roaring fi re in
a cold stove. Always warm your stove
up slowly!
5) Once a bed of coals has been established,
you may adjust the draft control to a low
setting to operate the unit in its most effi cient
mode.
6) During the fi rst couple of hours, keep the
combustion rate at a moderate level and
avoid a large fi re until the paint is cured.
Only then can you operate the insert at its
maximum setting, and only after the metal
has been warmed.
7) For the fi rst few hours, the insert will give
off an odour from the paint. This is to be
expected as the high temperature paint
becomes seasoned. Windows and/or doors
should be left open to provide adequate
ventilation while this temporary condition
exists. Burning the insert at a very high
temperature the fi rst few times may damage
the paint. Burn fi res at a moderate level the
fi rst few days.
8) Do not place anything on the insert top
during the curing process. This may result
in damage to your paint fi nish.
9) During the fi rst few hours it may be more
diffi cult to start the fi re. As you dry out
your fi re brick and your masonry fl ue (if
applicable), your draft will increase.
10) For those units installed at higher elevations
or into sub-standard masonry fi replaces,
drafting problems may occur. Consult an
experienced dealer or mason on methods
of increasing your draft.
11) Some cracking and popping noises may be
experienced during the heating up process.
These noises will be minimal when your unit
reaches temperature.
12) Before opening your door to reload, open
draft fully for approximately 10 to 15 seconds
until fi re has been re-established. This will
minimize any smoking.
13) All fuel burning appliances consume oxygen
during operation. It is important that you
supply a source of fresh air to your unit
while burning. A slightly opened window is
suffi cient for this purpose.
CAUTION: If the body of your unit starts
to glow you are overfi ring. Stop loading
fuel immediately and close the draft
control until the glow has completely
subsided.
14) Green or wet wood is not recommended for
your unit. If you must add wet or green fuel,
open the draft control fully until all moisture
has been dispersed by the intense fi re.
Once all moisture has been removed, the
draft control may be adjusted to maintain
the fi re.
15) If you have been burning your insert on a
low draft, use caution when opening the
door. After opening the damper, open the
door a crack, and allow the fi re to adjust
before fully opening the door.
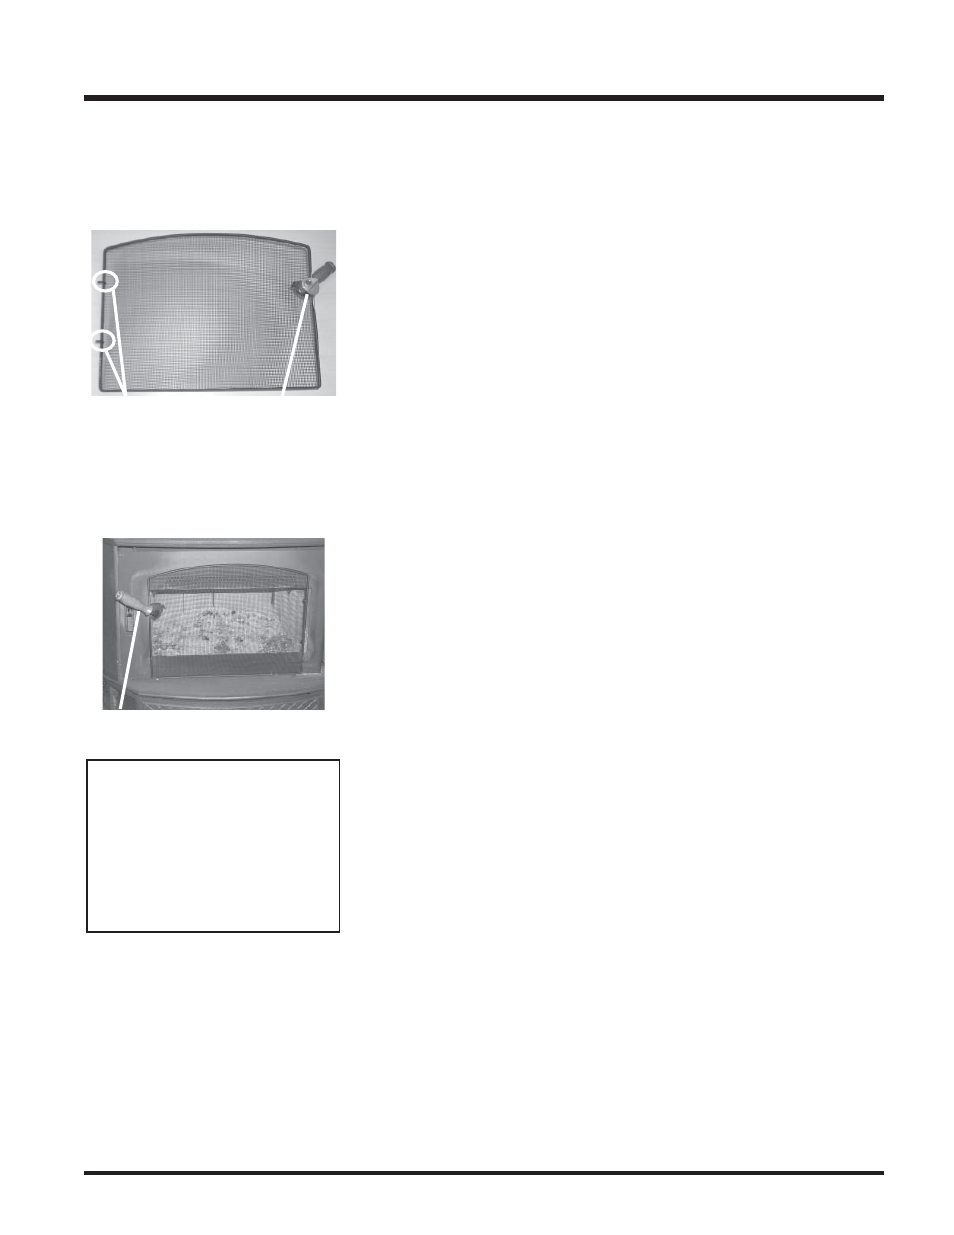
SCREEN DOOR
Hook screen to the inside on the right side
of the fi rebox door opening. Lock in place by
turning handle.
Back Side of Screen Shown
WARNING
Operate with doors fully open or fully
closed. If doors are left partly open,
gas and fl ame may be drawn out of
the opening, creating risks from both
fi re and smoke.
When operated with doors fully open
the manufacturer supplied screen
must be used.
NOTE: The handle must be positioned at 10
o'clock when closed to avoid the handle from
getting hot and to ensure the screen stays in
place.
Handle Lock
Hooks
Handle at 10 o'clock position.
INSTALLATION