Installation, Firebrick assembly, Door handle – Regency I1200S User Manual
Page 16: Draft control
I1200 Regency Wood Insert
16
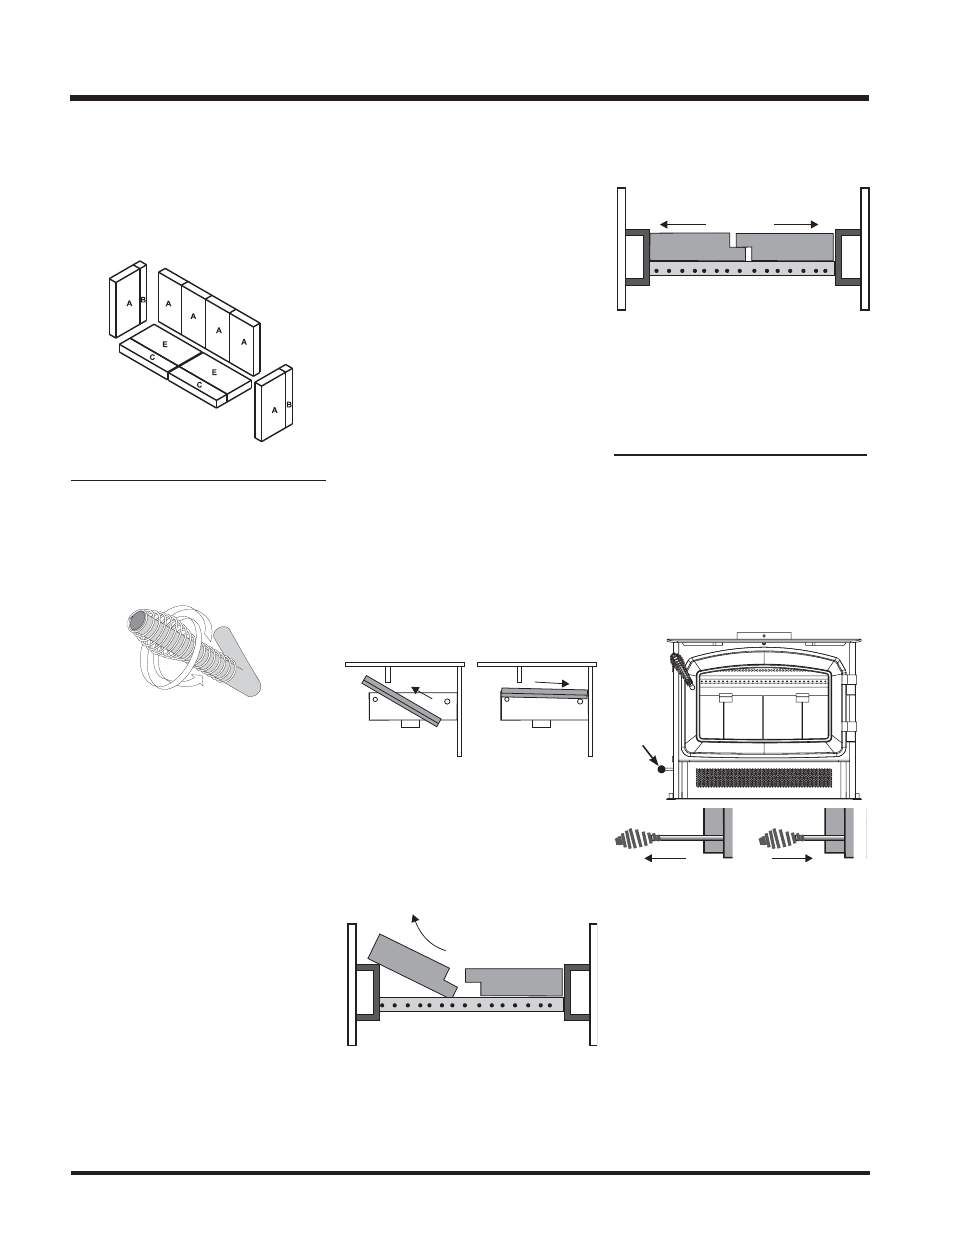
BRICK FLUE BAFFLE &
SECONDARY AIR TUBE
INSTALLATION
The fl ue baffl e system located in the upper area
of the fi rebox is removable to make cleaning
your chimney system easier. The brick baffl es
must be installed prior to your fi rst fi re. Smoke
spillage and draft problems may occur if the
baffl es are improperly positioned. Check the
position of the brick baffl es on a regular basis as
they can be dislodged if too much fuel is forced
into the fi rebox.
FIREBRICK ASSEMBLY
Firebrick is included to extend the life of your
insert and radiate heat more evenly. Check to
see that all fi rebricks are in their correct posi-
tions and have not become misaligned during
shipping.
DOOR HANDLE
Attach spring handle by rotating counter clock-
wise onto rod. Ensure that the rod fi ts into the
entire length of the spring handle.
Left = Open Right = Closed
Side View
Front View
Draft Rod
Front View
DRAFT CONTROL
Before establishing your fi rst fi re, it is important
that your fully understand the operation of you
draft control. The draft rod is on the left side of
the Insert and it controls the intensity of the fi re
by increasing or decreasing the amount of air
allowed into the fi rebox. To increase your draft
- slide left, and to decrease - slide right.
1) If the two air tubes are installed continue
on to Step 2), if not, follow the instructions
below. Install the air tube into the holes in the
side channels. The notch goes on the right
hand side with the air holes facing toward
the door. Slide the tube into the left hand
side, as far as possible and then bring it back
into the hole on the right hand side until it
locks into position. If the tube will not slide
in easily simply use a pair of vise grips or
pliers and tap it into place with a hammer. A
tighter fi t will ensure the tube will not move
when the unit is burning.
2) Slide the left baffl e brick over the front air
tube and then slide it back over the rear air
tube.
3) Tilt the left baffl e brick up on top of the side
channel and it will leave enough room to
position the right baffl e brick in the same
manner as Step 1) above. Then reposition
the left baffl e brick fl at on the air tube.
4) Important: push both baffl e bricks so
they are tight against the side walls and
to the back.
Note: When getting the chimney cleaned,
remove the baffl e bricks for access
to the fl ue, then replace them when
cleaning is completed.
As well as a primary and glass wash air system,
the unit has a full secondary draft system that
allows air to the induction ports at the top of the
fi rebox, just below the fl ue baffl e.
WARNING: To build a fi re in ignorance or to
disregard the informa tion contained in this
section can cause serious permanent dam-
age to the unit and void your warranty.
INSTALLATION