Set up the rimage 480i printer, Prepare the rimage 480i printer, Install the rimage software and printer driver – Rimage 480i User Manual
Page 13: Install the rimage software
Set up the Rimage 480i Printer
Set up the Rimage 480i Printer
This section provides the information that you need to set up the Rimage 480i printer.
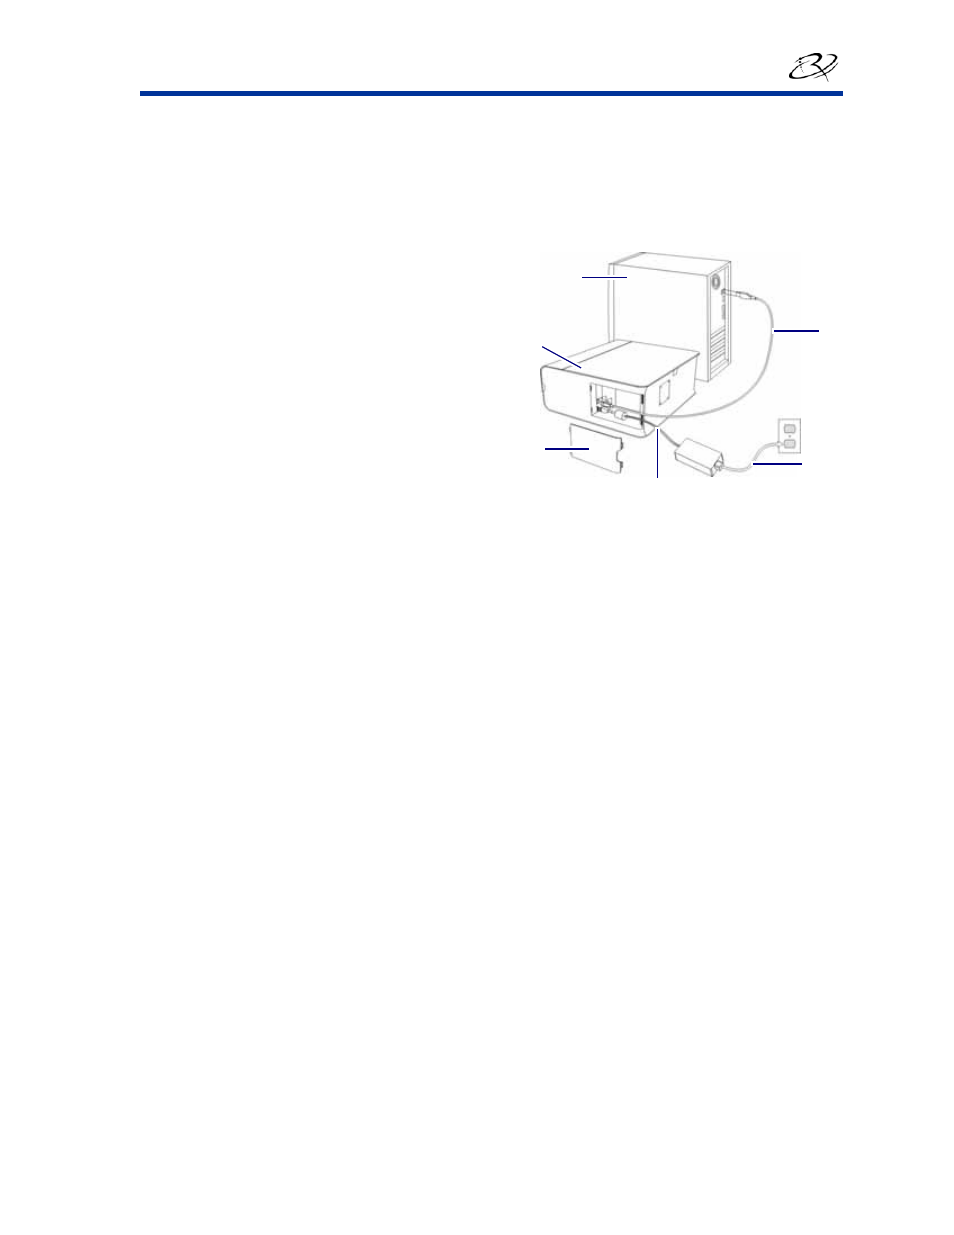
Prepare the Rimage 480i Printer
Use this procedure to prepare the Rimage 480i printer.
1. Remove
the
cable access door.
2. Connect
the
power cord to the AC power
adapter.
3. Connect
the
AC power adapter to the printer.
4. Connect
the
power cord to an outlet.
-
Important! Connect the USB cable only when
the software prompts you to connect it. Refer
to the
Install the Rimage Software and Printer
section below.
5. Install
the
ink cartridges. Refer to the
section on page 23.
PC
480i
Printer
AC Power
Adapter
Power
Cord
USB
Cable
Cable
Access
Door
Install the Rimage Software and Printer Driver
Use this information to install the Rimage software and printer driver.
Install the Rimage Software
1. Power on the PC.
2. Insert
the
CD Designer software disc in the PC. The Rimage CD Designer Software Suite window opens.
Tip: If the software installation does not start automatically, select Start and then Run. Browse to the
setup.exe file on the disc.
3. Select
Next in the Rimage CD Designer Software Suite window. The Setup Type dialog box opens inside
the Software Suite window.
4. Select
Rimage 480i Printer in the Setup Type dialog box and choose Next.
5. Follow the onscreen prompts to complete the software installation.
Note: In Windows XP, a Software Installation window may open. Select Continue Anyway to complete
the required software installation.
When the Rimage software installation is complete, the Software Installation window and Rimage CD
Designer Software Suite window close, and the Plug-n-Play Hardware Setup for Printers window opens.
Follow the instructions in the
section on page 10 to continue.
110761_D
9