Installation – Regency Wraps P36-LPG4 User Manual
Page 26
Regency
®
P36-4 Gas Log Fireplace
26
18) Install the supplied hinge to the hinge bracket using 2 screws.
20) Secure loose wires using wire clips to the base of the fi rebox as far
back as possible.
23) Align the bottom louver mounting tab with hinges on the left and right
side and secure using 2 screws on each side.
24) Plug in power source.
25) Close the bottom louver.
17) Remove the left side bottom hinge bracket by undoing the 2
screws.
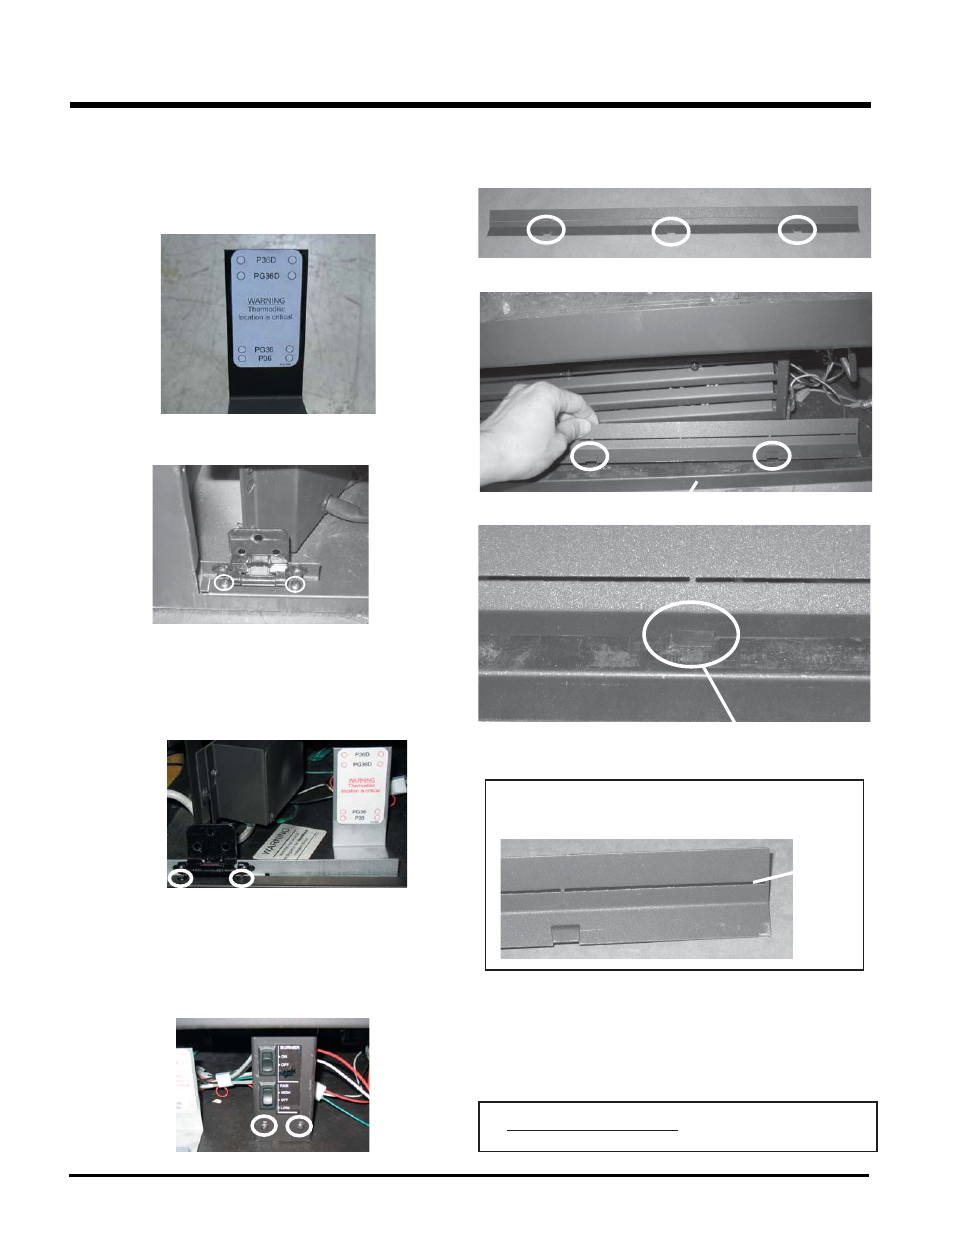
16) Mount the thermodisc bracket to the adjustable bracket using 2 screws.
Important: Thermodisc location is crucial, check the data badge to
identify unit and secure to screw location accordingly.
19) Slide the adjustable bracket to the bottom left corner and secure in
place using the 2 screw holes on the fi rebox fl ange.
21) Place the manual control bracket back into it's original location and
secure using 2 screws.
NOTE:
The fan must run at minimum speed to prevent the unit from overheating
which will cause automatic shutdown via the thermodisc safety switch.
15) Connect the thermodisc wire harness to the new valve/module wire
harness. Refer to the wiring diagram on next page for details.
22) Install the wire cover by fi tting the 3 clips onto the fl ange at the front
of the fi rebox. See note below for P36 units.
Firebox Flange
Wire Cover
NOTE - P36 UNITS ONLY:
For the wire cover to fi t in place on the P36 the top half of the wire
cover will need to be broken off by bending back and forth.
Bend Here
One clip shown in place
on fi rebox fl ange.
INSTALLATION