Installation – Regency Wraps P36-LPG4 User Manual
Page 22
Regency
®
P36-4 Gas Log Fireplace
22
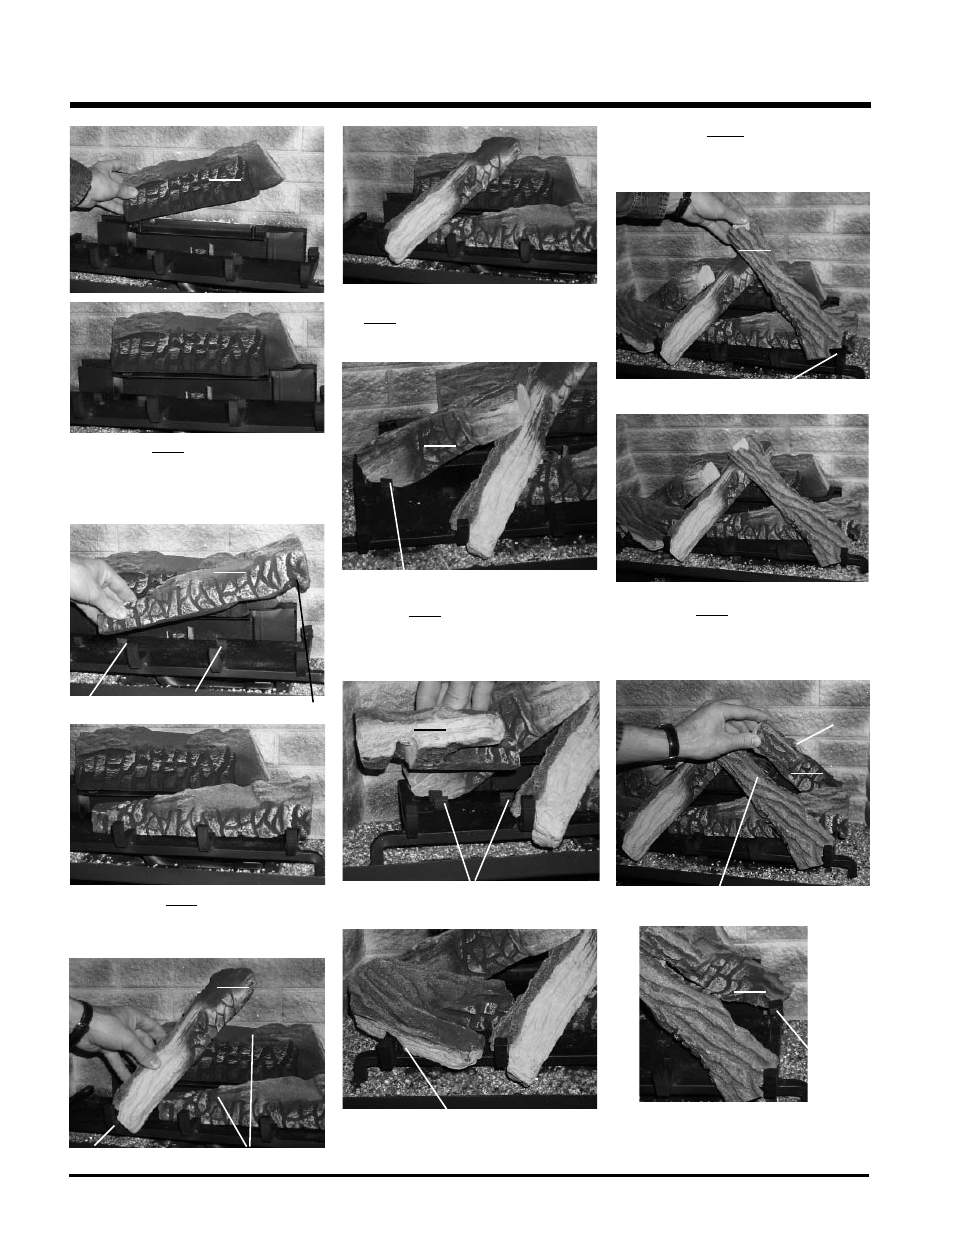
9) Place Log 02-52 between Logs 02-51 and
02-49 and on the indentation on Log 02-54.
The bottom right end sits behind the rear
grate tab.
Log indentation
Photo shows rear grate tab.
Log 02-51 was removed to show
the positioning of Log 02-52.
Rear
Grate
Tab
02-52
02-49
02-51
02-54
02-52
02-54
5th Grate Tab
Rear Bracket
Front Brackets
Notch
02-55
02-50
02-54
5) Position Log 02-53 across the cutouts in
Logs 02-49 and 02-51 with the notch on the
left side of the log fi tting into the 2nd grate
tab.
Cutouts
2nd Grate Tab
02-53
02-49
02-51
02-49
02-51
02-53
02-49
02-51
02-53
02-55
02-53
02-50
02-55
02-53
02-50
02-55
02-53
02-49
02-51
02
-53
02-51
02-54
Notch
Bracket
Bracket
02-49
02-51
02-49
02-51
4) Place Log 02-51 on the front right side of
the burner. Push the back of the log against
the 2 brackets with the notch on the bottom
right side of the log fi tting into the right side
of the grate.
6) Place the bottom left front edge of Log
02-55 against the rear bracket on the burner
tray and rest the log on the cutout on
Log
02-53.
7) Sit Log 02-50 on the front left side of the
burner. Push the back of the log against the
2 front brackets with the notch on the bottom
of the log fi tting into the fi rst grate tab.
8) Position Log 02-54 across the cutouts in
Logs 02-51 and 02-53. The notch in the
bottom right end fi tting against the 5th grate
tab.
INSTALLATION