Pfp controller description, Front panel – Runco REFLECTION VX-1000CI User Manual
Page 13
11
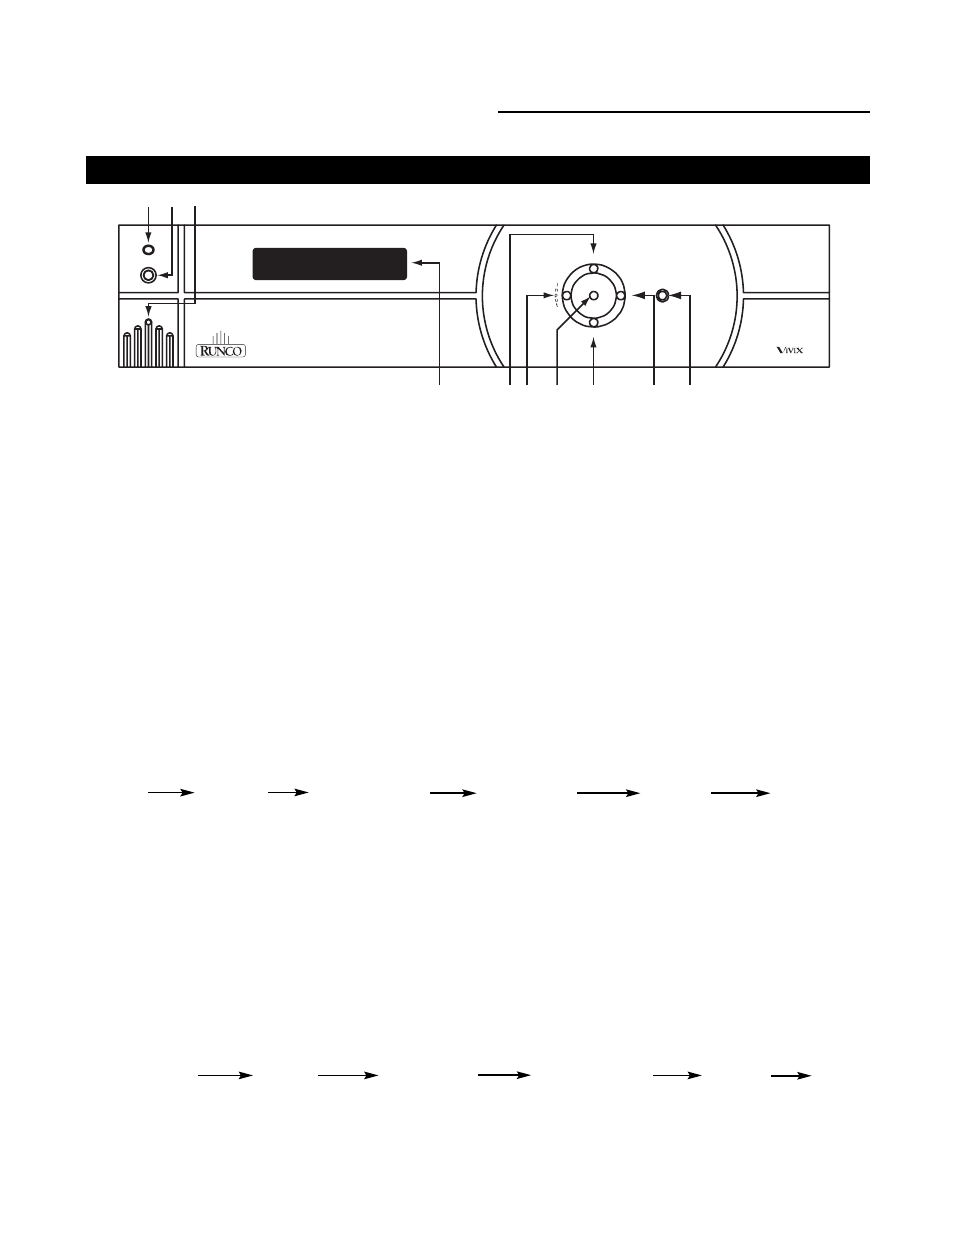
PFP Controller Description
Front Panel
menu
ratio
ratio
i
n
p
u
t
enter
>
<
<
<
P I X E L F O R P I X E L
TM
1 2 3
4
5 6 7 8 9 10
1.
IR RECEIVER
Receives the infrared signal from the remote control.
2.
POWER BUTTON
Turns the unit ON or OFF. The Main Power switch on the rear of the unit must be on first for this button to be active.
3. POWER INDICATOR
When the PFP Controller is ON, this LED will illuminate GREEN. When the unit is in STANDBY, this LED will
illuminate RED. A flashing red light indicates a fault. If this happens, unplug the unit for 2 minutes and re-try. A yellow
LED indicates a communication problem; double check that the ComLink cable is connected properly (page 14).
4. LED
DISPLAY
Indicates the model number, current source, resolution and aspect ratio.
5. UP BUTTON
When no menu is present on-screen, this button will toggle you through the different aspect ratios.
When the menu is on-screen, the UP button will move the cursor up within a menu.
When an adjustment item has been selected (i.e. brightness), the UP button will increase the value of that function.
6. LEFT
BUTTON
When no menu is present on-screen, the LEFT button will toggle you through the five different sources, in the order of:
DVI
RGB HD
Component HD
Component
S-Video
Composite
7. ENTER
BUTTON
When an item is highlighted on the On-Screen Display, the ENTER button will select the item. When no menus are
active (on screen) and the service mode is active, the ENTER button will enable the ‘Quick Menu’ on the front panel
(see page 23).
8. DOWN
BUTTON
When no menu is present on-screen, this button will toggle you through the different aspect ratios.
When the menu is on-screen, the DOWN button will move the cursor down within a menu.
When an adjustment item has been selected (i.e. brightness), the DOWN button will decrease the value of that function.
9. RIGHT
BUTTON
When no menus are present on-screen, the RIGHT button will toggle you through the five different sources, in the order of:
Composite
S-Video
Component
Component HD
RGB HD
DVI
10. MENU BUTTON
The MENU button brings up the main adjustment menu. After making adjustments, the MENU button will bring you back to
the sub-menu, then to the main menu. The menu will then either time-out after approximately 10 seconds, or pressing the
MENU button will remove the menu immediately.