Special setup for the copy, Resolution setup, Zoom setup – Ricoh LASER FACSIMILE User Manual
Page 23: Analysis origin setup, Contrast setup, Luminosity setup, Paper type setup, Paper tray selection, 3 - co py, Laser facsimile
Laser Facsimile
- 20 -
Special setup for the copy
Setups done through this menu become the device
default setups after you confirm.
Resolution setup
The RESOLUTION parameter allows you to setup the
photocopy resolution.
841 - ADVANCED FCT/COPY/RESOLUTION
1 Choose the resolution with the buttons
or
according to the following table:
2 Confirm your choice by pressing the OK button.
Zoom setup
The ZOOM parameter allows you to reduce or enlarge an
area of a document by choosing the origin and the zoom
level to apply to the document, from 25 to 400 %.
842 - ADVANCED FCT/COPY/ZOOMING
1 Enter the desired zoom level with the
Alpanumerical keyboard or choose among
predefined values with the buttons and .
2 Confirm your choice by pressing the OK button.
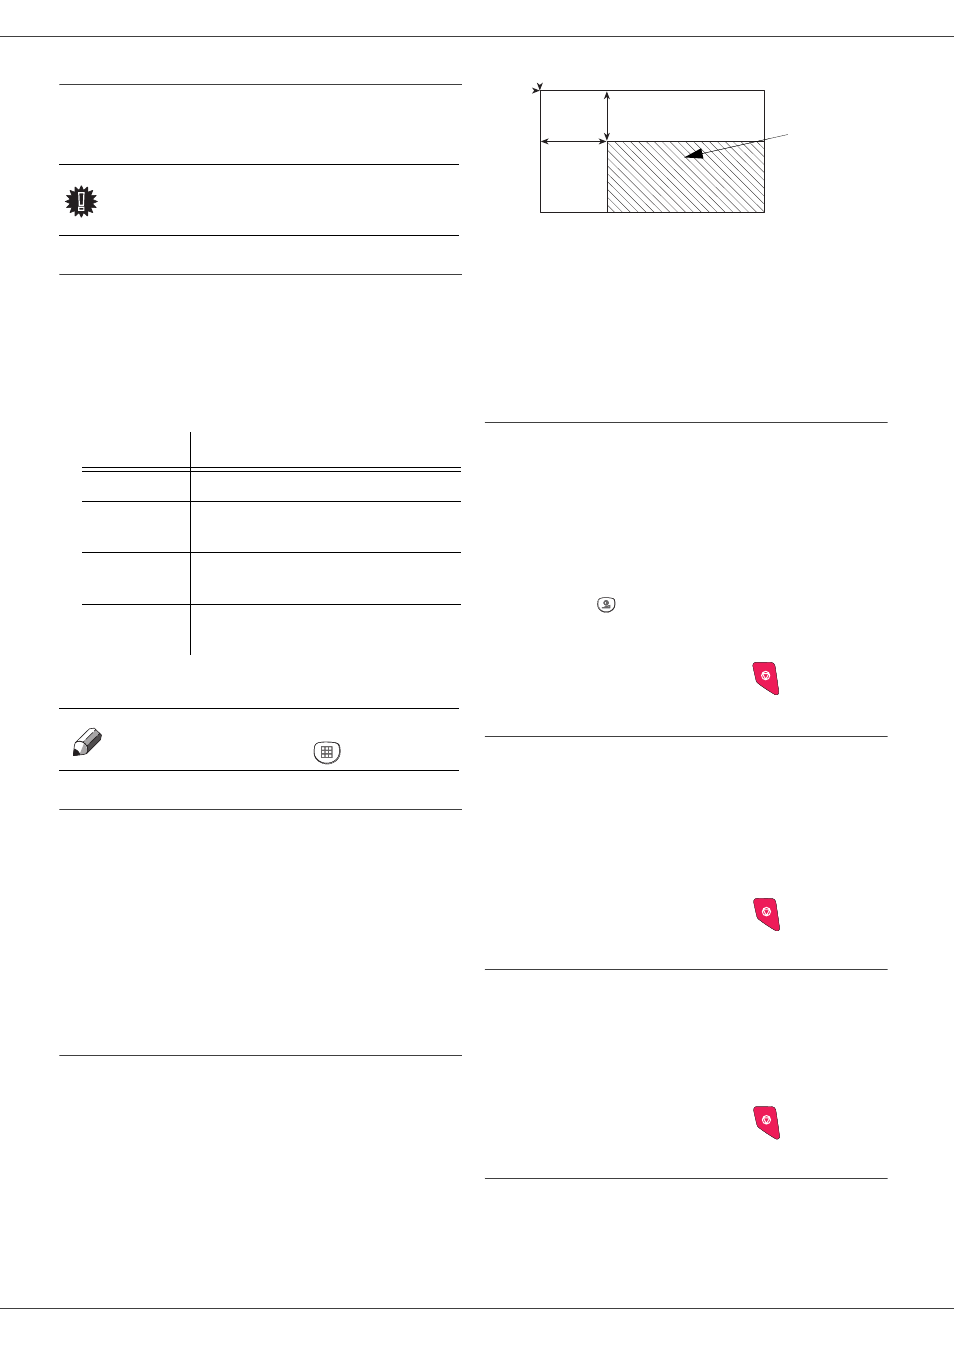
Analysis origin setup
If you want, you can change the origin of the scanner.
By entering new values for X and Y in mm (X < 210 and
Y < 280), you move the analysed area as shown on the
diagram below.
844 - ADVANCED FCT/COPY/ORIGIN
1 Select the X and Y coordinates with the buttons
or .
2 Setup the desired coordinates with the digital
keyboard or the buttons and , confirm your
choice by pressing on the OK button.
Contrast setup
The CONTRAST parameter allows to choose the
photocopy contrast.
845 - ADVANCED FCT/COPY/CONTRAST
1 Setup the desired level of contrast with the buttons
and , confirm by pressing the OK button.
2 You can also directly setup the desired contrast
with the
button, press several times on this
button until the desired setup without using the
Menu 845.
3 Quit this menu by pressing the
button.
Luminosity setup
The LUMINOSITY parameter allows to lighten or darken
your original document.
846 - ADVANCED FCT/COPY/LUMINOSITY
1 Setup the desired brightness with the buttons
and .
2 Confirm your choice by pressing the OK button.
3 Quit this menu by pressing the
button.
Paper type setup
851 - ADVANCED FCT/SCAN. & PRINT/PAPER
TYPE
1 Select the paper NORMAL or THICK that you use
with the buttons and .
2 Confirm your setup by pressing the OK button.
3 Quit this menu by pressing the
button.
Paper tray selection
The Automatic selection can have two meanings
depending on the paper format defined on the paper
trays. The following table describes the different cases.
Important
When the quality of the printing is not
satisfying, you can proceed to a
calibration with MENU 80.
Parameter
Signification
DRAFT
Low resolution.
AUTO
Standard resolution for documents
containing text and graphics.
QUALITY
TEXT
Optimal resolution for documents
containing text.
PHOTO
Optimal resolution for documents
containing photographies.
Note
You can also setup the resolution
by pressing the
button.
y
DEBUT
FEUILLE
FIN FEUILLE
x
Analysed area
B
E
GIN. OF
SHE
E
T
END O
F
SHEET