2 dhd controller front panel, Figure 2-3 . dhd controller front panel, Dhd controller front panel – Runco CRYSTAL CX-70DHD User Manual
Page 21: 3. dhd controller front panel, Pre l iminar y
CX-70DHD Installation/Operation Manual
7
PRE
L
IMINAR
Y
1.
RS-232 IN
Connect the Display Control output on the DHD Controller to this input (see Figure
2-4).
2.
RS-232 OUT
Not used.
3.
ANALOG IN
Not used.
4.
DVI IN
Connect the HDMI output from the DHD Controller to this input.
5.
DVI OUT
Not used.
6.
POWER INPUT
Connect the CX-70DHD to AC power here.
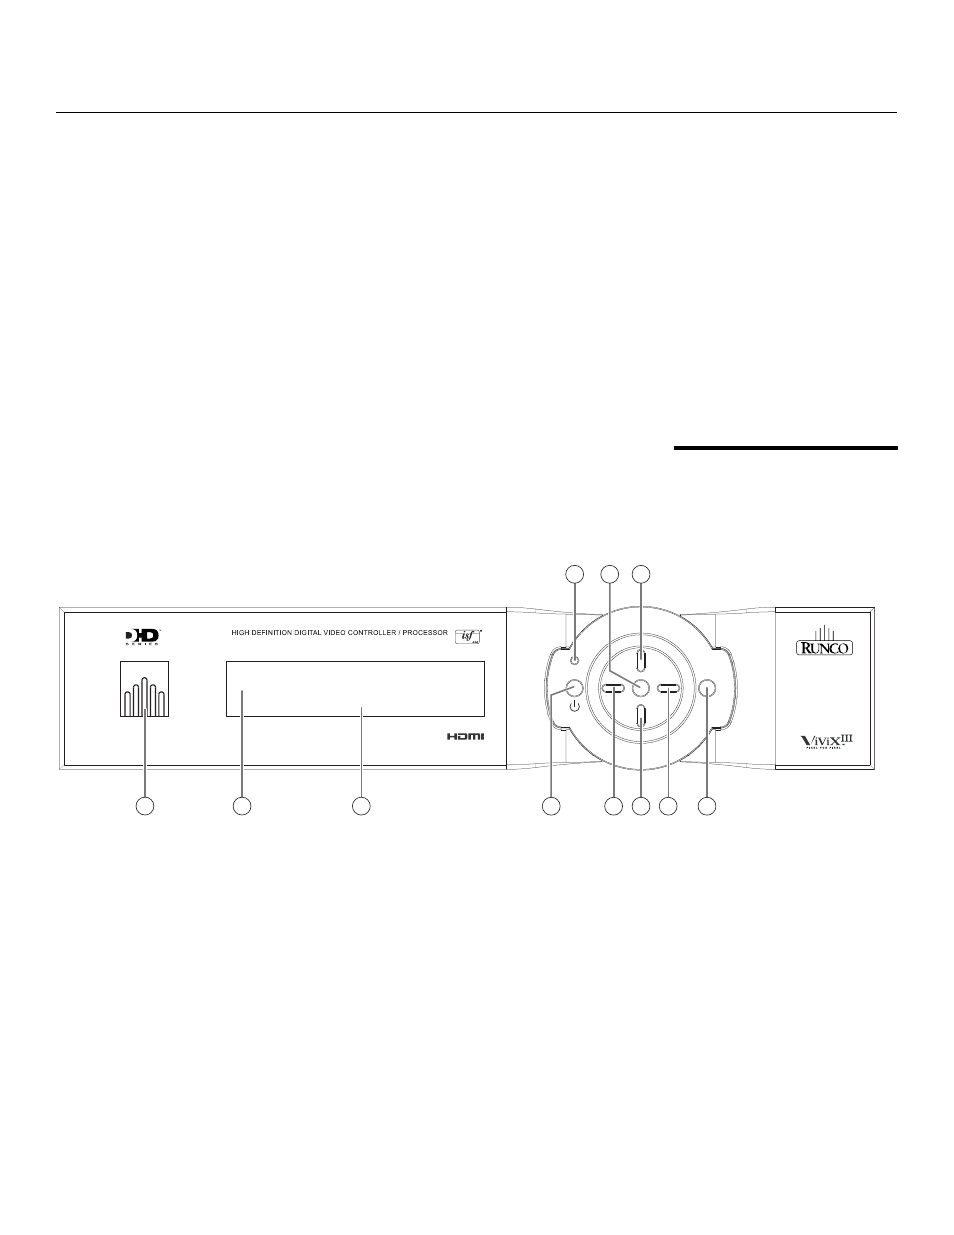
2.2
DHD Controller Front
Panel
Figure 2-3 shows the controls and indicators on the DHD Controller front panel; the
paragraphs that follow describe them.
Figure 2-3. DHD Controller Front Panel
1.
RUNCO ICON
Lights blue to indicate that the controller is on or powering up.
2.
IR SENSOR
Receives IR commands from the remote control.
3.
VACUUM FLUORESCENT DISPLAY
Can be used instead of the On-Screen Display (OSD). Displays currently-selected
menu or – if no menu is selected – the connected display device model, current
source, input resolution and aspect ratio.
4.
ON/STANDBY BUTTON
Press once to toggle from standby mode to on mode. Press it again to return to
standby mode. For a discrete on or off command, you can use the direct access
buttons on the remote control.
ratio
ratio
i
n
p
u
t
standby
m
e
n
u
i
n
p
u
t
enter
3
HDMI
1
16:9 1080i/60
3
1
9
10
11
6
5
4
8
7
2
CX-70DHD