Using the tv’s menu system, Auto color, Color warmth – RCA SCENIUM HDLP50W151 User Manual
Page 67: Noise reduction, Advanced settings, Chapter 4 65, Edge enhancement
Chapter 4
65
Using the TV’s Menu System
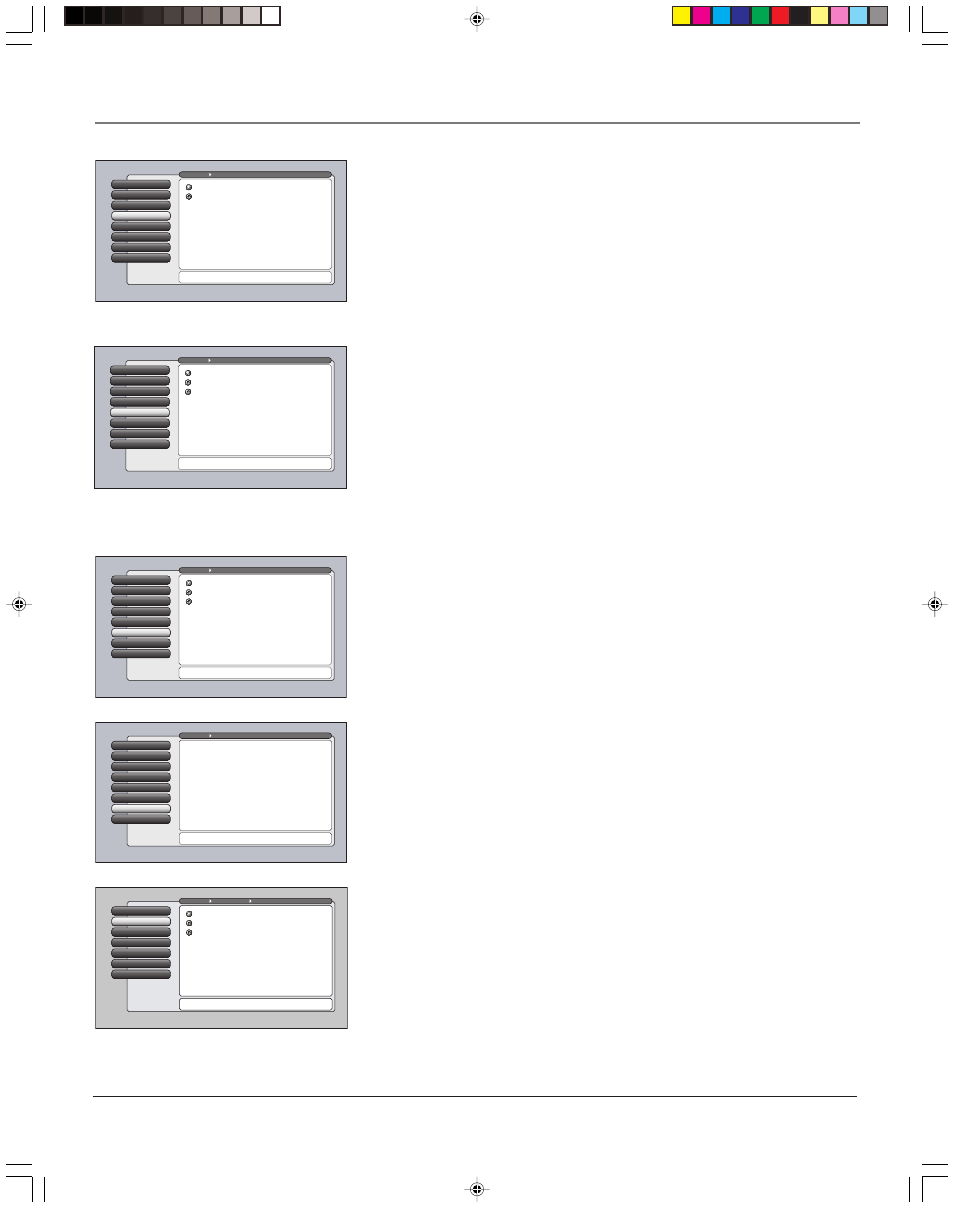
Auto Color
Auto Color minimizes the flesh tone variations of the TV picture. A different
Auto Color setting can be stored for each input. Choose On or Off, depending
on your preference.
Reset Controls
7
Advanced Settings
6
Noise Reduction
5
Color Warmth
4
Auto Color
Auto Color
3
Picture Presets
2
Picture Settings
1
Go Back
0
Main Menu
Picture Quality
Press
or to point to an option, then press OK to select
it. Press
to return to the menu.
When Auto Color is set to On, it minimizes flesh tone
variations.
A change in this screen is applied to Input 2.
Auto Color Off
Auto Color On
Color Warmth
Color Warmth automatically adjusts the color temperature of the picture. Color
Warmth can be stored for each input. The feature lets you set one of three
automatic color adjustments:
•
Cool
More blue.
•
Normal
Standard picture color.
•
Warm
More red.
Reset Controls
7
Advanced Settings
6
Noise Filter
Noise Reduction
5
Color Warmth
4
Auto Color
3
Picture Presets
2
Picture Settings
1
Go Back
0
Main Menu
Picture Quality
Press
or to point to an option, then press OK to select
it. Press
to return to the menu.
Noise Reduction reduces the appearance of video noise
on composite video sources, giving a smoother picture.
For other sources of video, the Noise Reduction is not active.
The Frame Comb setting provides a constant level of
improvement. In the Adaptive setting additional filtering
is applied, increasing only as the noise content increases.
A change in this screen is applied to Input 2.
Off
Adaptive
Frame Comb
Reset Controls
7
Convergence
Advanced Settings
6
Noise Reduction
5
Color Warmth
4
Auto Color
3
Picture Presets
2
Picture Settings
1
Go Back
0
Main Menu
Picture Quality
Press
or to point to an option, then press OK to select
it. Press
to return to the menu.
The Advanced Settings menu has screens that let you
enhance picture performance and adjust picture position.
•Edge Enhancement: Make the picture's edges sharper.
•Green Stretch: Intensify and enhance shades of green.
•Contrast Expand: Intensify and enhance shades of black.
•Film Mode: Improve the quality of movie playback.
•Horizontal Position: Center the picture left/right.
•Vertical Position: Center the picture up/down.
Noise Reduction
Noise Reduction displays a list that lets you set one of the three settings that
allows you to reduce picture “static” or any type of interference. A Noise
Reduction setting can be stored for each input. You can set the Noise Reduction
to Frame Comb, Off or Adaptive. The settings are explained in the on-screen
help text.
Advanced Settings
The Advanced Settings menu contains menus that allow you to fine tune the
picture and adjust the picture position for a “bigger than life” experience. The
settings available are: Edge enhancement, Green Stretch, Contrast Expand, Film
Mode, Horizontal Position, and Vertical Position. Each one is described below.
Reset Controls
7
Advanced Settings
6
Noise Reduction
5
Color Warmth
Color Warmth
4
Auto Color
3
Picture Presets
2
Picture Settings
1
Go Back
0
Main Menu
Picture Quality
Press
or to point to an option, then press OK to select
it. Press
to return to the menu.
Color Warmth automatically adjusts the "temperature" of
the picture. Cool gives a more blue pallete of picture colors.
Warm gives a more red pallete of picture colors.
Note: Selecting a new Picture Preset (except for Personal
presets) may also change your Color Warmth setting.
A change in this screen is applied to Input 2.
Warm
Normal
Cool
Vertical Position
6
Horizontal Position
5
Film Mode
4
Contrast Expand
3
Green Stretch
2
Text here
Edge Enhancement
1
Go Back
0
Main Menu
Picture Quality
Advanced Settings Antenna A
Press
or to point to an option, then press OK to select
it. Press
to return to the menu.
Edge Enhancement "replaces" gradual edge transitions in
the video with steeper edges. This creates a picture with
sharper edges.
A change in this screen is applied to all inputs.
High
Low
Off
Edge Enhancement
Edge Enhancement makes the edges of the video steeper and sharper. There
are three options for the edge enhancement: Off, Low, or High. The default
setting is High—the picture should appear sharper with crisper edges. If
artifacts appear in the video, change the setting to Low or Off.
Any change to this feature is applicable to all video inputs and does not affect
the Picture Settings.
1614682A.06_menu_8.8
9/18/03, 5:29 PM
65